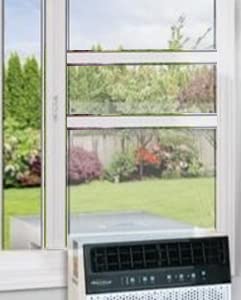
How to Install a Window Air Conditioner in a Horizontal Sliding Window
A complete step‑by‑step guide to mounting a window AC unit in a horizontal sliding window – safely, securely, and without damaging your home.
View Window AC UnitsHorizontal sliding windows (also called slider windows) present a different challenge compared to standard double‑hung windows. Because the sash moves sideways, you can't simply rest an air conditioner on a lower sash. Still, with the right sliding window AC installation kit and careful sealing, you can enjoy the cooling power of a window air conditioner without major modifications. Before you begin, make sure you've chosen the correct unit by checking our sizing guide and using the BTU calculator by room size – a properly sized AC will cool efficiently and avoid energy waste.
Tools and Materials You'll Need
- Measuring tape
- Screwdriver (Phillips and flathead)
- Power drill with bits
- Level
- Safety glasses
- Pencil
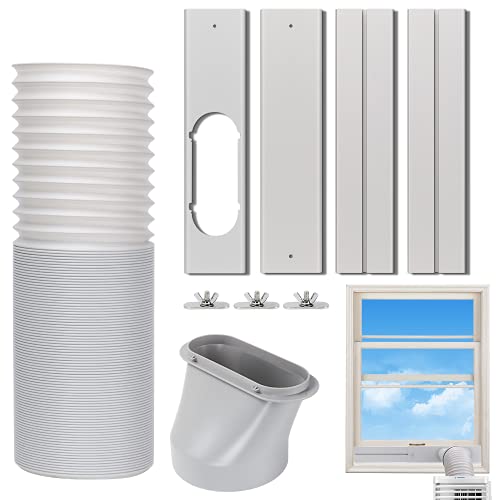
- Sliding window AC installation kit*
- Plywood or plexiglass panel (cut to size)
- Foam weatherstripping
- Screws (if not included in kit)
- Assistant (recommended for lifting)
*A dedicated sliding window AC kit includes brackets that secure the unit and fill the open gap. You can find one through our AC shopping guide.
Step‑by‑Step Installation Guide
Measure the Window Opening
Use a measuring tape to get the exact width and height inside the sliding track. Most window ACs require a minimum width of 22 to 36 inches. Remember that you will need to fill the vertical space above the AC after installation, so check that the unit’s height leaves enough room for a filler panel. A common installation mistake is assuming the window can hold any AC – avoid these pitfalls by measuring twice.
Install the Support Bracket
Most sliding window AC kits come with a lower mounting bracket that attaches to the windowsill or the sliding track. Place the bracket on the sill, use a level to ensure it is perfectly horizontal, and mark the screw holes with a pencil. Drill pilot holes and secure the bracket with screws. This bracket will carry most of the weight, so it must be rock‑solid. If your kit includes side‑locking clamps, attach them loosely for now.
Lift and Place the Air Conditioner
With a helper, lift the window AC and rest it on the support bracket. Slowly slide the window sash towards the AC so that the sash presses against the side of the unit. The AC should sit with a slight outward tilt (about 1‑2 degrees) – this ensures condensation drains outside, not inside. Most brackets are designed to create this tilt automatically. If not, adjust with shims.
Fill the Gap Above the AC
With the window closed against the unit, there will be an open space above the AC (where the window doesn't reach the top of the frame). Measure this gap and cut a piece of plexiglass or plywood to fit snugly. Secure the panel to the window frame using screws (into the frame, not the glass) or the brackets provided in your kit. This filler panel is crucial for security and insulation.
Seal All Gaps
Apply foam weatherstripping along the edges where the AC meets the window frame, as well as around the filler panel. This blocks outdoor air, insects, and noise while improving energy efficiency. A well‑sealed unit can save up to 10% on cooling costs – for more ways to save, read our energy‑saving tips.
Secure and Test the Unit
Double‑check that all screws, brackets, and clamps are tight. Plug the AC into a dedicated outlet (avoid extension cords), turn it on, and let it run for 10‑15 minutes. Listen for excessive rattling and feel for air leaks. If needed, add more weatherstripping or tighten the mounting hardware. For a full checklist on what to look for, see our guide on how to test a new AC installation.
- If you’re a renter or cannot drill holes, consider a portable air conditioner – it only requires a window venting kit and is easy to remove. Check our AC solutions for renters for more non‑permanent options.
- Always unplug the unit before adjusting the fit. Never leave the window unsupported while working.
- If you feel unsure at any point, hiring a professional is a smart choice. Learn when to call an expert in our guide to choosing an HVAC contractor.
After Installation: Testing & Maintenance
Once your AC is running, take a few moments to register the warranty and note the model number – our warranty registration guide can help. Regular upkeep keeps your unit efficient: clean the filter monthly (clean AC filter tutorial), inspect seals at the start of each season, and follow a seasonal maintenance checklist. A well‑maintained window AC can last 8‑10 years without major issues.
For a deeper dive into overall care, visit our complete AC maintenance guide.