Seal Air Ducts for Efficiency: Slash Energy Bills & Boost Home Comfort
Discover how professional duct sealing can reduce your energy costs by up to 20%, improve indoor air quality, and extend your HVAC system's lifespan. Complete DIY and pro guide inside.
START SAVING NOW →Quick Fact: According to the U.S. Department of Energy, the average home loses 20–30% of conditioned air through leaky ducts. Sealing them is one of the most cost-effective home improvements you can make, often paying for itself in under two years.
Why Duct Sealing Matters
How to Tell If Your Ducts Are Leaking
Before investing time or money into sealing, it's important to diagnose whether your ducted air conditioning system is actually losing air. Common signs include uneven room temperatures, unusually high energy bills, whistling sounds near vents, or visible dust blowing from registers. If some rooms are always too hot in summer or too cold in winter while others are comfortable, leaky ducts are often the culprit.
For homeowners with central air conditioning, duct leaks force your system to work harder, reducing its effective lifespan. A simple pressure test performed by an HVAC professional can quantify exactly how much air you're losing. However, even a visual inspection of accessible ducts in your attic, crawlspace, or basement can reveal obvious gaps, disconnected joints, or crushed sections that need attention.
4 Surprising Benefits of Sealing Air Ducts
While lower utility bills are the primary motivator, proper duct sealing delivers several other advantages that many homeowners overlook. First, it dramatically improves indoor air quality by preventing dusty, fiberglass-laden attic or crawlspace air from being pulled into your living spaces. Second, it reduces strain on your HVAC equipment, which can extend its life by 3–5 years. Third, it eliminates annoying whistling or rattling noises that travel through leaky ductwork. Finally, a well-sealed system allows you to maintain consistent temperatures across every room, eliminating hot and cold spots that make family members uncomfortable.
If you're considering upgrading your system, note that even the most energy-efficient AC will perform poorly with leaky ducts. Sealing should always come before purchasing new equipment. Many homeowners who invest in inverter AC technology are disappointed with performance until they address underlying duct issues. The same applies to ductless mini-split AC systems, which don't use ducts at all — but for central systems, duct sealing is non-negotiable for optimal efficiency.
Duct Sealing Methods: DIY vs Professional
There are three primary methods for sealing air ducts, ranging from simple homeowner fixes to advanced professional solutions. Understanding your options helps you choose the right approach based on your budget, skill level, and duct accessibility.
- Duct Tape (Not Recommended) – Standard cloth duct tape dries out and fails within months. Avoid it despite its misleading name.
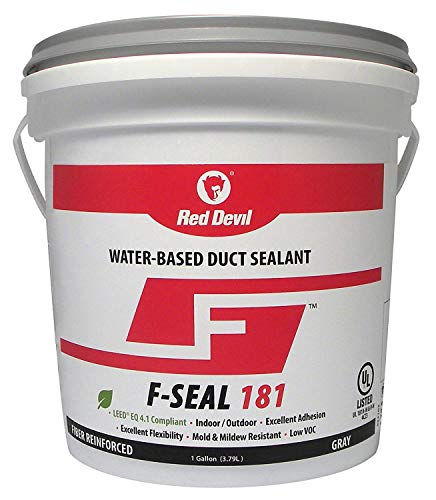
- Mastic Sealant (Best for DIY) – A brush-on paste that creates a permanent, flexible seal. Ideal for accessible joints and seams. Costs $15–$30 per gallon.
- Metal Foil Tape (UL 181 Rated) – Professional-grade tape that withstands temperature extremes. Great for straight runs and small gaps.
- Aerosol Sealing (Professional Only) – A mist of sealant injected into pressurized ducts seals leaks from the inside. Perfect for inaccessible ducts but costs $1,000–$2,500.
For homeowners comfortable with basic DIY, applying mastic sealant to visible duct joints in your basement or attic is straightforward. However, if your ductwork design includes hard-to-reach sections or if you suspect hidden leaks, hiring a professional is worth the investment. Many HVAC companies offer duct sealing as part of a broader AC maintenance plan, often at discounted rates when combined with seasonal tune-ups.
Duct Sealing Cost: What to Expect
Duct sealing costs vary widely based on home size, duct accessibility, and whether you choose DIY or professional service. Use this pricing guide to budget effectively:
| Method | Cost Range | Best For |
|---|---|---|
| DIY Mastic + Foil Tape | $30–$100 | Accessible ducts, small homes |
| Handyman / Local HVAC Pro | $300–$800 | Average 1,500–2,500 sq ft home |
| Aerosol Sealing (Aeroseal) | $1,000–$2,500 | Inaccessible ducts, maximum efficiency |
| Full Duct Replacement | $2,500–$6,000+ | Deteriorated or damaged ductwork |
Before hiring, always request an installation quote from at least three contractors. Many offer free duct assessments, especially if you're also considering replace vs repair options for an aging system. Also check for utility rebates — many energy companies offer $100–$500 incentives for professional duct sealing as part of efficiency programs.
DIY Duct Sealing: A Practical Guide (With Photos)
If your ducts are accessible and in good condition, sealing them yourself is a weekend project that delivers professional-level savings. Follow these steps carefully:
Step 1: Safety First – Turn off your HVAC system at the thermostat and breaker. Wear gloves, safety glasses, and a dust mask. Ductwork can contain fiberglass particles and dust.
Step 2: Clean the Surfaces – Use a stiff brush or shop vacuum to remove dust, dirt, and loose insulation from areas you'll seal. Mastic won't stick to dirty surfaces.
Step 3: Inspect All Joints – Check every connection point where two duct sections meet, plus corners, take-offs, and plenum connections. Mark problem areas with chalk.
Step 4: Apply Mastic Sealant – Using a 2-3 inch brush, apply a thick layer (about 1/8 inch) over each joint, extending 1 inch beyond the seam on all sides. For larger gaps, embed fiberglass mesh tape before applying mastic.
Step 5: Reinforce with Foil Tape – After mastic dries (4–6 hours), apply UL 181-rated foil tape over straight runs. Press firmly to eliminate air bubbles.
Step 6: Seal Register Boots – Where ducts connect to floor or wall vents, seal the gap between the boot and drywall using caulk or mastic.
After completing your DIY sealing, it's wise to schedule a seasonal AC checklist inspection to verify performance improvements. Many homeowners also combine this project with cleaning AC filters and condenser coils for maximum efficiency gains.
Aerosol Duct Sealing: The Premium Solution
For homeowners with ducts hidden behind walls, under floors, or above ceilings, traditional manual sealing may be impossible. Aerosol-based sealing technology (branded as Aeroseal) offers a breakthrough solution. Technicians seal all supply registers, pressurize the duct system, and inject a water-soluble polymer mist. As air escapes through leaks, sealant particles accumulate at the edges of each opening, gradually closing gaps up to 5/8 inch.
This method typically reduces duct leakage by 90–95% and can be completed in 4–8 hours with minimal disruption. It's particularly valuable for older homes without accessible ductwork or for homeowners who want maximum efficiency without renovation. While upfront costs are higher, many users report reduced energy bills by 25–40%, making aerosol sealing an excellent long-term investment.
Before committing, verify that your contractor uses EPA-registered sealants and offers a performance guarantee. Reputable companies will measure pre- and post-sealing leakage rates, typically achieving leakage reduction from 30-50% down to under 5%.
Beyond Sealing: Insulating Your Ducts
Sealing stops air from escaping, but insulation prevents thermal energy loss. In unconditioned spaces like attics, crawlspaces, and garages, even perfectly sealed ducts can lose 10–15% of heating/cooling energy through uninsulated walls. Adding R-6 to R-8 duct insulation wrap around metal ducts or using pre-insulated flexible ductwork solves this problem.
If your home has basement AC routing or attic ductwork, inspect insulation thickness. Foil-faced fiberglass wrap is affordable ($0.50–$1.50 per linear foot) and can be DIY-installed. For maximum efficiency, consider pairing duct sealing with a zoning system that directs conditioned air only to occupied areas. This combination can reduce annual HVAC costs by $400–$800 for typical single-family homes.
Pro Tip: After sealing and insulating your ducts, recalibrate your thermostat programming. With more efficient airflow, you may find you can raise summer settings by 2-3°F without sacrificing comfort, unlocking additional electricity bill reductions. Also consider installing a programmable thermostat to automate energy savings.
Know Your Limits: When DIY Isn't Enough
While many homeowners successfully seal accessible ducts, certain situations demand professional expertise. Call an HVAC technician if you encounter: fibrous ductboard that crumbles when touched, visible mold growth inside ducts, signs of rodent damage or nesting, extremely high summer humidity despite AC running, or if your home was built before 1980 (older ducts may contain asbestos insulation).
Professional duct sealing often includes complementary services like complete duct sealing procedures, system balancing, and airflow measurement. For serious issues, a refrigerant leak might be mistaken for duct problems — only a trained technician can differentiate. When interviewing contractors, ask about their experience with HVAC license and insurance requirements in your state.
Finally, remember that even after sealing your ducts, routine maintenance remains essential. Follow this complete AC maintenance guide to keep your system running efficiently for years. The combination of sealed ducts and regular upkeep can extend equipment life well beyond the typical AC lifespan of 12–15 years.
Next Steps: Your Duct Sealing Action Plan
Ready to stop wasting money through leaky ducts? Here's your action plan:
- Week 1: Perform a DIY inspection of all accessible ducts. Mark all gaps, disconnected joints, and crushed sections.
- Week 2: Decide between DIY mastic sealing or professional quotes. For DIY, purchase mastic, brush, and UL 181 foil tape ($50–100).
- Week 3: Complete sealing project (DIY or schedule pro). Take before/after photos of your work.
- Month 2: Monitor your energy bills and comfort levels. You should see noticeable improvement immediately.
- Ongoing: Include duct inspection in your annual HVAC service routine.
📈 Real-World Results: Homeowners who properly seal their ducts typically recover their investment within 12–24 months through lower utility bills. For a typical home spending $1,500 annually on heating/cooling, sealing can save $300–$450 per year — year after year.