AC Refrigerant Line Set: Complete Sizing & Installation Guide
Understand refrigerant line sets – the critical link between your indoor and outdoor AC units. Learn about proper sizing, copper vs aluminum, installation costs, and best practices to maximize efficiency.
Jump to Sizing Guide →Why line sets matter: The refrigerant line set carries pressurized gas and liquid refrigerant between the outdoor condenser and indoor evaporator coil. Incorrect sizing, poor insulation, or improper installation can reduce efficiency by 15–20%, increase energy bills, and shorten compressor life. This guide helps you avoid costly mistakes.
What Is an AC Refrigerant Line Set?
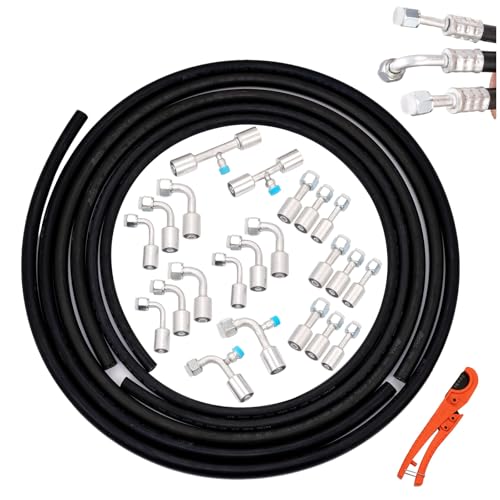
A refrigerant line set consists of two insulated copper tubes that connect the outdoor condensing unit to the indoor evaporator coil (or air handler). The larger tube (suction line) carries low-pressure vapor back to the compressor, while the smaller tube (liquid line) delivers high-pressure liquid refrigerant to the indoor coil. Modern systems often use soft copper for flexibility during installation. Line sets are essential for central air conditioning, ductless mini-split AC systems, and even some packaged AC units that require split configurations.
If you are retrofitting an older home without existing refrigerant piping, understanding line set specifications is crucial. Improperly matched lines can lead to oil return issues and reduced SEER rating performance.
Line Set Sizing: Matching BTU and Length
Choosing the correct diameter and length is non-negotiable. Most residential systems use 1/4" or 3/8" liquid lines and 3/8", 1/2", 5/8", or 3/4" suction lines. The manufacturer’s specifications for your outdoor unit dictate the exact sizes. Exceeding maximum recommended length (typically 50–75 feet for mini-splits, up to 150 feet for some central systems) results in pressure drops and loss of capacity. For larger homes, consider whole house AC system with professionally engineered line lengths.
| System Capacity (BTU) | Typical Liquid Line Size | Typical Suction Line Size | Max Recommended Length (ft) |
|---|---|---|---|
| 12,000 – 18,000 BTU | 1/4" | 3/8" or 1/2" | 50 ft |
| 24,000 – 36,000 BTU | 3/8" | 5/8" | 75 ft |
| 42,000 – 60,000 BTU | 3/8" | 3/4" or 7/8" | 100+ ft (with upsizing) |
Always consult your unit's installation manual. For inverter AC systems, proper line sizing is even more critical because variable-speed compressors are sensitive to refrigerant velocity. Using an undersized suction line can starve the compressor of oil and cause premature failure.
Copper vs Aluminum Refrigerant Lines: Pros & Cons
Copper has been the industry standard for decades due to its durability, corrosion resistance, and ease of brazing. However, some modern mini-splits use aluminum tubing to reduce weight and cost. Here is a comparison:
- Copper lines: Highly reliable, long lifespan (20+ years), better heat transfer, can be brazed or flared. Slightly higher material cost but preferred by most HVAC professionals.
- Aluminum lines: Lighter and more affordable, but more prone to pinhole leaks and galvanic corrosion if not properly isolated. Often found in budget window air conditioner conversions or some portable systems.
For permanent installations, copper remains the superior choice. If your system is a ductless mini-split AC, pre-flared and insulated copper line sets are widely available in lengths from 15 to 50 feet.
Installation Best Practices: What Every Homeowner Should Know
Installing a line set requires precision. Even experienced DIYers should weigh the complexity; a small leak can lead to refrigerant loss and expensive repairs. Key steps include:
- Flaring vs Brazing: Mini splits use flare connections (no torch) – ensure clean, smooth flares. Central AC systems require brazing with nitrogen purging to prevent oxidation inside pipes.
- Insulation: The suction line must be fully insulated with closed-cell foam to prevent condensation and energy loss. Minimum thickness 1/2" for warm climates.
- Leak Testing: After connections, pressurize with dry nitrogen (150–300 psi) and use soap bubbles or an electronic leak detector.
- Deep Vacuum: Pull a vacuum to at least 500 microns to remove moisture and non-condensables. This ensures system efficiency and compressor longevity.
Common mistakes include kinking the copper tube, over-tightening flare nuts (cracks), and failing to seal line set penetrations through walls. Check local codes: some jurisdictions require a permit for refrigerant line repair or new installation. If you're unsure, hiring a licensed HVAC contractor is wise.
How Much Does an AC Refrigerant Line Set Cost?
Costs vary based on length, diameter, and whether the installation is part of a new AC system or a retrofit replacement. Typical pricing for 2025–2026 (excluding labor):
| Component / Service | Typical Cost (USD) |
|---|---|
| Pre-insulated copper line set (25 ft, 1/4" x 5/8") | $120 – $250 |
| Pre-insulated copper line set (50 ft, 3/8" x 3/4") | $220 – $400 |
| Line set cover / conduit (per 10 ft) | $30 – $60 |
| Professional installation labor (per hour) | $120 – $250 |
| Full line set replacement (existing system, 2-4 hours) | $500 – $1,200 |
If you are replacing a line set as part of a new AC installation cost estimate, most contractors include line set, insulation, and labor in the total quote (typically $1,500–$4,000 for central AC). For AC for small apartment with a mini split, line set length is often limited to 15–25 ft, reducing material cost.
📦 Need a new line set for your DIY mini-split project? Pre-charged or pre-flared sets are available online. Ensure diameter matches your outdoor unit.
Average 25-ft copper set: $150–$290
Should You Replace an Old Refrigerant Line Set?
If you are upgrading to a high-efficiency unit (e.g., from R22 to R410A or newer R32 systems), reusing old lines is risky because residual oil, moisture, or incorrect diameters can contaminate the new compressor. The R410A phase-out introduces new refrigerants (R32/R454B) that often require specific line set ratings. Most HVAC experts recommend installing fresh lines when replacing the outdoor and indoor units.
Additionally, check for signs of corrosion or previous leak repairs. A compromised line set will reduce the most energy efficient AC performance you paid for. For homes with difficult access (e.g., finished walls), line set replacement can be invasive, but modern flexible copper can be routed through chases or exterior line-hide systems.
Troubleshooting Refrigerant Line Set Issues
Even well-installed line sets can develop problems over time. Watch for these symptoms:
- Hissing sound at connections: Possible flare nut leak. Tighten with a torque wrench (do not over-tighten).
- Frost on the suction line: Indicates low refrigerant charge or restricted airflow. Check insulation and filter.
- Oil stains near fittings: Clear sign of refrigerant leak – call a technician for refrigerant leak repair.
- Reduced cooling capacity despite clean filters: Could be line set diameter mismatch or excessive length creating pressure drop.
Routine maintenance includes inspecting the exposed portions of the line set for physical damage and ensuring insulation hasn't degraded. When you schedule annual AC service, ask the technician to verify line set pressures and check for small leaks.
Do You Need a Permit or Licensed Installer?
In many US states, altering or installing new refrigerant lines requires an EPA Section 608 certification and local mechanical permit. Handling refrigerant (opening the system) without proper license is illegal. For mini-splits with pre-charged linesets (DIY friendly), you still need to pull a vacuum and verify no leaks. If you are not confident, hire a contractor. Learn how to choose HVAC contractor who follows best practices with nitrogen and deep vacuum.
Also ensure the line set routing does not compromise structure or electrical safety — refer to AC indoor & outdoor placement guidelines for optimal distance and clearance.
Final thought: The refrigerant line set is the circulatory system of your air conditioner. Selecting the correct size, material, and professionally installing it guarantees that your investment in a high-SEER unit yields maximum comfort and energy savings. Bookmark this guide and share it with your HVAC installer to ensure transparency.