AC Maintenance Tips: The Complete Guide to Keep Your Air Conditioner Running Efficiently
Regular maintenance is the single most important thing you can do to extend your AC's lifespan, lower energy bills, and avoid costly repairs. This guide covers everything you need to know.
VIEW MAINTENANCE SCHEDULEWhy AC Maintenance Matters More Than You Think
Most homeowners only think about their air conditioner when something goes wrong. But by then, the damage is often already done — and the repair bill reflects it. Whether you own a central air conditioning system, a ductless mini-split, or a simple window unit, regular maintenance is the key to getting the most out of your investment.
The average lifespan of a well-maintained AC system is 15 to 20 years, while a neglected unit may fail in as little as 8 to 10 years. That's a difference of thousands of dollars in premature replacement costs. If you're curious about how long an AC typically lasts, the answer depends heavily on how consistently you maintain it.
Here's what proper maintenance delivers:
- Up to 30% lower energy bills — a dirty AC works harder and consumes more electricity
- Fewer unexpected breakdowns — most AC failures are preventable with routine care
- Better indoor air quality — clean filters trap dust, allergens, and pollutants effectively
- Consistent cooling performance — no more hot spots or uneven temperatures in your home
- Longer equipment lifespan — regular care prevents premature wear on compressors, fans, and coils
- Protected warranty coverage — many manufacturers require proof of maintenance for warranty claims
Units with high SEER ratings and inverter technology are particularly sensitive to poor maintenance. Their efficiency gains can be completely wiped out by clogged filters or dirty coils. Even an ENERGY STAR certified unit will underperform if you skip basic upkeep.

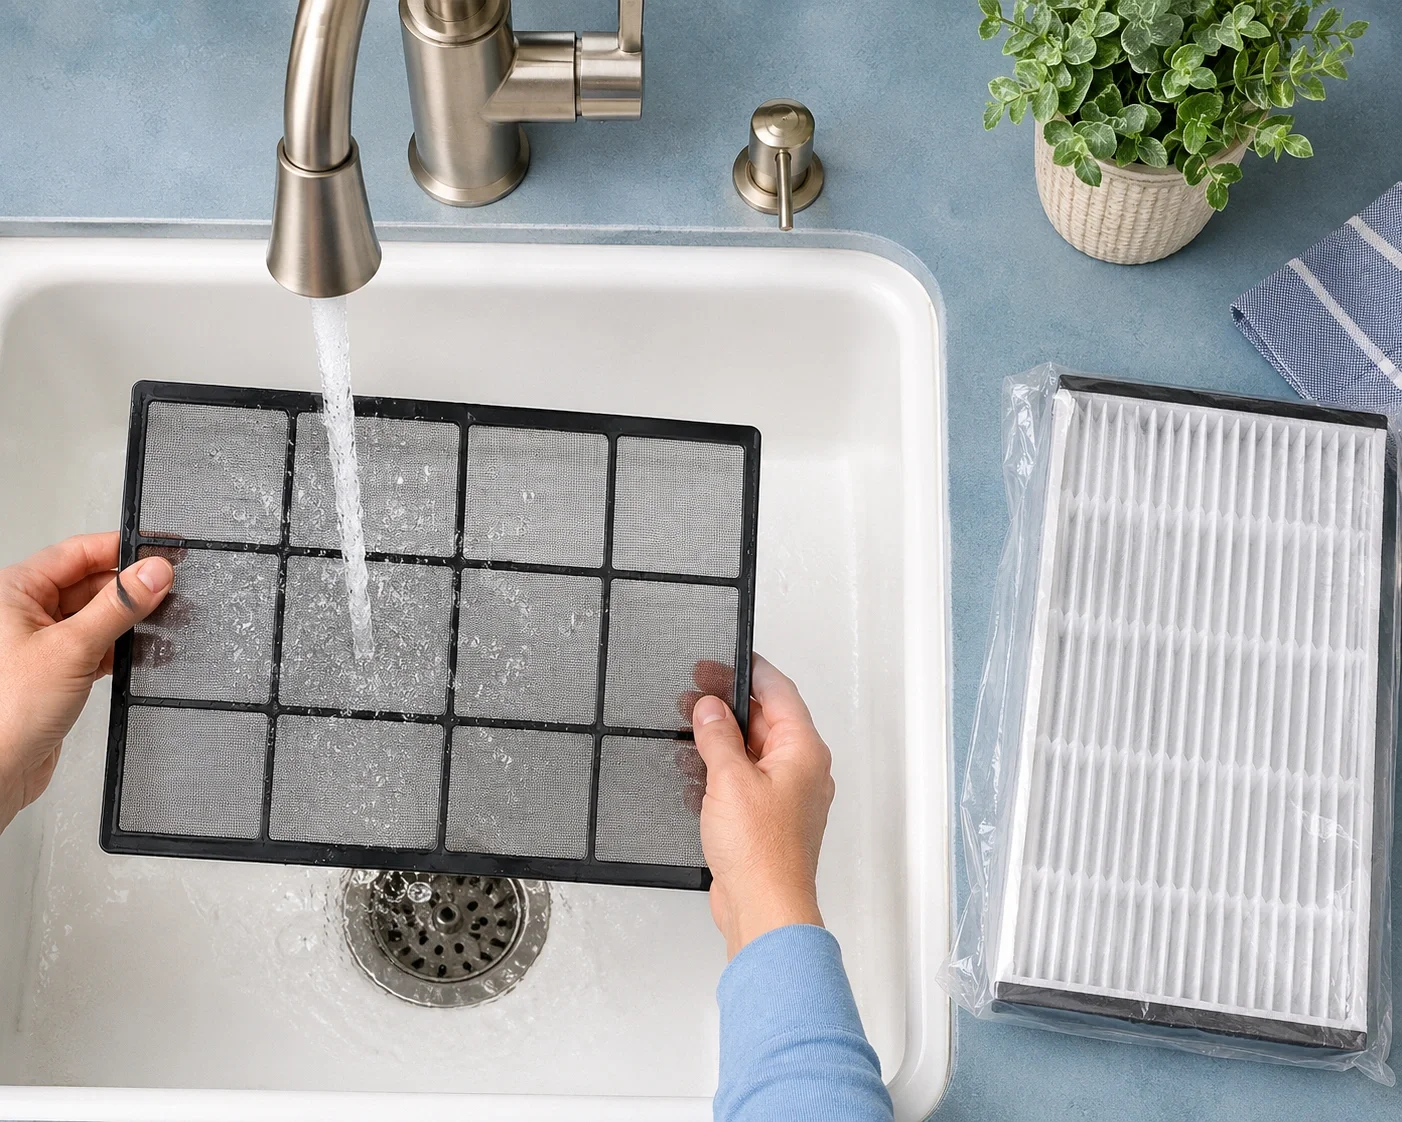
Air Filter Maintenance: The Most Critical Task
Your AC's air filter is its first line of defense — and the single most overlooked maintenance item. A clogged filter restricts airflow, forces the system to work harder, reduces cooling capacity, and can even cause the evaporator coil to freeze. Learning how to clean an AC filter properly is the foundation of all AC maintenance.
How Often Should You Check Your Filter?
The answer depends on several factors: whether you have pets, the level of dust in your area, how often you run the AC, and the type of filter installed. As a general rule, inspect your filter every 30 days and replace or clean it as needed.
For homes with pets or allergy sufferers, you may need to change filters every 4 to 6 weeks. Homes in dusty or high-pollution areas should also stick to a more frequent schedule. If you're unsure when to replace your AC filter, look for visible discoloration, reduced airflow from vents, or increased dust accumulation on surfaces.
Pro Tip: Set a recurring calendar reminder on your phone for the first of every month to check your AC filter. This simple habit alone can prevent the majority of common AC problems and save you hundreds in energy costs over time.
Types of AC Filters and Their Replacement Schedule
Different filters have different lifespans. Understanding which type your system uses helps you plan replacements and budget accordingly:
| Filter Type | Replacement Interval | Cost Per Filter | Best For |
|---|---|---|---|
| Fiberglass (disposable) | Every 30 days | $2–$5 | Budget-conscious, basic filtration |
| Pleated (MERV 8–11) | Every 60–90 days | $8–$20 | Most homes, good dust removal |
| Electrostatic (washable) | Clean every 30 days | $15–$40 | Eco-friendly, reusable for years |
| HEPA (MERV 13–16) | Every 6–12 months | $25–$60 | Allergy sufferers, clean air priority |
| Carbon-activated | Every 3–6 months | $15–$35 | Odor removal, smoke, VOCs |
When purchasing replacement filters, always check the dimensions printed on the side of your current filter — never guess by measuring yourself, as even a small size difference can allow unfiltered air to bypass the filter entirely.
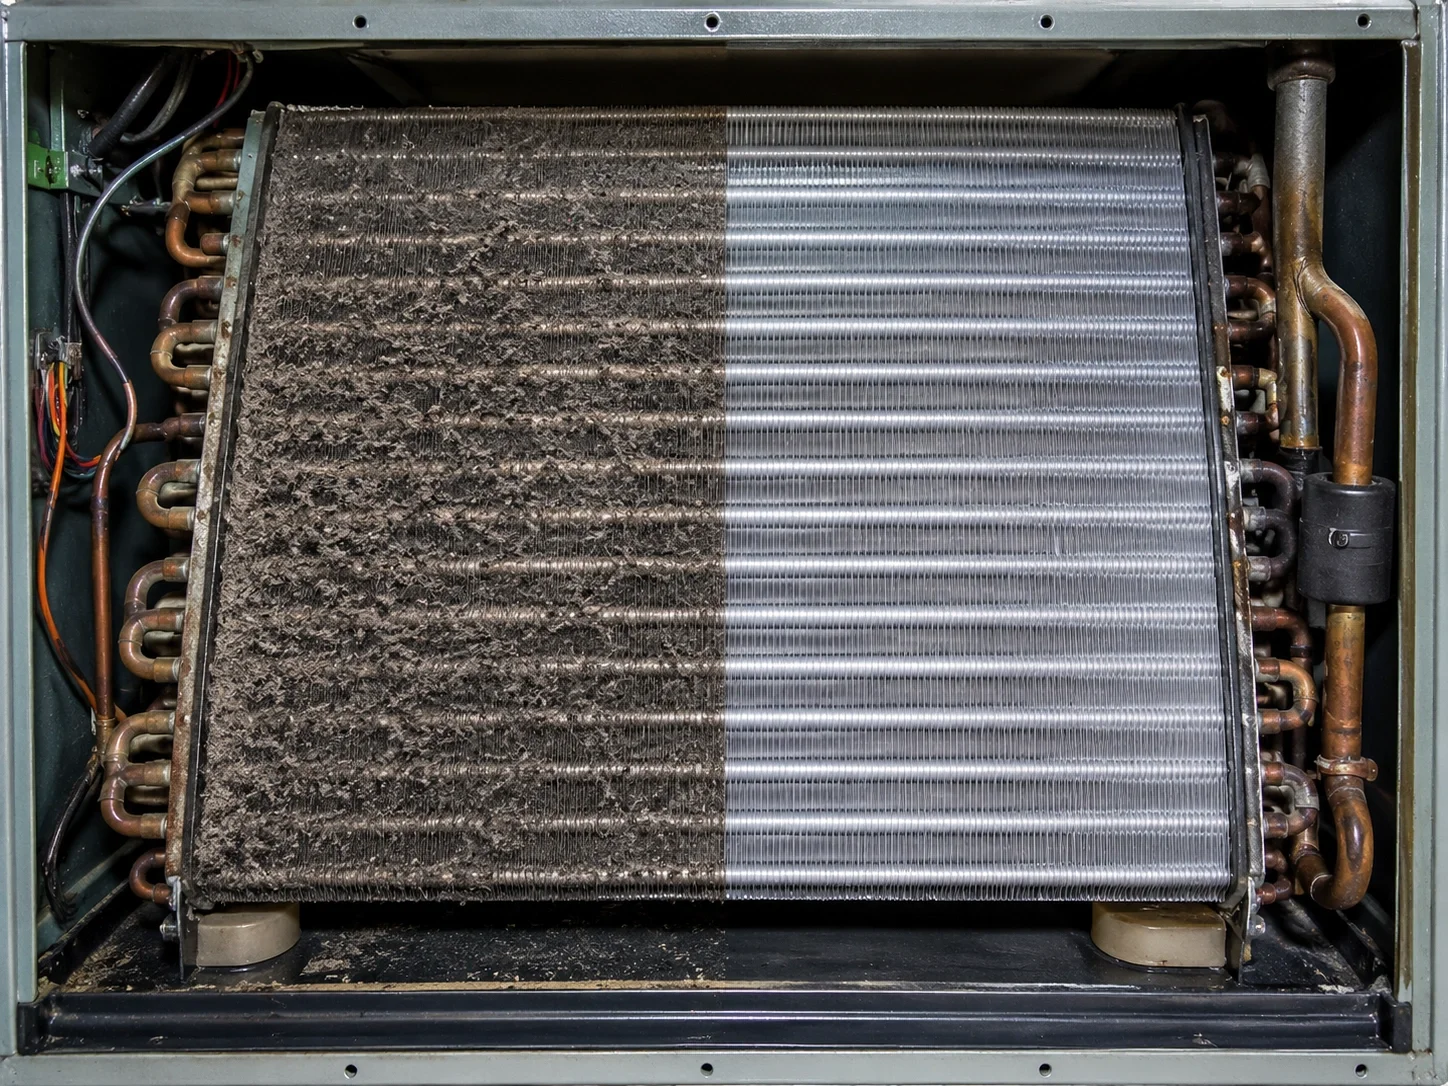
Condenser Coil Cleaning: Protecting Your Outdoor Unit
The outdoor condenser unit is exposed to the elements year-round — rain, wind, dust, leaves, grass clippings, and even nearby vegetation can accumulate on the coils and fins. When the condenser coil is dirty, the system can't release heat effectively, which reduces cooling capacity and increases energy consumption. Cleaning your condenser coils is one of the most impactful maintenance tasks you can perform.
Step-by-Step Condenser Coil Cleaning
- Turn off power — Shut off the breaker dedicated to your AC unit before touching anything. This is a critical safety step that should never be skipped.
- Clear debris around the unit — Remove leaves, twigs, grass, and any objects within a 2-foot radius of the condenser. Proper AC placement includes maintaining adequate clearance.
- Remove the outer grille or cage — Most units have screws or clips holding the protective grille in place. Set aside carefully.
- Use a soft brush or coil cleaning spray — Apply a specialized evaporator/condenser coil cleaner (available for $8–$20) following the product directions. Let it sit for the recommended time to break down grime.
- Rinse gently with a garden hose — Use low to moderate water pressure. Never use a pressure washer, as it can bend the delicate aluminum fins.
- Straighten bent fins — Use a fin comb ($5–$12) to carefully straighten any crushed fins, which restores proper airflow through the coil.
- Reassemble and restore power — Once everything is clean and dry, put the grille back, turn the breaker on, and test the system.
⚠️ Warning: Never use harsh chemicals, bleach, or abrasive brushes on condenser coils. These can corrode the aluminum and permanently damage the coil surface. Always use products specifically formulated for HVAC coil cleaning.
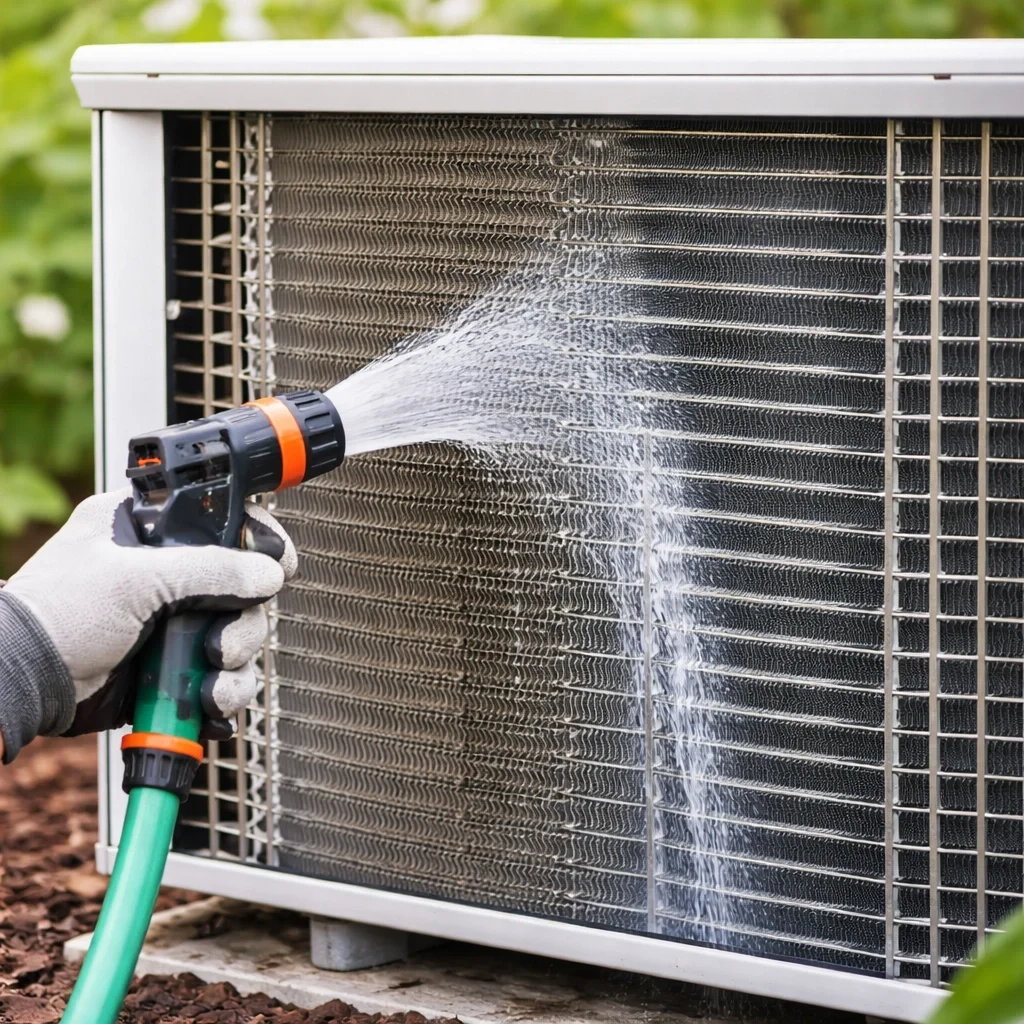
Pro Tip: Perform condenser coil cleaning at least twice a year — once in early spring before cooling season starts, and again in early fall after the heaviest use period. If your unit is located near a busy road, construction site, or area with lots of trees, increase this to four times per year.
Evaporator Coil Maintenance: The Hidden Problem Area
While the condenser coil sits outside where you can see it, the evaporator coil is tucked inside your air handler or furnace — making it easy to forget. But a dirty evaporator coil is one of the most common causes of AC not cooling properly. When dust, mold, and moisture accumulate on the evaporator coil, it insulates the coil surface and prevents it from absorbing heat from your indoor air.
Cleaning evaporator coils is more involved than filter changes but still manageable for confident DIYers. Access the coil by removing the access panel on your indoor air handler. Light dust can be removed with a soft brush or vacuum with a brush attachment. For heavier buildup, use a no-rinse evaporator coil cleaner that's self-drying.
Signs your evaporator coil needs attention include:
- • Reduced cooling output even when the AC runs constantly
- • Ice forming on the refrigerant lines or indoor unit
- • Musty or damp smell coming from vents
- • Higher than usual energy bills with no change in usage
If you notice frozen coils, turn off the AC immediately and let the ice thaw completely before attempting to clean or inspect. Operating the system with frozen coils can cause compressor damage — a repair that costs $1,500 to $3,500.
Pro Tip: If your AC has a self-cleaning feature, it helps reduce evaporator coil buildup but does not eliminate the need for periodic manual inspection. Self-cleaning functions are a helpful supplement, not a replacement for hands-on maintenance.
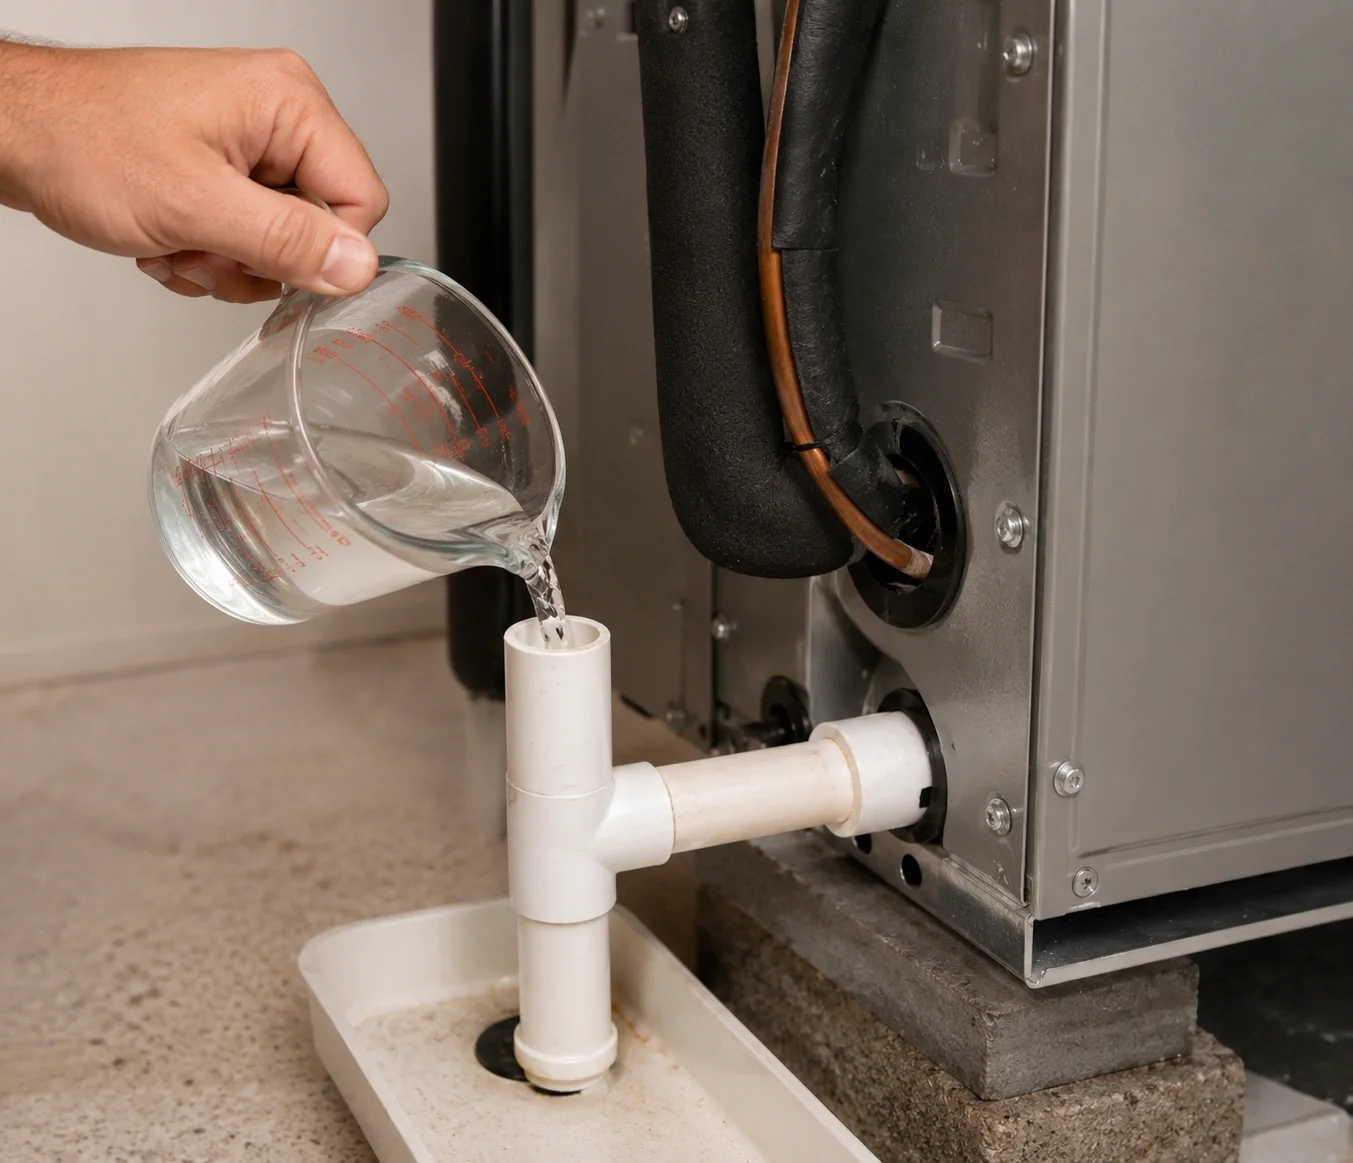
Condensate Drain Line Maintenance: Preventing Water Damage
As your AC removes humidity from indoor air, it produces condensation — typically 5 to 20 gallons per day during peak summer. This water drains out through a narrow PVC pipe called the condensate drain line. When this line clogs with algae, mold, dirt, or debris, the water has nowhere to go and backs up into your home, causing AC water leaks that can damage walls, ceilings, and flooring.
Drain line maintenance is simple but often overlooked. Here's what you should do:
- Locate the drain line exit point — usually a PVC pipe near the outdoor condenser unit, often near the foundation of your home.
- Flush with white vinegar monthly — Pour 1 cup of undiluted white vinegar into the drain line access point (where the line connects to the indoor unit). Vinegar kills algae and mold naturally without damaging the pipe. Let it sit for 30 minutes, then flush with warm water.
- Use a wet/dry vacuum for stubborn clogs — If the line is already clogged, attach a wet/dry vacuum to the outdoor drain exit and suck out the blockage. This typically resolves 90% of clogs without professional help.
- Install a drain line float switch — This inexpensive safety device ($15–$30) automatically shuts off the AC if water backs up, preventing overflow damage. Many local building codes now require them.
- Consider adding algae tablets — Placing an AC drain pan tablet ($5–$10 for a 6-pack) in the drain pan helps prevent algae growth between vinegar treatments.
⚠️ Warning: Never use bleach to clear drain lines if your drain system includes a condensate pump, as bleach can corrode the pump components. Stick to white vinegar or commercial AC drain line cleaners specifically labeled as pump-safe.
Seasonal Maintenance Checklist
Different seasons demand different maintenance priorities. Following a seasonal AC checklist ensures you're always ahead of potential problems rather than reacting to them. Here's what to focus on during each key transition period:
Prepare for Cooling Season
- Replace or clean air filters
- Clean outdoor condenser coils
- Clear 2-foot clearance around outdoor unit
- Inspect refrigerant lines for damage
- Test the thermostat and calibrate if needed
- Schedule professional AC tune-up
- Check ductwork for visible leaks
- Inspect electrical connections
Maintain During Heavy Use
- Check filters every 2–4 weeks
- Monitor for unusual sounds or odors
- Keep condenser area free of debris weekly
- Check condensate drain line weekly
- Monitor indoor temperature consistency
- Watch for ice on refrigerant lines
- Track energy bills for unexpected spikes
- Ensure all supply vents are unblocked
Wrap Up and Protect
- Replace air filters one final time
- Clean condenser coils after summer
- Cover outdoor unit with breathable cover
- Flush drain line with vinegar
- Inspect and clean evaporator coil
- Document any issues for next spring
- Test heating function if heat pump
- Schedule off-season professional service
Pro Tip: Scheduling your professional tune-up in early spring (March–April) is ideal. HVAC companies are less busy during this window compared to peak summer, and you'll have ample time to address any issues before you need the AC. Some contractors even offer off-season discounts of 10% to 20%.
Energy-Saving Tips That Work With Your Maintenance Routine
Maintenance and energy efficiency go hand in hand. A well-maintained AC runs less, uses less electricity, and delivers more consistent comfort. But there are additional habits and adjustments that multiply those savings. These strategies can help you reduce your AC electricity bill by 15% to 40% beyond what maintenance alone achieves.

Optimize Your Thermostat Settings
The ideal AC temperature setting for balancing comfort and efficiency is 78°F (26°C) when you're home and awake. Each degree below 78°F increases energy consumption by approximately 3% to 5%. If you're looking for maximum savings without sacrificing comfort, this is the single most effective adjustment you can make.
When you're away from home for more than 2 hours, raise the temperature to 85°F–88°F. A programmable thermostat ($25–$120) automates this process so you never forget. For smart home setups, a Wi-Fi enabled thermostat lets you adjust settings remotely and track energy usage patterns through your phone.
Avoid the common mistake of setting the thermostat lower than your target temperature thinking it will cool faster. AC systems cool at a fixed rate regardless of the thermostat setting — setting it to 65°F won't cool your home any faster than setting it to 75°F, but it will cause the system to run far longer and waste significant energy.
Use Your Ceiling Fan Strategically
Using a ceiling fan with your AC creates a wind-chill effect that makes the room feel 3°F to 4°F cooler without actually lowering the temperature. This means you can set your thermostat higher while experiencing the same level of comfort. The fan uses only about 1% of the electricity that your AC consumes, making this an exceptionally cost-effective strategy.
Make sure your ceiling fan rotates counterclockwise in summer (which pushes air downward and creates the cooling breeze) and turn off fans when you leave a room — fans cool people, not empty spaces.
Seal and Insulate Your Ductwork
Leaky ducts can waste 15% to 30% of your conditioned air before it ever reaches your living spaces. If you have a ducted AC system, inspect visible ductwork for gaps, disconnected joints, or damaged sections. Sealing air ducts with mastic sealant or metal-backed tape (never standard duct tape, which degrades quickly) is a weekend project that pays for itself within one cooling season. For comprehensive duct sealing in inaccessible areas, consider hiring a professional — the cost of $300 to $1,200 is typically recouped in energy savings within 1 to 2 years.

Common AC Problems and How to Prevent Them
Most AC problems don't happen overnight — they develop gradually and are preventable with proper maintenance. Recognizing early warning signs allows you to act before a minor issue becomes a major expense. Here are the most frequent problems homeowners encounter and the maintenance steps that prevent each one:
AC Not Cooling
Usually caused by dirty filters, low refrigerant, or blocked coils. Regular filter changes and coil cleaning prevent 80% of these cases. For persistent issues, read our full troubleshooting guide.
AC Leaking Water
Almost always caused by a clogged condensate drain line. Monthly vinegar flushes and drain pan tablets prevent this entirely. Learn more about fixing AC water leaks.
Unusual Noises
Banging, squealing, or rattling sounds indicate loose components, worn bearings, or debris in the blower. Annual professional inspections catch these early. See AC noise troubleshooting.
Bad Odors
Musty smells mean mold on the evaporator coil or in the drain pan. Burning smells suggest electrical issues. Regular coil cleaning and drain maintenance prevent both. Learn how to diagnose AC smells.
Frozen Coils
Caused by restricted airflow (dirty filter, closed vents) or low refrigerant. Never run the AC with frozen coils — it can destroy the compressor. Read our frozen coil solutions.
Weak Airflow
Blocked or leaky ducts, dirty blower wheel, or clogged filter. Check all supply vents are open and unobstructed. If duct issues are suspected, consider professional duct sealing.
When to Call a Professional: Know Your Limits
While many maintenance tasks are safe and straightforward for homeowners, some tasks require specialized tools, training, and EPA certifications. Attempting to handle refrigerant or perform electrical work without proper qualifications is dangerous and may violate federal law. Knowing when to call an HVAC technician protects both your safety and your wallet.
Tasks That Always Require a Professional
- ✗ Refrigerant handling — Only EPA-certified technicians can legally purchase, handle, or recharge refrigerants. Refrigerant leak repair requires specialized detection equipment.
- ✗ Electrical diagnostics and repairs — Capacitor testing, contactor replacement, and wiring repairs involve high voltage. If you're unsure whether you need an electrician, err on the side of caution.
- ✗ Compressor issues — Compressor replacement is the most expensive AC repair ($1,500–$3,500) and requires precise installation, brazing, and system evacuation.
- ✗ Internal ductwork repairs — Accessing and sealing ducts inside walls, attics, or crawlspaces requires professional equipment and expertise.
Understanding Maintenance Costs
Investing in preventive maintenance is significantly cheaper than emergency repairs. The annual AC service cost typically runs $150 to $400 for a comprehensive tune-up, which includes refrigerant level check, coil cleaning, electrical inspection, and system performance testing. Compare that to a single emergency repair visit that can cost $300 to $800 just for the diagnostic call, plus parts and labor.
Many HVAC companies offer maintenance plans that include two annual visits, priority scheduling, and discounts on repairs for $200 to $500 per year. These plans often pay for themselves through the repair discounts alone, not to mention the prevention value.
| Service Type | Typical Cost | Frequency |
|---|---|---|
| DIY filter replacement | $5–$30 | Every 1–3 months |
| DIY coil cleaner supplies | $8–$25 | 2–4 times per year |
| Professional tune-up | $150–$400 | Once per year |
| Annual maintenance plan | $200–$500 | Per year (2 visits) |
| Refrigerant recharge (if needed) | $200–$600 | As needed (shouldn't be regular) |
| Duct sealing (professional) | $300–$1,200 | One time or as needed |
| Compressor replacement | $1,500–$3,500 | Rare (preventable with maintenance) |
If you're facing the decision between repairing or replacing your AC, a good rule of thumb is: if the repair cost exceeds 50% of the replacement cost and the unit is more than 10 years old, replacement usually makes better financial sense. A qualified technician can give you a specific recommendation based on your system's condition.
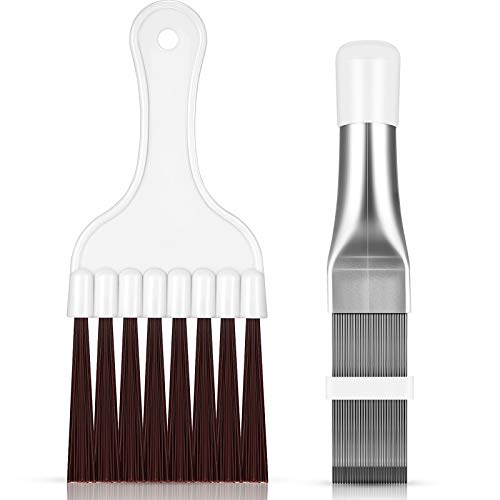
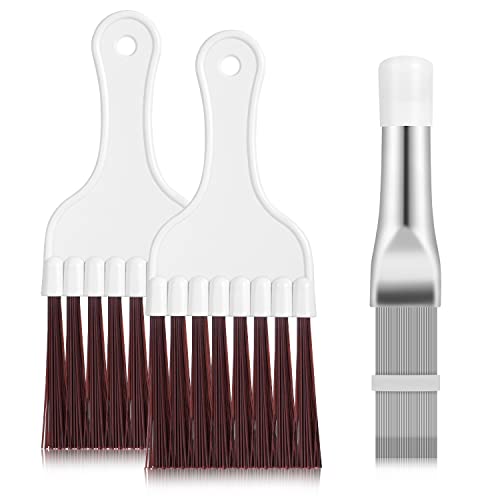
Essential Maintenance Tools Every Homeowner Should Have
You don't need a professional toolkit to handle basic AC maintenance. A few inexpensive tools and supplies cover 90% of routine tasks. Having these on hand means you can address issues immediately rather than waiting for a service appointment.
Screwdriver Set
Phillips and flathead for accessing panels and grilles — $10–$20
Soft-Bristle Brush
For gently removing dust from coils and fins — $8–$15
Coil Cleaner Spray
Specialized formula for condenser and evaporator coils — $8–$20
Fin Comb
Straightens bent aluminum fins to restore airflow — $5–$12
White Vinegar
Natural drain line cleaner — prevents algae and mold — $3–$5
Multimeter
Basic voltage testing for thermostat batteries and connections — $20–$40
Work Gloves
Protect hands from sharp fins, chemicals, and refrigerant lines — $8–$15
Flashlight
For inspecting dark areas around the air handler and ductwork — $10–$25
Complete Maintenance Schedule at a Glance
Use this quick-reference schedule to stay on track with every maintenance task throughout the year. Print it out and keep it near your thermostat or on your refrigerator as a constant reminder.
| Task | Monthly | Quarterly | Bi-Annually | Annually |
|---|---|---|---|---|
| Inspect / replace air filter | ✓ | ✓ | ✓ | ✓ |
| Clear debris around outdoor unit | ✓ | ✓ | ✓ | ✓ |
| Flush condensate drain line | ✓ | ✓ | ✓ | ✓ |
| Check for unusual sounds or odors | ✓ | ✓ | ✓ | ✓ |
| Monitor energy bill trends | — | ✓ | ✓ | ✓ |
| Clean condenser coils | — | — | ✓ | ✓ |
| Clean evaporator coils | — | — | — | ✓ |
| Inspect ductwork for leaks | — | — | — | ✓ |
| Professional tune-up / inspection | — | — | — | ✓ |
| Check refrigerant level | — | — | — | ✓ |
| Test thermostat accuracy | — | — | ✓ | ✓ |
| Inspect electrical connections | — | — | — | ✓ |
Ready to Find the Right AC for Your Home?
Now that you understand how to maintain an air conditioner, make sure you start with the right unit. Our buying guides help you choose the perfect AC based on your room size, budget, and efficiency needs.
EXPLORE BUYING GUIDESFrequently Asked Questions
You can handle several tasks yourself: filter changes, condenser coil cleaning, drain line flushing, and keeping the outdoor area clear. These tasks cover the majority of preventive maintenance. However, you should always hire a licensed HVAC technician for refrigerant handling, electrical work, and comprehensive annual inspections. If you're unsure about when to call a professional, the safest approach is to schedule an annual tune-up and handle the monthly tasks yourself.
DIY maintenance (filters, coil cleaner, vinegar) costs approximately $30 to $80 per year in supplies. A professional annual tune-up adds $150 to $400. An AC maintenance plan that includes two visits per year typically costs $200 to $500. In total, budget $180 to $580 per year for comprehensive maintenance — a fraction of what a single emergency repair costs ($300–$800+).
Neglecting maintenance leads to progressively worse outcomes: higher energy bills (up to 30% more), reduced cooling performance, frequent breakdowns, poor indoor air quality, and a significantly shortened lifespan. A unit that should last 15–20 years may fail in 8–10 years without maintenance. The most severe consequence is compressor failure, which often costs $1,500–$3,500 and may make replacement more economical than repair.
Yes, significantly. A dirty AC with clogged filters and coils can lose 5% to 15% of its efficiency per year of neglected maintenance. This means a unit with a SEER rating of 16 could effectively perform like a SEER 10 unit within a few years. Regular maintenance preserves the efficiency your unit was designed to deliver, keeping energy bills as low as possible. Combined with smart thermostat use and proper duct sealing, maintenance can reduce cooling costs by 30% to 40% compared to a neglected system.
For most homeowners, yes. An AC maintenance plan ($200–$500/year) typically includes two comprehensive inspections, priority scheduling for breakdowns, and 10% to 20% discounts on repairs. The repair discounts alone often cover the plan cost, and the preventive value of catching problems early can save thousands. Maintenance plans are especially worthwhile for older systems (10+ years), homes in harsh climates, and systems still under warranty that require documented service records.
AC systems do not "consume" refrigerant — it circulates in a sealed loop. If your system is low on refrigerant, it means there's a leak. Signs include reduced cooling, ice on the evaporator coil, hissing sounds near the indoor unit, and longer run times. Refrigerant checks require specialized gauges and must be performed by an EPA-certified technician. If you suspect a leak, refrigerant leak repair should be done promptly — running a system with low refrigerant can cause compressor failure.