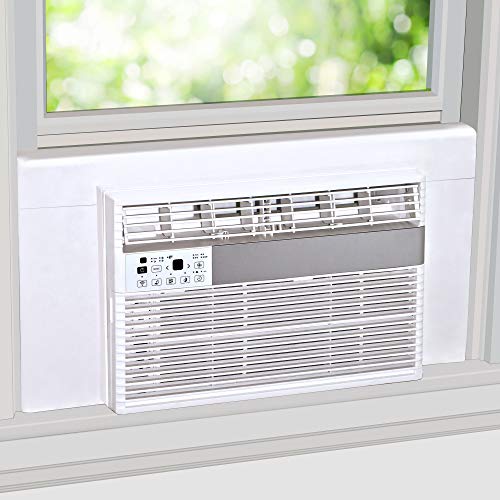
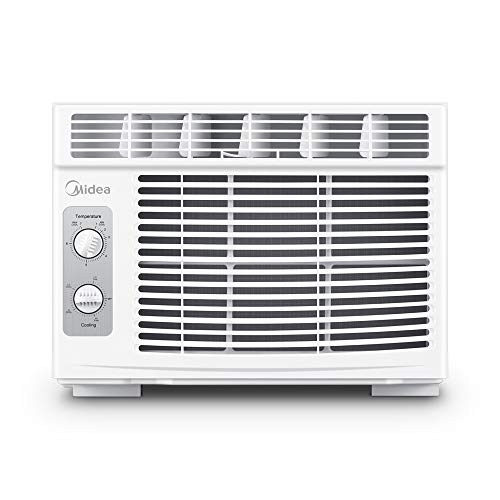
Putting In a Window Air Conditioner
A complete, safety-first guide to installing a window air conditioner — from choosing the right window and checking the electrical load to sealing the frame and running your first cooling test.
START THE GUIDEWhy proper installation matters: A window air conditioner is only as effective as the installation behind it. A unit that sits level, seals tightly, and draws power from a properly rated circuit will cool more efficiently, run quieter, and last longer. A rushed job can leak air, vibrate, overheat, or — in the worst cases — fall out of the window. This guide walks you through the full process so you can plan the job before you lift a single tool.
Before You Begin: Planning and Safety Checks
Window air conditioners are a practical cooling solution for rooms without ductwork, and they remain one of the most widely used options in apartments and older homes. Before you start, take time to confirm that your window, wall, and electrical system can support the unit. Getting these basics right prevents most installation problems.
1 Choose the Right Window
Double-hung windows that open vertically are the standard choice for window AC units because the lower sash can be closed down onto the unit for support. Single-hung windows work as well. Sliding and casement windows require special adapter kits and are not compatible with standard units out of the box.
- Confirm the window frame is solid, level, and free of rot.
- Measure the window opening width and height against the unit's specifications.
- Check that the sill can bear the weight — larger units may need a support bracket.
2 Verify Electrical Capacity
Window AC units draw significant current, especially during compressor startup. Match the unit's nameplate amperage to the circuit and outlet rating. Small units often run on a standard 15-amp household circuit, while larger models may require a dedicated 20-amp circuit.
- Check the unit's plug type — some larger models use a 5-20P or 6-20P plug that requires a matching outlet.
- Avoid sharing the circuit with other high-draw appliances on the same breaker.
- If you are unsure, have a licensed electrician inspect the circuit before installation.
3 Inspect the Unit and Gather Tools
Unpack the air conditioner and confirm that all mounting hardware, side panels, and the window sash lock are present. Read the manufacturer's installation sheet — it takes priority over general guidance if there is any conflict.
- Measuring tape, level, drill, screwdriver set, and utility knife.
- Support bracket (recommended for units above a lightweight threshold).
- Weather sealing foam, insulation strips, and a window sash lock.
- Help for lifting — window AC units are awkward and heavier than they look.
⚠️ Safety first: Never install a window air conditioner alone if the unit is heavy or you are working above the ground floor. Always disconnect power before working near the outlet, and never modify the unit's plug or cord to fit an outlet. If the window is on an upper floor, confirm the unit is fully secured before releasing your grip.
Step-by-Step Installation
The process below follows the sequence used by most manufacturers. Work slowly, check the level at each stage, and do not skip the sealing steps — they are what keep the cool air inside and the hot air out. If you would rather leave the physical work to a professional, professional window air conditioner installation services are widely available and can save you from costly mistakes.
1 Prepare the Window and Frame
Open the lower sash fully and clean the sill and frame. Remove any storm window or screen that would block the unit's outdoor side. Check that the window tracks are clear so the sash can close smoothly later.
- Measure the interior opening and compare with the unit's minimum and maximum window width.
- Mark the center of the sill so the unit sits evenly.
- If the frame is uneven, use shims to create a level base.
2 Install the Support Bracket (Recommended)
A support bracket attaches to the exterior wall below the window and carries the unit's weight, reducing stress on the sash and frame. Many manufacturers recommend a bracket for larger units, and some building codes require one for upper-floor installations.
- Follow the bracket's instructions to mount it to the exterior wall or window frame.
- Confirm the bracket is level and firmly anchored before resting the unit on it.
- For units above the ground floor, a bracket is not optional — it is a safety requirement.
3 Set the Unit in the Window
With a helper, lift the unit into the window opening and rest it on the sill and bracket. The indoor side should sit slightly higher than the outdoor side so condensation drains outside rather than into the room. Most manufacturers specify a slight downward tilt toward the exterior.
- Use a level to confirm the side-to-side position is even.
- Check that the unit's outdoor side extends past the window frame as specified.
- Do not force the unit — if it does not fit, stop and re-measure.
4 Secure the Unit and Close the Sash
Install the side panels (accordion or rigid) that come with the unit to fill the gap between the unit and the window frame. Close the lower sash down onto the top of the unit, then lock the sash in place.
- Attach the included window sash lock to prevent the window from being opened from outside.
- Trim the side panels if they are too long, and seal their edges.
- Confirm the unit cannot shift forward, backward, or sideways.
5 Seal the Gaps
Air leaks around the unit waste energy and let humid outdoor air into the room. Use foam insulation strips and weather sealing around the side panels, the top of the unit where the sash meets it, and any remaining gaps in the frame.
- Fill the gap between the two window sashes with foam weatherstrip.
- Seal the side panel edges with caulk or weatherstrip if air passes through.
- Check the outdoor side for gaps around the bracket and frame.
6 Power Up and Test
Plug the unit into the correct outlet, set the mode to cool, and let it run for several minutes. Confirm that cold air reaches the room, the outdoor fan is moving air, and no unusual vibration or noise appears.
- Check for water dripping inside — if so, re-check the tilt toward the exterior.
- Listen for rattling from loose side panels and tighten them if needed.
- Confirm the breaker does not trip during compressor startup.
Sealing, Insulation, and Long-Term Efficiency
A well-sealed window AC installation is quieter and more efficient. Gaps around the unit let hot outdoor air in and cool indoor air out, forcing the compressor to run longer. Sealing is inexpensive and takes only a few minutes, but it delivers noticeable results over a full cooling season.
Sealing Checklist
- Foam weatherstrip between the upper and lower sashes.
- Insulation strips along the side panels and the top of the unit.
- Caulk or sealant on exterior gaps around the bracket and frame.
- Sash lock installed and engaged to prevent drafts and break-ins.
- No visible daylight through the frame when the room is dark.
If your home has multiple rooms and you are weighing options, it helps to compare a window unit against other formats. Ductless systems avoid window openings entirely, and a look at the pros and cons of ductless air conditioning can clarify whether a window unit or a mini-split is the better fit for your space. For rooms that will be cooled for many years, a quiet window air conditioner with a remote control can also make daily use more comfortable.
Matching the Unit to Your Room
The right capacity depends on room size, ceiling height, sun exposure, and the number of occupants. An oversized unit cools too quickly and leaves the room humid, while an undersized unit runs constantly without reaching the set temperature. Use the table below as a general reference, then confirm against the manufacturer's sizing chart.
| Room Size | Typical Capacity Range | Best For |
|---|---|---|
| Up to 150 sq ft | 5,000 – 6,000 BTU | Small bedrooms, home offices |
| 150 – 250 sq ft | 8,000 – 10,000 BTU | Medium bedrooms, living areas |
| 250 – 400 sq ft | 12,000 – 14,000 BTU | Large bedrooms, open living spaces |
| 400 – 550 sq ft | 15,000 – 18,000 BTU | Studio apartments, large rooms |
Beyond capacity, window AC units fall into broad market tiers. Entry-level models cover the basics — mechanical controls and standard cooling. Mid-range models add electronic controls, remote operation, and better insulation. Premium and top-tier models typically include inverter compressors, quieter fans, Wi-Fi control, and higher efficiency ratings. The table below uses tier descriptors rather than figures so it stays useful regardless of market conditions.
| Tier | Typical Features | Best For |
|---|---|---|
| Entry-level | Mechanical controls, standard fan speeds, basic filtering | Occasional use, secondary rooms |
| Mid-range | Electronic controls, remote, programmable timer, washable filter | Everyday bedroom and living room use |
| Premium | Inverter compressor, quieter operation, energy-saving mode, better sealing | Primary rooms used daily |
| Top-tier | Wi-Fi/app control, high-efficiency inverter, advanced filtration, remote scheduling | Smart homes, long cooling seasons |
Common Installation Mistakes to Avoid
! Tilting the Unit the Wrong Way
The unit must slope slightly toward the outdoors so condensation drains outside. Tilting it toward the room causes water to pool inside and can damage the wall and floor.
! Skipping the Support Bracket
Relying only on the window sash to hold a heavy unit stresses the frame and creates a fall risk. A bracket is a low-effort addition with a large safety payoff.
! Overloading the Circuit
Plugging a large unit into a shared circuit can trip breakers and overheat wiring. Check the amperage and use a dedicated circuit when the unit calls for one.
! Leaving Gaps Unsealed
Unsealed side panels and sashes let hot air in and cool air out, reducing efficiency and increasing run time. Sealing takes minutes and improves comfort immediately.
! Blocking Outdoor Airflow
Shrubs, fences, or stored items placed too close to the outdoor coil restrict airflow. Keep at least 12 to 18 inches of clear space around the outdoor side.
Maintenance After Installation
Once the unit is installed, a simple maintenance routine keeps it running well. Clean or replace the filter every two to four weeks during heavy use, inspect the outdoor coil for debris, and check the seal around the frame at the start of each cooling season. If the unit stops cooling, a quick fix for AC not blowing cold air often starts with the filter and the thermostat setting before anything else.
At the end of the season, remove the unit or cover it securely, and inspect the window frame for moisture or drafts. If you plan to keep the unit installed year-round, confirm that the seal remains tight and that the unit is switched off at the breaker during cold months.
When to Call a Professional
Most window AC installations are within reach for a careful DIYer, but some situations call for a professional. Upper-floor windows, unusually heavy units, older wiring, and windows that are not level all increase the risk. A professional can also confirm that the circuit is correctly rated and that the unit is secured to local code.
If you are also considering a more permanent cooling solution for the rest of the home, it helps to compare formats before committing. A review of the pros and cons of portable air conditioners can clarify whether a portable unit is a better fit for a rental or a room without a suitable window.
Frequently Asked Questions
Do I need a special bracket to install a window air conditioner?
Many units include basic mounting hardware, but a dedicated support bracket is strongly recommended for larger and heavier units. A bracket transfers weight to the exterior wall and reduces stress on the window frame, improving safety and stability.
Can I install a window air conditioner in a sliding window?
Yes, but only with the correct accessory kit. Sliding windows require a special filler panel and bracket system because the unit cannot rest on a vertical sash. Double-hung windows remain the most straightforward option for standard window AC units.
How much space should I leave around the outdoor side of the unit?
Leave at least 12 to 18 inches of clear space around the outdoor coil and vents. Restricted airflow forces the compressor to work harder, reduces cooling performance, and shortens the life of the unit.
Should I use a dedicated electrical circuit for a window air conditioner?
For larger units, yes. A dedicated circuit prevents overloads and nuisance breaker trips. Check the unit's nameplate amperage and match it to a properly rated breaker and outlet, ideally installed by a licensed electrician.
Why does water drip inside after installation?
Water dripping inside usually means the unit is tilted toward the room instead of the outdoors, or the drain holes are blocked. Re-check the tilt and clear any debris from the base of the unit.
Ready to Cool Your Room?
Once your window is prepared and the circuit is confirmed, the right unit makes the job straightforward. Browse recommended window air conditioners below, compare features by tier, and choose the option that matches your room size and daily use.
VIEW RECOMMENDED UNITS