
AC Schrader Valve Replacement: The Complete Homeowner’s Guide
A small valve can cause a big refrigerant loss. Learn how to recognize a failing Schrader valve, understand the replacement process, and decide when to call a licensed technician for a lasting repair.
1. What a Schrader Valve Does in an AC System
A Schrader valve is the small spring-loaded service port you see on the refrigerant lines of nearly every air conditioning system. It looks similar to the valve stem on a car tire, and it serves a comparable purpose: it lets technicians connect gauges and charging equipment while keeping refrigerant sealed inside the system the rest of the time.
Your AC system uses two service ports, one on the low-pressure (suction) side and one on the high-pressure (liquid) side. Each port contains a Schrader valve core that is held closed by a spring and a seal. When a technician presses a gauge hose onto the port, the core is pushed open momentarily, allowing pressure readings and refrigerant flow. When the hose is removed, the spring snaps the core shut again.
Because this component sits at the boundary between the sealed refrigerant circuit and the outside world, it is one of the most common points for slow leaks. A worn seal or a weak spring can allow refrigerant to escape gradually, which is why the Schrader valve is frequently inspected during any professional AC inspection.
2. Warning Signs Your Schrader Valve Is Failing
Schrader valve problems rarely announce themselves with a dramatic failure. Instead, they usually show up as slow, nagging symptoms that gradually worsen. Watch for these signs:
- Gradual loss of cooling capacity. The system runs but struggles to reach the set temperature, especially on hot days. This often overlaps with broader AC not cooling symptoms.
- Visible oil residue around the service port. Refrigerant oil often escapes with the gas, leaving a dark, oily stain or dust buildup around the valve cap.
- Bubbles at the service port. A soap-and-water test can reveal small bubbles forming at the valve, indicating an active leak.
- Hissing sound near the outdoor unit. A faint hiss when the system is running may point to a leaking valve core.
- Frequent refrigerant top-ups. If your system needs refrigerant more often than expected, a leaking Schrader valve is a prime suspect. See our guide on refrigerant refill for context on how often topping up is reasonable.
- Frozen evaporator coils. Low refrigerant charge caused by a leak can lead to frozen coils and reduced airflow.
- System short-cycling or not blowing cold air. When charge drops below a threshold, the system may behave like it is not blowing cold air at all.
3. Why Schrader Valves Fail Over Time
Even a well-made valve core is a wear item. Several factors contribute to premature failure:
- Rubber seal degradation. The tiny O-ring or seal inside the core dries out and cracks with age and heat cycling.
- Spring fatigue. The spring that holds the core closed loses tension over thousands of open-close cycles during service calls.
- Contamination. Dirt, moisture, or debris that enters through a missing or loose cap can damage the sealing surface.
- Improper service technique. Forcing gauges onto the port or over-tightening the cap can deform the valve.
- Corrosion. Outdoor units exposed to salt air, humidity, or acid rain are more prone to corrosion around brass and steel valve components.
- Missing valve caps. The plastic or brass cap is a secondary seal. When it is lost, the primary core is exposed to dirt and moisture.
Understanding these causes helps explain why regular AC maintenance includes checking service ports and caps, not just filters and coils.
4. The Replacement Process, Step by Step
Schrader valve replacement is a small job in terms of parts, but it requires refrigerant-handling skills and the right tools. Here is what a proper replacement looks like when performed by a qualified technician:
- System assessment. The technician confirms the leak location with electronic leak detection or UV dye, and checks that the valve, not a nearby brazed joint, is the source.
- Refrigerant recovery. Under EPA regulations, refrigerant must be recovered into a recovery cylinder before the system is opened. This step protects the environment and is legally required in the United States.
- Core removal. Using a valve core removal tool, the technician extracts the old core. On some systems, the port fitting itself is replaced if the threads or seat are damaged.
- Seat inspection and cleaning. The port interior is inspected for debris or corrosion and cleaned so the new core seals properly.
- New core installation. A fresh valve core, ideally a high-grade replacement rated for the system’s refrigerant type, is threaded in and torqued to specification.
- Leak test. The system is pressurized with nitrogen or refrigerant and checked with a leak detector or soap solution to confirm a tight seal.
- Evacuation. A vacuum pump pulls the system down to remove moisture and non-condensable gases, which is essential for reliable operation.
- Recharge and verification. Refrigerant is weighed back in to the manufacturer’s specified charge, and the system is run to verify pressures and temperatures.
- New caps installed. Fresh valve caps are fitted as a secondary seal and to keep dirt out.
For a broader view of how this fits into overall system service, see our AC repair guide and the refrigerant cycle explanation.
5. DIY vs. Professional Replacement
It is tempting to treat a Schrader valve like a tire valve and swap it yourself. In practice, the two jobs are very different. A tire contains air at low pressure; an AC system contains a regulated refrigerant under pressure, and releasing it is both illegal in many jurisdictions and harmful to the environment.
| Factor | DIY Replacement | Professional Replacement |
|---|---|---|
| Tools required | Core tool, gauges, vacuum pump, recovery machine — rarely owned by homeowners | Technician carries all required equipment |
| Refrigerant handling | Risk of venting refrigerant; legal compliance issues | Proper recovery and recharge per EPA rules |
| Leak verification | Hard to confirm a tight seal without a detector | Electronic and soap testing included |
| Warranty impact | May void equipment warranty | Preserves warranty when done by a licensed pro |
| Best for | Cap replacement only (no system opening) | Any work that opens the refrigerant circuit |
There is one safe DIY task: replacing a missing or cracked valve cap. That is a simple screw-on accessory that adds a secondary seal. Anything beyond that, including core replacement, should be handled by a licensed AC service technician. If you are unsure whether your system needs attention, an AC inspection is the right first step.
When comparing repair options, our guide on replace vs. repair helps you weigh a small valve fix against larger system decisions.
6. Choosing the Right Replacement Valve
Not all Schrader valve cores are interchangeable. The right part depends on the refrigerant type, system pressure, and port size. A technician will typically select from a few standard categories:
| Tier | Category | Best For |
|---|---|---|
| Essential tier | Standard replacement core | Routine replacement on residential split systems |
| Mid-tier | High-grade seal core | Systems in humid or coastal climates where corrosion is a concern |
| Top-tier | Heavy-duty / commercial-grade core | Commercial equipment and high-cycle service ports |
| Accessory | Brass or locking valve cap | Secondary sealing and contamination protection |
Selection also depends on the refrigerant in use. Newer systems using R32 or R454B may require cores rated for those refrigerants. Your technician will match the part to the system’s nameplate data, which is the most reliable approach.
7. Preventing Future Valve Problems
Schrader valve wear is largely unavoidable, but you can slow it down and catch problems early:
- Keep the caps on. Replace missing caps immediately. They are the cheapest insurance against contamination and slow leaks.
- Schedule annual service. A yearly AC maintenance visit includes a check of service ports and refrigerant pressures.
- Avoid unnecessary gauge connections. Every time a gauge is connected, the core cycles. Fewer unnecessary hookups means longer valve life.
- Watch for oil staining. A quick visual check of the outdoor unit ports each season can reveal early leaks.
- Consider a maintenance plan. A recurring AC maintenance plan keeps inspections on schedule and often includes priority service.
- Address small leaks early. A slow leak that is ignored can lead to compressor damage and a much larger repair. Our guide on AC repair costs explains how small issues escalate.
If your system is showing broader performance problems, such as not cooling properly or making unusual noise, the Schrader valve may be only one part of the picture.
8. Frequently Asked Questions
How often should a Schrader valve be replaced?
Can a leaking Schrader valve cause my AC to stop cooling entirely?
Is it safe to just tighten the valve cap instead of replacing the core?
Will replacing a Schrader valve require adding refrigerant?
How do I know if my valve is leaking or if the problem is elsewhere?
Can I replace the valve myself if I have the right tools?
Ready to Address a Suspected Valve Leak?
If you have spotted oil residue, heard hissing near the service ports, or noticed declining cooling performance, the next step is a professional inspection. A licensed technician can confirm the leak source and recommend the right repair path for your system.
Find Local AC Repair HelpRecommended AC Schrader Valve Replacement Parts & Tools
⚠️ AFFILIATE DISCLOSURE: This website contains affiliate links. As an Amazon Associate, we earn from qualifying purchases. If you make a purchase through these links, we may receive a small commission at no additional cost to you. Read our full affiliate policy.

31Pcs R134A Valve Core Quick Remover Installer Tool Set, High Low Pressure AC Valve Core Removal Tool with R134A Valve Core AC Service Port Cap Valve Stem Kit for Refrigerant Air Conditioner System
Check price on Amazon
39 PCS Air Conditioning Valve Core Accessories Kit, Schrader Valve Tool | R12 R134a Tire Valve Stem Cores with Single & Dual Heads Valve Core Remover Installer Tool, HVAC System Seal Caps Kit
Check price on Amazon
OMT AC Valve Core Removal Tool, R134a R1234yf R22 AC Schrader Valve Tool | Brass & Aluminum Build; Built-In Ball Valve; Standard JRA Support; Auto AC Repair for Technicians
Check price on Amazon
UNLRAE 17PCS AC Schrader Valve Kit,Car Accessories AC Valve Core Kit with Removal Tool,Compatible with R12,R22,R134 Refrigerants,Suitable for Replacement and Repair of Car Air Conditioners
Check price on Amazon
DikTalk AC Schrader Valve Core Removal Tool,60pcs Air Condition Schrader Valve Remover Installer Tool Kit with O-Ring Rubber Seal for R134A, R1234YF R22,High Low Pressure Repair Tools
Check price on Amazon
GELRIUNY AC Schrader Valve Core Remover Tool Kit, R134a R1234YF R22 | GELRIUNY AC Schrader Valve Core Remover Tool Kit for Automotive and Home Air Conditioning Systems(AC R22 R134a R1234YF)
Check price on Amazon
TEOFix R134A Valve Core Quick Removal Tool Set. AC Schrader Valve Tool | Designed for Leak-Free Replacement of Valve cores in Automotive AC Systems.
Check price on Amazon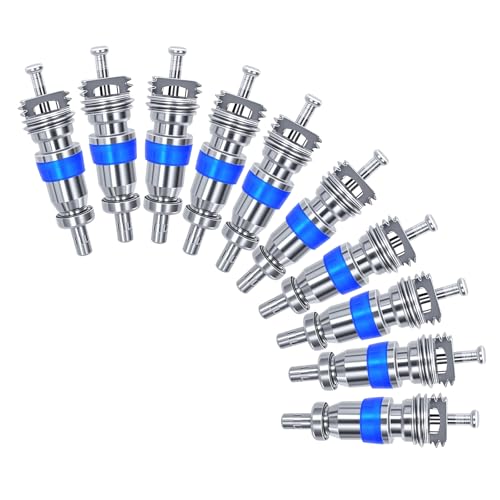
50-Pack Valve Core for HVAC R32 R410A R22, AC Schrader Replacement | HVAC Schrader Valve Core w/ Teflon seal. For AC, refrigeration, heat pumps. Leak-proof, high-pressure rated.
Check price on AmazonDisclaimer
Some of the content on this site uses AI assistance. Information is provided for educational purposes only. We are not responsible for any losses resulting from the use of this information. By using this site, you waive any right to bring legal claims against us arising from your use of the information provided. If you do not agree, please do not use this site. Read the full disclaimer.