Central Air Conditioning System Installation
A complete guide to understanding what central AC installation involves, how projects are structured by system tier, and how to prepare your home for a smooth, professional installation.
START LEARNINGAC Units Guide Philosophy: A central air conditioning system is one of the most significant comfort upgrades a home can receive. Understanding the installation process helps you ask the right questions, evaluate contractor proposals fairly, and make confident decisions before work begins.
What Central Air Conditioning Installation Involves
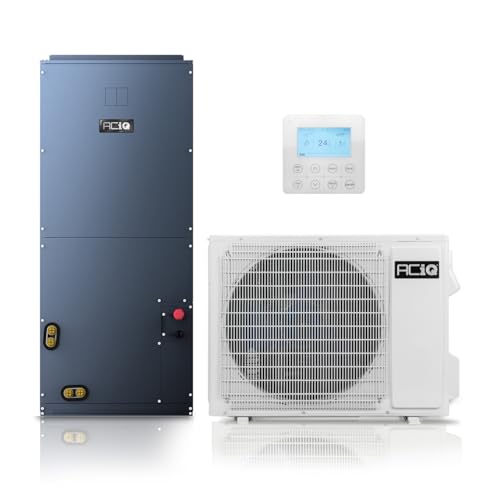
Central air conditioning installation is a multi-stage HVAC project that integrates an outdoor condenser unit, an indoor air handler or evaporator coil, refrigerant lines, electrical connections, condensate drainage, and a thermostat control system. For homes with existing ductwork, the project often centers on equipment replacement and system balancing. For homes without ducts, installation expands to include a full duct design and distribution layout.
Because every home has a different layout, insulation profile, and electrical service, a qualified HVAC contractor performs a load calculation before recommending equipment. This ensures the selected system matches the home's actual cooling demand rather than relying on rough square-footage estimates. If you are early in the research phase, a useful companion read is our overview of what a central air conditioning system project typically includes, which explains how equipment selection and labor scope fit together.
The installation itself generally follows this sequence: site assessment, load calculation, equipment selection, permit acquisition, indoor unit and coil placement, line set routing, outdoor unit pad and placement, electrical and drain connections, vacuum and refrigerant charge, system start-up, airflow balancing, and homeowner walkthrough.
System Tiers in Central AC Installation
Central air conditioning systems are commonly grouped into three broad market tiers. These tiers describe the relative position of a system in the market, not a specific figure, and they help homeowners frame expectations for efficiency, noise, and feature depth.
Entry-Level Tier
Entry-level central AC systems deliver reliable single-stage cooling with standard efficiency ratings. They are a solid choice for homeowners replacing an aging unit in a moderately sized home with existing ductwork. Build quality is generally straightforward, with durable construction focused on core cooling performance rather than advanced features.
Mid-Range Tier
Mid-range systems often introduce two-stage compressors, improved sound insulation, and higher efficiency ratings. Compared with entry-level models, mid-range units typically offer smoother temperature control and quieter operation. This tier is well-specified for households that want a balance of comfort, efficiency, and long-term durability.
Premium Tier
Premium central AC systems feature variable-speed compressors, advanced humidity control, smart thermostat integration, and the highest efficiency ratings in the category. These systems are a long-term investment for homeowners seeking precise comfort, low operating noise, and top-tier performance across changing outdoor conditions.
Comparing Installation Scope by System Tier
The installation scope can vary depending on the tier and whether ductwork already exists. The table below summarizes how project elements typically differ across tiers. It uses neutral tier descriptors rather than figures.
| Installation Element | Entry-Level Tier | Mid-Range Tier | Premium Tier |
|---|---|---|---|
| Compressor Type | Single-stage | Two-stage | Variable-speed |
| Indoor Comfort | Basic temperature control | Improved temperature and humidity balance | Precise zoned comfort and humidity management |
| Noise Level | Standard | Reduced with insulation upgrades | Quietest in category |
| Thermostat Compatibility | Standard programmable | Smart thermostat ready | Advanced smart and zoning integration |
| Ductwork Considerations | Reuse existing ducts when in good condition | Partial duct sealing and balancing recommended | Full duct design review and optimized airflow |
| Best For | Straightforward replacements in existing ducted homes | Homeowners upgrading comfort and efficiency | Whole-home precision comfort and long-term efficiency |
Step-by-Step Central AC Installation Process
Understanding the installation sequence helps you follow along with your contractor and prepare your home for the work. The following steps describe a typical ducted installation.
1. Home Assessment and Load Calculation
The contractor evaluates square footage, window orientation, insulation, ceiling height, and occupancy patterns. A proper load calculation determines the correct system capacity and prevents short cycling or inadequate cooling. Homeowners with questions about matching system size to home size may find our guide on central AC sizing for a mid-sized home useful during this stage.
2. Equipment Selection and Proposal Review
Based on the load calculation, the contractor proposes equipment at an appropriate tier. Review the proposal carefully, including efficiency ratings, warranty terms, and whether duct modifications are included. For a broader view of how equipment and labor combine in a project, see our breakdown of central air conditioning system cost structure.
3. Permits and Scheduling
Most jurisdictions require an HVAC permit for a central AC installation. A reputable contractor handles the permit application and schedules inspections. Skipping permits can complicate future home sales and void manufacturer warranties.
4. Indoor Unit and Coil Placement
The indoor air handler or evaporator coil is positioned in the attic, closet, or utility space. The contractor confirms that the location allows adequate airflow, service access, and condensate drainage.
5. Line Set and Drain Routing
Refrigerant lines connect the indoor coil to the outdoor condenser. Proper routing, insulation, and support are essential to prevent vibration, refrigerant leaks, and condensation issues. Condensate drains must slope correctly and terminate at an approved location.
6. Outdoor Condenser Placement
The outdoor unit is set on a level pad with adequate clearance for airflow and service. The contractor checks that the location complies with local setback rules and does not direct noise toward bedrooms or neighboring windows.
7. Electrical Connections
Central AC systems require a dedicated circuit, disconnect, and properly sized breaker. Electrical work should be performed or verified by a licensed electrician where local codes require it.
8. Vacuum, Charge, and Start-Up
The contractor evacuates the refrigerant lines to remove moisture and non-condensable gases, then charges the system according to manufacturer specifications. Start-up includes verifying pressures, temperatures, and electrical draw.
9. Airflow Balancing and Walkthrough
After the system runs, the contractor balances airflow across registers and confirms the temperature split between supply and return. The walkthrough covers thermostat operation, filter maintenance, and warranty registration.
Installing Central AC in a Home Without Ductwork
Homes without existing ducts face a larger project scope. The installation adds duct design, material selection, ceiling or wall penetrations, and register placement. This can extend the project timeline and increase complexity, especially in older homes with limited attic or crawlspace access.
Homeowners exploring alternatives sometimes compare ducted central systems with ductless options. If you are weighing those paths, our guide on air conditioning systems without ductwork explains how ductless mini-splits differ in installation scope and room-by-room control. For homes that already have forced-air heating, adding cooling to the existing system may be a more efficient path; our article on adding central air to a forced-air system covers the integration considerations.
How Long Does Central AC Installation Take?
For a straightforward replacement in a home with existing ductwork, installation commonly takes one to two days. Projects that include duct modifications, electrical panel upgrades, or attic work can extend to three to five days. New duct systems in homes without ductwork may take longer, depending on layout complexity and access.
Scheduling also depends on permit processing and inspection availability, which vary by jurisdiction. A contractor with a clear project plan will provide a realistic timeline during the proposal stage and communicate any changes as work progresses.
How to Prepare Your Home Before Installation Day
- Clear access to the attic, closets, and utility spaces where indoor equipment will be placed.
- Remove fragile items and cover furniture near work areas.
- Confirm parking access for the contractor's vehicle and equipment delivery.
- Secure pets in a separate room during installation.
- Review the proposal to confirm what is included, such as duct sealing or thermostat replacement.
- Ask about the permit process and expected inspection schedule.
- Confirm the warranty registration steps for the new equipment.
Choosing the Right HVAC Contractor
The quality of the installation matters as much as the equipment itself. A well-installed entry-level system often outperforms a poorly installed premium system. When evaluating contractors, confirm licensing, insurance, and manufacturer authorization. Ask for references from recent installations in homes similar to yours.
Compare proposals on scope, not just on tier. A proposal that includes load calculation documentation, permit handling, and a clear commissioning process reflects a professional approach. Homeowners replacing an older system may also want to review our guide on air conditioning system replacement planning, which explains how replacement projects differ from first-time installations.
For larger properties or commercial spaces, installation scope and equipment selection differ meaningfully. Our resource on AC for office buildings is a useful reference for understanding how commercial-grade installations are planned.
Common Questions About Central AC Installation
Do I need a permit for central AC installation?
In most jurisdictions, yes. A permit ensures the installation meets local mechanical and electrical codes and that inspections verify safe operation. Reputable contractors include permit handling in their proposals.
Can I install central AC myself?
Central AC installation involves refrigerant handling, electrical connections, and duct design. Refrigerant work is regulated and generally requires EPA certification. Professional installation protects both safety and manufacturer warranty coverage.
How do I know what size system I need?
A load calculation accounts for square footage, insulation, windows, and local climate. Relying on square footage alone can lead to an oversized or undersized system. Ask your contractor for the load calculation documentation.
What is the difference between the system tiers?
Entry-level systems use single-stage compressors and focus on reliable cooling. Mid-range systems add two-stage operation and improved comfort. Premium systems use variable-speed compressors, advanced controls, and the highest efficiency ratings in the category.
How soon can I use the system after installation?
Once start-up and airflow balancing are complete, the system is ready for normal use. The contractor typically walks you through thermostat operation and filter maintenance before leaving.
Ready to Explore System Options?
Review recommended central air conditioning systems and compare features across tiers before requesting installation proposals from local contractors.
VIEW RECOMMENDED SYSTEMS