
Cost to Install Window AC: The Complete Guide
Understand the real factors that shape window air conditioner installation, from electrical requirements and mounting methods to the differences between DIY and professional setup — so you can make a confident, well-informed decision before you buy.
Why Window AC Installation Deserves Careful Planning
A window air conditioner is one of the most practical cooling solutions for single rooms, apartments, and spaces without ductwork. It is compact, self-contained, and straightforward to operate. However, the installation itself is where many homeowners either succeed elegantly or run into frustrating problems — sagging brackets, water leaks, vibration noise, or electrical trips.
Understanding the installation landscape before you buy helps you avoid costly rework and ensures the unit performs efficiently for years. Unlike central systems or ductless mini-splits, window units are designed for a relatively simple mounting process — but "simple" does not mean "careless." The window frame, the unit's weight, the electrical circuit, and the outdoor exposure all play a role in how well the installation holds up.
This guide walks you through the practical and technical aspects of window AC installation. Whether you plan to handle the job yourself or hire a professional, you will learn what to expect, what to check, and how to make sure the unit is installed safely and effectively.
Key Factors That Influence Window AC Installation Requirements
No two window installations are identical. The effort and complexity involved depend on several physical and electrical variables. Understanding these factors helps you anticipate what the installation will involve and whether a professional is needed.
1. Window Type and Frame Condition
Double-hung windows with a vertical sliding sash are the most compatible with standard window AC units. Single-hung windows can also work, but the fixed upper sash limits how the unit sits. Casement windows (crank-out style) and awning windows generally cannot support a window unit without special brackets or an adapter kit. Sliding windows require a sash kit that fills the gap above the unit.
The condition of the frame matters too. Older wooden frames may be soft or warped, which can compromise the support bracket. Vinyl frames are common and generally fine, but the window must be able to close securely against the unit's top seal to prevent air leaks.
2. Unit Weight and Support Requirements
Window AC units vary significantly in weight depending on cooling capacity. Smaller units for compact rooms are lighter and may sit securely on the window sill with the included bracket. Larger units for bigger rooms are heavier and often require an external support bracket that transfers weight to the exterior wall. Proper support is not optional — an unsupported unit can tilt, vibrate, or fall.
3. Electrical Circuit Capacity
This is the factor most often overlooked. Window units draw a significant amount of current, especially during compressor startup. A dedicated circuit is strongly recommended. Sharing a circuit with other appliances can cause breaker trips or, worse, overheating. The unit's nameplate rating tells you the amperage draw; the circuit breaker and wiring must be rated to handle it with a safe margin.
4. Outdoor Exposure and Drainage
Window units sit partially outdoors, so they are exposed to weather. The installation must allow for proper condensate drainage — most units are designed to drain through the rear or bottom. Tilting the unit slightly toward the outside (per the manufacturer's instructions) helps water flow away from the room. Sealing the gap around the unit with foam or weatherstripping prevents drafts and insect entry.
| Factor | What It Affects | Practical Consideration |
|---|---|---|
| Window type | Compatibility and sealing | Double-hung is easiest; casement needs adapters |
| Unit weight | Bracket type and wall load | Heavier units need external support brackets |
| Electrical circuit | Safe operation and breaker sizing | Dedicated circuit recommended for larger units |
| Outdoor exposure | Durability and drainage | Proper tilt and weather sealing extend lifespan |
DIY vs Professional Installation: Pros and Cons
Many homeowners install window AC units themselves, and for smaller units in compatible windows, that is entirely reasonable. But the decision should be based on your comfort level with tools, the unit's weight, and the electrical setup — not simply on convenience.
DIY Installation
Installing a window unit yourself gives you full control over timing and lets you understand your equipment more intimately. For a standard double-hung window and a mid-size unit, the process typically involves placing the unit on the sill, attaching the included brackets, securing the sash, and sealing gaps. The main risks are improper support (leading to vibration or sagging), poor sealing (causing energy loss), and electrical overload if the circuit is shared.
- Advantages: Full scheduling control, deeper familiarity with the unit, no labor coordination.
- Risks: Incorrect bracket use, inadequate weather sealing, electrical circuit overload.
- Best for: Lightweight units in standard double-hung windows with a nearby dedicated outlet.
Professional Installation
A professional installer brings experience with different window types, bracket systems, and electrical safety checks. They can identify issues — like a weak sill or an undersized circuit — that a homeowner might miss. For larger units, second-story windows, or any situation involving electrical work beyond plugging into an existing outlet, professional help is a wise investment.
- Advantages: Proper support and sealing, electrical verification, reduced risk of rework.
- Considerations: Requires scheduling and coordination with the installer.
- Best for: Heavy units, non-standard windows, second-story installations, or any electrical upgrades.
Step-by-Step Window AC Installation Process
Whether you hire a professional or do it yourself, understanding the sequence helps you verify that the job is done correctly. Below is the standard workflow for a typical double-hung window installation.
Step 1: Preparation and Safety
Unplug or turn off power to the circuit you plan to use. Read the manufacturer's installation manual — different units have different bracket and sealing requirements. Check that the window opens fully and that the sill is solid. Have a second person available for lifting units above the smallest sizes.
Step 2: Test-Fit the Unit
Before securing anything, place the unit in the window opening to confirm fit. The unit should sit level or with a slight outward tilt per the manual. Check that the window sash can close against the top of the unit without forcing. If the unit does not fit, stop and reconsider the window or the unit.
Step 3: Install Support Brackets
Most window units include L-brackets or a support rail that attaches to the exterior sill. For heavier units, an external support bracket is strongly recommended. Follow the manual's torque and placement guidance. The goal is to transfer weight to the wall structure, not to rely solely on the window sill.
Step 4: Position and Secure the Unit
With the brackets in place, lift the unit into the opening. Slide it back until it sits firmly on the support. Attach the included side panels (accordion-style) to fill the gap between the unit and the window frame. These panels should be extended fully and secured with screws.
Step 5: Seal the Gaps
Weatherstripping or foam insulation should fill any remaining gaps around the unit, especially at the top where the sash meets the unit. This step prevents drafts, keeps insects out, and improves cooling efficiency. Some installers use a dedicated window AC seal kit for a cleaner result.
Step 6: Secure the Window Sash
Close the window sash firmly against the top of the unit. Use the included sash lock or a screw to prevent the window from being opened from the outside. This is both a security and a stability measure.
Step 7: Electrical Connection and Test
Plug the unit into a properly rated outlet — ideally a dedicated circuit. Turn on the unit and let it run for several minutes. Check for unusual vibration, water leakage, or cooling problems. Confirm that the breaker does not trip during startup.
Ready to Choose Your Window AC?
Now that you understand the installation process, explore the units that match your room size and electrical setup.
Compare Window AC OptionsElectrical Requirements and Safety Essentials
Electrical safety is the single most important aspect of window AC installation. A window unit is a motor-driven appliance with a compressor that draws high current at startup. Ignoring circuit capacity can lead to nuisance trips, damaged equipment, or fire risk.
Understanding Amperage and Circuit Sizing
Every window AC unit has a nameplate rating that lists its voltage, amperage, and sometimes its cooling capacity. A unit rated at 115 volts and 12 amps, for example, should be on a circuit that can comfortably handle that load. The National Electrical Code (NEC) generally requires that a dedicated appliance circuit be sized at 125% of the appliance's rated current. For a 12-amp unit, that means a 15-amp circuit is the minimum, and a 20-amp circuit is often preferable.
Dedicated Circuit vs Shared Circuit
A dedicated circuit serves only the air conditioner. This is the safest arrangement, especially for larger units. If the unit shares a circuit with other outlets or appliances, the combined load can exceed the breaker's rating, causing trips. In some cases, shared circuits can cause voltage drops that stress the compressor over time.
Outlet Type and Grounding
Most window units use a standard three-prong grounded plug. Never use a cheater adapter or remove the ground prong. If the outlet is not grounded, have an electrician correct it before using the unit. For units that require 230 volts, a dedicated 230-volt circuit with the correct receptacle is necessary.
- Always use a grounded outlet that matches the unit's plug.
- Never use extension cords for window AC units.
- Check the breaker rating against the unit's nameplate amperage.
- If the breaker trips repeatedly, stop using the unit and consult an electrician.
- Keep the area around the outlet dry and free of obstructions.
Common Installation Mistakes to Avoid
Even experienced DIYers can overlook details that affect performance and safety. Here are the most common pitfalls and how to avoid them.
1. Skipping the External Support Bracket
Many units come with basic brackets, but heavier models need an external support that attaches to the exterior wall. Relying solely on the window sill can cause the unit to sag, leading to vibration, noise, and eventual damage to the window frame.
2. Forgetting to Seal the Gaps
Unsealed gaps let hot air in and cool air out. They also allow insects and moisture to enter. Use the included side panels and add weatherstripping where needed. A small investment in sealing materials pays off in efficiency and comfort.
3. Ignoring the Manual's Tilt Requirement
Most manufacturers specify a slight outward tilt to allow condensate to drain. Installing the unit perfectly level or tilting it inward can cause water to pool and leak into the room. Always follow the manual's guidance.
4. Overloading the Circuit
Plugging a window unit into a shared outlet or using an extension cord is a common shortcut that creates real risk. If the circuit is not dedicated, consider having one installed or choose a smaller unit that draws less current.
5. Neglecting Window Security
An unsecured window sash can be opened from the outside, allowing entry. Use the sash lock or a screw to fix the window in place. This is a simple step that significantly improves home security.
How to Choose the Right Window AC for Your Space
Installation success starts with the right unit. Choosing a window AC that fits your room size, window type, and electrical capacity makes the installation smoother and the cooling more effective.
Match Cooling Capacity to Room Size
Window AC capacity is measured in British Thermal Units (BTU). A unit that is too small will struggle to cool the room, while an oversized unit will cool too quickly and cycle off before removing humidity, leaving the room feeling clammy. As a general guideline, rooms up to 150 square feet typically need around 5,000–6,000 BTU; rooms up to 250 square feet need around 8,000–10,000 BTU; and larger rooms may need 12,000–14,000 BTU or more. Ceiling height, sun exposure, and occupancy also affect the right size.
Check Window Compatibility
Confirm that your window type and width match the unit's requirements. Most manufacturers list a minimum and maximum window width. Double-hung windows are the most compatible. For sliding windows or casement windows, look for units designed for those configurations or plan to use an adapter kit.
Consider Energy Efficiency
The energy efficiency ratio (EER) or combined energy efficiency ratio (CEER) indicates how efficiently the unit converts electricity into cooling. Higher efficiency units may be a better long-term investment, especially if you use the AC frequently. Look for ENERGY STAR certification as a reliable baseline for efficiency.
Noise and Smart Features
If the unit will be in a bedroom or home office, noise level matters. Many modern units operate at lower decibel levels than older models. Smart features like Wi-Fi control and programmable timers add convenience but are secondary to proper sizing and installation.
| Room Size | Typical Capacity | Installation Consideration |
|---|---|---|
| Up to 150 sq ft | 5,000–6,000 BTU | Lighter units; standard window bracket often sufficient |
| 150–250 sq ft | 8,000–10,000 BTU | May need external support bracket; check circuit |
| 250–400 sq ft | 12,000–14,000 BTU | Heavier unit; dedicated circuit strongly recommended |
Frequently Asked Questions
Can I install a window AC unit myself?
Yes, for smaller units in standard double-hung windows with a nearby grounded outlet, DIY installation is feasible. However, larger units, non-standard windows, and any electrical upgrades are best handled by a professional to ensure safety and proper support.
Do I need a dedicated electrical circuit for a window AC?
A dedicated circuit is strongly recommended, especially for units above 8,000 BTU. Sharing a circuit with other appliances can cause breaker trips and voltage fluctuations that stress the compressor. If a dedicated circuit is not available, consult an electrician before installation.
How do I know if my window can support a window AC?
Check the window type and frame condition. Double-hung windows are the most compatible. The sill should be solid and level, and the unit should fit within the manufacturer's specified window width range. For heavy units, an external support bracket is necessary regardless of window type.
What should I do about gaps around the installed unit?
Use the included accordion side panels and add weatherstripping or foam insulation to seal any remaining gaps. Proper sealing prevents drafts, keeps insects out, and improves cooling efficiency.
Why does my window AC leak water into the room?
Water leakage usually indicates that the unit is not tilted correctly. Most units require a slight outward tilt to allow condensate to drain outside. Check the manufacturer's instructions and adjust the tilt accordingly. If the leak persists, the drain holes may be clogged.
Can I use an extension cord with a window AC?
No. Extension cords are not rated for the continuous high current draw of a window AC unit and can overheat or cause a fire. Plug the unit directly into a properly rated grounded outlet.
Recommended Window Air Conditioners for Reliable Installations
⚠️ AFFILIATE DISCLOSURE: This website contains affiliate links. As an Amazon Associate, we earn from qualifying purchases. If you make a purchase through these links, we may receive a small commission at no additional cost to you. Read our full affiliate policy.

No Drill Window AC Bracket, Heavy Duty Adjustable Air Conditioner Support Bracket, Easy Install Window AC Mount for Single & Double Hung Windows, Supports Up to 220 lbs
Check price on Amazon
HOOMEE 157”(400CM) Universal Window Seal for Mobile Air Conditioner and Tumble Dryer – Window Kit Works with Portable AC, Easy to Install - Air Exchange Guards with Zip and Adhesive Fastener
Check price on Amazon
Window AC Side Insulated Foam Panels, Window Air Conditioner Seal Insulation Panels EVA2P
Check price on Amazon
HOOMEE 118”(300CM) Universal Window Seal for Mobile Air Conditioner and Tumble Dryer – Window Kit Works with Portable AC, Easy to Install - Air Exchange Guards with Zip and Adhesive Fastener
Check price on Amazon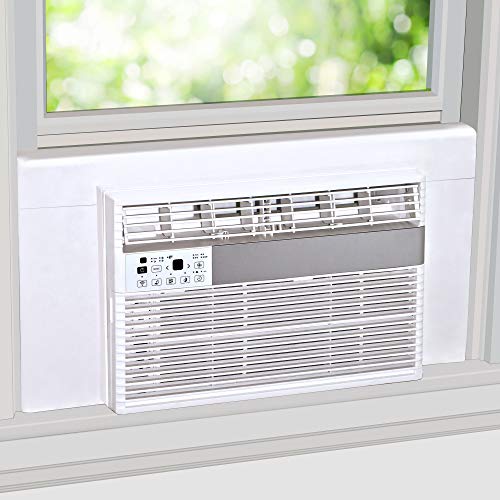
Breeze Stop Surround Insulation Side Panels White for Window AC Unit Indoor Air Conditioner Cover for Winter and Summer
Check price on Amazon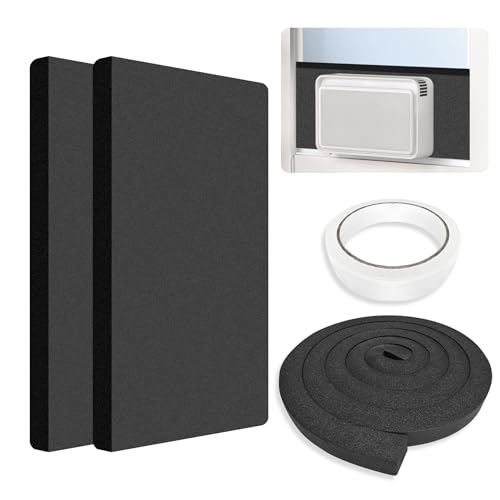
Window Air Conditioner Insulated Foam Side Panels Block Hot/Cold Air | Window AC Foam Insulation Kit, Reduce Noise & Energy Costs, Universal Fit Most 5000-15000 BTU Air Conditioners Unit
Check price on AmazonDisclaimer
Some of the content on this site uses AI assistance. Information is provided for educational purposes only. We are not responsible for any losses resulting from the use of this information. By using this site, you waive any right to bring legal claims against us arising from your use of the information provided. If you do not agree, please do not use this site. Read the full disclaimer.