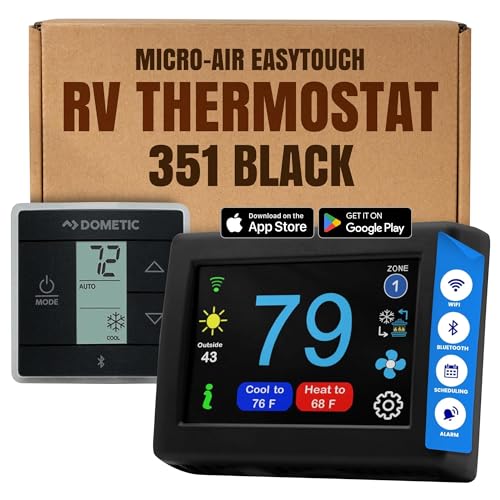
Cost to Replace Air Conditioner Thermostat: A Complete Guide
Understand the signs of a failing thermostat, what a replacement involves, how to choose the right model for your system, and what to expect before you commit to an upgrade.
Start the GuideWhy this guide matters: A thermostat is the command center of your cooling system. When it fails, your AC can short-cycle, run nonstop, or refuse to start at all. Replacing it is often one of the simplest and most impactful upgrades you can make—but only if you choose the right model and understand the wiring. This guide walks you through every decision point.
Whether your current thermostat is blank, inaccurate, or simply outdated, the information below will help you move from research to a confident decision.
Signs Your AC Thermostat Needs Replacing
Before assuming your air conditioner itself is failing, check the thermostat. These symptoms almost always point to the thermostat rather than the compressor or refrigerant circuit:
- Blank or flickering display — often a sign of a failed internal board or a loose C-wire connection.
- Temperature readings that drift — the room feels noticeably warmer or cooler than the displayed set point.
- System short-cycling — the AC turns on and off every few minutes without reaching the target temperature.
- Unresponsive buttons or touchscreen — the unit does not accept commands or ignores schedule changes.
- AC runs continuously — the thermostat never signals the system to stop, even when the room is cool.
- Frequent battery drain — if you are replacing batteries every few weeks, the thermostat is likely failing.
- Age over 10–15 years — older mechanical and early digital units become unreliable and lack modern scheduling features.
What the Replacement Process Involves
Replacing a low-voltage thermostat is a manageable DIY project for most homeowners. The key is preparation: label every wire before disconnecting anything, and always cut power at the breaker first.
1. Power Down Safely
Switch off the air handler and the outdoor condenser at the circuit breaker. Confirm the thermostat display is blank before proceeding. Never work on a live low-voltage circuit without isolating it.
2. Photograph & Label Wires
Take a clear photo of the terminal block and label each wire with its letter (R, W, Y, G, C, O/B). This step prevents the most common installation mistakes and makes reverting easy if needed.
3. Remove the Old Base
Unscrew the mounting plate and gently pull the wire bundle through. Check the wall for damage or drafts that could affect temperature sensing. Patch or insulate as needed.
4. Mount & Wire the New Unit
Attach the new base plate, reconnect each labeled wire to its matching terminal, and snap the thermostat into place. Follow the manufacturer's wiring diagram carefully—terminals can vary between brands.
5. Restore Power & Test
Turn the breaker back on, set the thermostat to cool, and wait for the system to respond. Verify that the fan, compressor, and temperature reading behave correctly before closing up.
6. Configure Schedules
Set up your weekday and weekend schedules, adjust temperature differentials, and enable any smart features such as geofencing or humidity control. Proper configuration is where most efficiency gains come from.
If your system uses a line-voltage thermostat (common with baseboard heaters or some mini-split systems) or you discover a missing C-wire, professional installation is the safer route. For a broader look at HVAC service considerations, see our guide on HVAC system topics.
Thermostat Tiers: Choosing the Right Fit
Thermostats fall into recognizable tiers based on features, build quality, and system compatibility. Use the table below to match a tier to your needs—then compare specific models in the product section further down the page.
| Tier | Best For | Key Features | Compatibility Notes |
|---|---|---|---|
| Starter Tier | Basic single-stage systems and simple setups | Manual dial or basic digital display, heat/cool/off modes, no scheduling | Works with most conventional 24V systems; no C-wire needed |
| Essential Tier | Homeowners who want weekday/weekend scheduling | 7-day programmable, backlit display, adjustable temperature differential | Requires C-wire for stable power; check terminal labels |
| Balanced Tier | Homes with heat pumps or multi-stage equipment | Multi-stage support, humidity sensing, smart scheduling, app control | C-wire required; verify O/B terminal compatibility for heat pumps |
| Premium Tier | Whole-home comfort with zoning or advanced automation | Geofencing, remote sensors, energy reports, voice assistant integration | Requires stable Wi-Fi and C-wire; check HVAC equipment compatibility list |
For systems that are part of a larger upgrade, it helps to understand how thermostat choices interact with equipment decisions. Our guides on replacing an air conditioning unit and replacing an HVAC system provide useful context for planning.
Wiring and Compatibility Checklist
Before you buy any replacement thermostat, confirm these details. A five-minute check prevents most installation headaches:
- Count the wires at the terminal block. Four wires typically mean no C-wire; five or more usually include one.
- Identify your system type. Conventional single-stage, heat pump, multi-stage, or dual-fuel systems each require specific terminal support.
- Check for an O/B terminal. Heat pump systems use a reversing valve that requires this terminal to be configured correctly.
- Note the voltage. Most thermostats are 24V low-voltage; line-voltage systems require a different class of device entirely.
- Confirm Wi-Fi signal strength at the thermostat location if you plan to use a smart model.
- Look up the compatibility list published by the thermostat manufacturer—especially for older or high-efficiency equipment.
Energy Efficiency and Long-Term Considerations
A thermostat does not change how much cooling your system produces, but it controls when and how long it runs. That timing has a measurable effect on energy use over a season. Modern programmable and smart models can reduce runtime during unoccupied hours, adjust for humidity, and provide reports that help you spot inefficient patterns.
The gains depend heavily on your habits and home. A well-configured essential-tier thermostat in a well-insulated home often delivers more benefit than a premium model in a leaky one. If you are planning broader efficiency upgrades, our article on high-efficiency air conditioner considerations covers related trade-offs.
Consider the thermostat as part of a long-term investment in home comfort. A durable, well-specified unit that matches your HVAC equipment will typically serve reliably for many years, while a mismatched or poorly configured model can cause short-cycling and unnecessary wear.
When to Call a Professional
Most low-voltage thermostat swaps are DIY-friendly, but these situations warrant a licensed technician:
- Line-voltage wiring or equipment you are unfamiliar with.
- No C-wire and no practical route to run one.
- Heat pump systems with complex reversing valve configurations.
- Zoned systems with multiple thermostats and dampers.
- Signs of electrical damage, burning smells, or repeated thermostat failures.
If you are already planning service work, it may make sense to bundle the thermostat replacement with other maintenance. Our guide on air conditioning service topics explains what routine service typically includes.
Frequently Asked Questions
How do I know if my air conditioner thermostat needs replacing?
Look for a blank display, inaccurate temperature readings, short-cycling, unresponsive controls, or a unit that is more than a decade old. If the AC itself tests healthy but the thermostat behaves erratically, replacement is usually the most practical step.
Can I replace an AC thermostat myself?
For most low-voltage thermostats, yes. Cut power at the breaker, photograph and label the wiring, remove the old base, mount the new one, reconnect wires, and restore power. Hire a technician if you encounter line-voltage wiring or a missing C-wire with no easy route to run one.
What is a C-wire, and why does it matter?
The C-wire provides continuous low-voltage power to the thermostat. Smart and programmable models generally require it. If your cable has only four wires, an adapter kit or new wiring run may be needed.
Will a new thermostat improve energy efficiency?
A modern programmable or smart thermostat can reduce runtime during unoccupied hours and improve scheduling consistency. Actual savings depend on your habits, insulation, and how well the device is configured.
How long does a thermostat last?
Mechanical and early digital models often last 10 to 15 years. Smart thermostats typically have a 5 to 10 year service life due to electronics and software support. Dust, heat, and power surges can shorten lifespan.
Ready to Compare Thermostat Options?
Browse recommended models matched to the tiers described above and find the right fit for your system.
View Recommended Thermostats