
Dryer Vent Duct Replacement: The Complete Guide
Everything you need to replace a dryer vent duct safely — recognizing when the duct is failing, choosing the right material, planning the route, and installing it to meet code and protect your home from lint fires.
START WITH THE STEPSWho this guide is for: Homeowners who have noticed longer drying times, excess heat or lint near the dryer, or a crushed or damaged duct behind the appliance. This guide covers why dryer vent duct replacement matters, how to choose the right material, and how to install a new duct properly — or recognize when the job needs a professional.
What Is a Dryer Vent Duct and Why It Matters
The dryer vent duct is the pipe that carries hot, moist air and lint from the dryer to the outdoors. Every load of laundry produces moisture and lint, and the duct is the only path out of the house. When the duct is crushed, kinked, clogged, or made from the wrong material, airflow drops, the dryer runs hotter and longer, and lint can accumulate inside the duct.
Lint is highly flammable. A restricted or damaged duct is one of the most common causes of dryer fires, and it also forces the dryer to work harder, which shortens the appliance's life. Replacing a failing duct is a small, targeted repair that has an outsized effect on safety and efficiency — a long-term investment in both.
The duct system also affects indoor air quality. A duct that leaks into a wall cavity or crawlspace pushes humid air into the building, which can lead to mold and moisture damage over time. For broader context on moisture control indoors, see the guide to what humidity level is good for a house.
Signs Your Dryer Vent Duct Needs Replacement
Not every clog calls for a replacement — sometimes cleaning is enough. But the following signs mean the duct itself should be replaced, not just cleaned:
- Clothes take longer than one cycle to dry. A restricted duct is the most common cause and often a sign of lint buildup or a crushed duct.
- The dryer gets hot to the touch or shuts off mid-cycle. Overheating is a safety warning — stop using the dryer until the duct is inspected.
- Visible lint around the duct connection. Lint escaping the duct means a poor seal or a damaged duct.
- The duct is crushed, kinked, or torn. Flexible ducts behind a dryer are frequently pinched when the appliance is pushed back. These restrictions must be corrected.
- The duct is made of vinyl or thin foil. Many building codes prohibit these materials because they can sag, trap lint, and melt in a fire. Replace them with rigid metal.
- A musty smell in the laundry area. Moisture backing up into the room can indicate a blocked duct.
- Excess heat or humidity in the laundry room. The dryer is exhausting indoors rather than outside.
- The outside vent flap does not open when the dryer runs. A sign of a blocked or disconnected duct.
If you notice any of these signs, inspect the full duct run — from the back of the dryer to the exterior vent — before using the dryer again.
Choosing the Right Duct Material
The material you choose has a direct effect on safety, airflow, and code compliance. The table below summarizes the main options.
| Material | Best For | Code Status | Tier Context |
|---|---|---|---|
| Rigid metal (galvanized steel or aluminum) | Main duct runs, most installations | Accepted by most codes | top-tier |
| Semi-rigid metal | Short transitions, tight spaces | Accepted in many jurisdictions | high-end tier |
| Flexible foil | Temporary setups only | Restricted in many codes | essential tier |
| Vinyl or plastic | Not recommended for any installation | Prohibited by most codes | starter tier |
Each material has clear trade-offs:
- Rigid metal duct. The best choice for the main duct run. Its smooth interior resists lint buildup, it is durable, and it is accepted by most building codes. Rigid metal is available in straight sections and adjustable elbows, and it can be sealed with foil tape and screws.
- Semi-rigid metal duct. Flexible enough to route through tight spaces but still smooth enough inside to resist lint. Best used for short transitions, such as the segment from the back of the dryer to the wall connection.
- Flexible foil duct. The corrugated interior traps lint, the material is easily crushed, and many codes restrict its use. Acceptable only for temporary setups, if at all.
- Vinyl or plastic duct. Should not be used for a dryer vent. The material can melt in a fire, sags under heat, and traps lint. Replace any existing vinyl duct with rigid metal.
Planning the Replacement: Length, Routing, and Code
Before you buy materials, plan the route and confirm the run meets the dryer manufacturer's requirements and local building codes.
- Duct length. Most manufacturers specify a maximum total duct length — commonly 25 feet from the dryer to the outside vent — with each 90-degree elbow reducing the allowance. Shorter, straighter runs are always better. Check the dryer's manual for the specific limit.
- Route. Route the duct as directly as possible to the exterior. Avoid long horizontal runs that trap lint and avoid routing through a roof if a wall vent is possible.
- Exterior vent hood. The exterior vent should have a backdraft damper and a hood that keeps rain and pests out while opening freely when the dryer runs.
- Material consistency. Use rigid metal for the main run. If a short flexible transition is needed, keep it as short as possible and use semi-rigid metal rather than foil.
- Sealing. Seal all joints with foil tape or duct sealant. Do not use screws that protrude into the duct — they trap lint. Do not use cloth-backed duct tape, which dries out and fails.
- Code and permits. Some jurisdictions require a permit for dryer vent changes, especially if the exterior vent location changes. Check local requirements before starting.
Duct Length Rule of Thumb
A straight run of up to 25 feet is typically acceptable. Each 90-degree elbow counts as roughly 5 feet of equivalent length, and each 45-degree elbow counts as roughly 2.5 feet. A run with two 90-degree elbows therefore has an effective length about 10 feet longer than its physical length. Keep the equivalent length within the dryer manufacturer's limit.
Tools and Materials You Will Need
Gather the following before you begin the replacement. A complete set on hand avoids mid-project trips.
- Rigid metal duct sections and adjustable elbows sized to your dryer's outlet (commonly 4-inch diameter).
- Semi-rigid metal transition duct for the short segment behind the dryer, if needed.
- Foil tape (not cloth duct tape) or duct sealant for sealing joints.
- Sheet metal screws (short, so they do not protrude into the duct).
- Exterior vent hood with a backdraft damper, if you are replacing the exterior termination.
- Adjustable elbows to match the existing route.
- Gloves and eye protection — cut metal edges are sharp.
- Vacuum with a crevice tool to clean the dryer outlet and surrounding lint before installation.
- Level and drill for mounting the exterior hood and securing duct sections.
Step-by-Step: How to Replace a Dryer Vent Duct
The steps below apply to a typical wall-vented dryer with an accessible duct route. If the duct is routed through walls or a roof, or if the route needs modification, consider professional installation.
- Unplug the dryer and move it away from the wall. Pull the dryer forward enough to access the duct connection. Have a helper if the appliance is heavy or the space is tight.
- Disconnect the old duct. Loosen the clamp at the dryer outlet and at the wall connection. Remove the old duct and set it aside for disposal.
- Clean the area. Vacuum lint from the back of the dryer, the wall connection, and the floor. Lint is flammable — remove as much as possible before installing the new duct.
- Inspect the wall connection and exterior hood. Check the wall opening for damage, and verify the exterior hood opens and closes freely. If the hood is damaged or missing, replace it.
- Plan the new route. Dry-fit the rigid metal sections and elbows between the dryer outlet and the wall connection. Keep the run as straight and short as possible.
- Assemble the duct sections. Join rigid sections with foil tape or duct sealant. Use short sheet metal screws at each joint, positioned so the tips do not protrude into the airstream. Wrap each joint with foil tape for an airtight seal.
- Attach the duct to the wall connection. Slide the duct over the wall collar and secure with a clamp or foil tape. Confirm the seal is tight.
- Attach the duct to the dryer. Connect the duct to the dryer outlet, using a short semi-rigid metal transition if needed. Keep the transition as short and straight as possible. Secure with a clamp.
- Check for crush points. Carefully push the dryer back into place, checking that the duct does not kink or crush against the wall. Adjust the route if needed. Leave a small amount of slack for movement, but not so much that the duct sags.
- Test the airflow. Run the dryer on air-fluff or a short cycle and confirm the exterior vent flap opens and closes freely. Check for leaks at each joint by feeling for escaping air. Fix any leaks before regular use.
- Clean up and dispose of the old duct. Vacuum up any remaining lint and dispose of the old duct outdoors.
Safety Notes
Never use vinyl or foil flexible duct for a permanent installation. Never use screws that protrude into the duct — they trap lint. Do not use cloth-backed duct tape, which fails over time and is not approved for dryer vents. If you smell gas or notice scorching near the dryer outlet, stop and call a professional.
Keeping the New Duct in Good Condition
Once the new duct is installed, a small amount of routine care keeps it safe and efficient for years.
- Clean the lint trap before every load. This is the simplest and most important habit for reducing lint in the duct.
- Inspect the exterior vent every few months. Confirm the flap opens and closes freely and that no lint or debris is visible around the hood.
- Check the duct behind the dryer annually. Pull the dryer forward and confirm the duct is not crushed, kinked, or disconnected.
- Clean the duct run every one to two years. A professional duct cleaning removes lint that the lint trap does not catch. If you notice longer drying times despite a clean lint trap, schedule a cleaning.
- Replace the transition duct if it becomes damaged. The short segment behind the dryer is the most commonly crushed part of the system.
These habits mirror the preventive approach used in other household systems — the same principle behind the AC maintenance guide for cooling equipment. Regular attention to airflow and cleanliness prevents the majority of failures.
When to Call a Professional
Replacing a short, accessible duct is a manageable DIY task. Call a professional for the following situations:
- The duct is routed through walls, ceilings, or a roof. These runs require careful planning, proper materials, and code-compliant termination.
- The exterior vent location needs to change. This may require new wall or roof penetration and a permit.
- The run is long or has multiple elbows. A professional can verify the effective length against the dryer's requirements.
- You suspect a lint fire risk or smell smoke. Stop using the dryer immediately and call a professional.
- The duct connection at the dryer or wall is damaged. A professional can assess whether the dryer outlet or wall collar needs repair.
For HVAC system work that often accompanies laundry room ventilation, a licensed contractor can also advise on related issues — see heating and air conditioning service companies for how to choose one. If your laundry area shares space with mechanical equipment, the guide to AC plumbing may also be relevant.
Recommended Dryer Vent Duct Replacement Supplies
⚠️ AFFILIATE DISCLOSURE: This website contains affiliate links. As an Amazon Associate, we earn from qualifying purchases. If you make a purchase through these links, we may receive a small commission at no additional cost to you. Read our full affiliate policy.

Steelsoft Heavy Duty 4"Flexible Dryer Vent Exhaust Duct Hose 3 Feet | Tool-Free, for Tight Space, Extra Thick Aluminum Foil HVAC Ducting Kit with 2 Key Hose Clamps
Check price on Amazon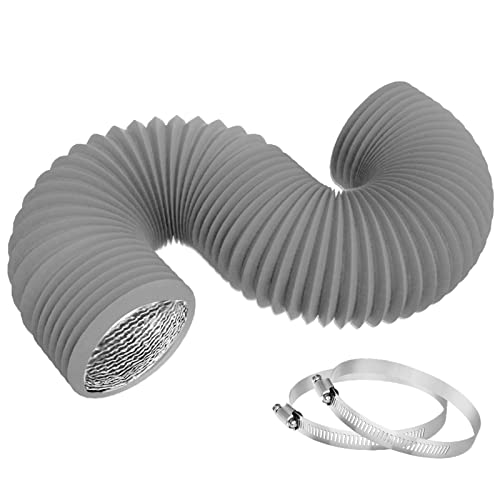
TEAIERXY 4 Inch 8FT Dryer Vent Hose,Flexible Insulated Air Ducting,Vent Hose PVC Aluminum Foil with 2 Clamps for HVAC Ventilation(Grey)
Check price on Amazon
Eastman 8 Foot ArmorFlex Dryer Vent, Flexible Aluminum Duct with Clamps, Semi-Rigid, 69028
Check price on Amazon
HOOMESUN 4 Inch 8FT Semi Rigid Dryer Duct, Vent Hose for Improved Airflow | Semi-rigid design holds shape, Smooth Inner, High Airflow Efficiency,with 2 Hose Clamps, Aluminum Foil Tape Sealing
Check price on Amazon
Steelsoft Heavy Duty 4"Flexible Dryer Vent Exhaust Duct Hose 6 Feet | Tool-Free, Extra Thick Aluminum Foil HVAC Ducting Kit with 2 Key Hose Clamps
Check price on Amazon
Deflecto Dryer Lint Trap Kit for Indoor Dryer Venting with 4"x5' Flex Duct | Designed for use with indoor electric dryers where outside venting is impossible, captures lint to improve dryer safety
Check price on Amazon
Whirlpool 4396006RW Genuine OEM Dryer Vent Elbow Connector, 90-Degree Close-Turn, 4-Inch Aluminum Space-Saver Accessory
Check price on Amazon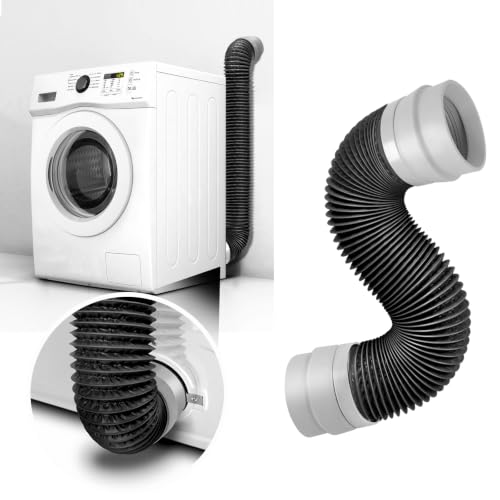
US Patented Dryer Vent Hose 4 Inch 8 Feet, Flexible Heat Resistant Dryer Hose for Tight Space, Indoor Dryer Vent Kit with 90 Degree Elbow and Connector
Check price on AmazonFrequently Asked Questions
How often should a dryer vent duct be replaced?
A rigid metal duct can last for decades if it is cleaned and inspected regularly. Flexible foil or vinyl ducts should be replaced every few years, and any duct should be replaced immediately if it is crushed, torn, kinked, or showing signs of lint buildup or overheating.
What type of dryer vent duct is best?
Rigid metal duct is the best choice for most installations. It has the smoothest interior, resists lint buildup, and meets most building codes. Semi-rigid metal is acceptable for short transitions. Vinyl and foil flexible ducts are prohibited by many codes and should be replaced.
Can I replace a dryer vent duct myself?
Yes, in many cases. Replacing a short, accessible duct run is a manageable DIY project. Long runs, ducts routed through walls or roofs, or ducts that require new openings are best handled by a professional to ensure proper venting and code compliance.
How long should a dryer vent duct be?
Most manufacturers recommend a maximum duct length of 25 feet from the dryer to the outside vent, and each 90-degree elbow reduces that allowance. Shorter, straighter runs are always better. Check your dryer's manual for the specific limits.
What are the signs that a dryer vent duct needs replacement?
Signs include clothes taking longer to dry, the dryer overheating or shutting off mid-cycle, visible lint around the duct connection, a crushed or kinked duct, a musty smell in the laundry area, and excessive heat or humidity in the room. Any of these warrants inspection and likely replacement.
Can a clogged dryer vent duct cause a fire?
Yes. Lint is highly flammable, and a restricted or damaged duct allows lint to accumulate near the heat source. Dryer vent fires are one of the most common causes of home fires. Regular cleaning, a rigid metal duct, and prompt replacement of damaged ducts are the key prevention measures.
Ready to Replace Your Dryer Vent Duct?
Review the recommended supplies above, plan the route, and follow the steps carefully. If the run is long or hidden in walls, have a professional install it to code.
VIEW REPLACEMENT SUPPLIES