Ductless Mini Split Air Conditioner Installation
A complete, practical guide to planning, mounting, connecting, and commissioning a ductless mini split system — whether you hire a professional or want to understand exactly what the job involves.
Explore the Installation StepsWhy Ductless Mini Split Installation Is Different
A ductless mini split pairs an outdoor condenser with one or more indoor air handlers connected by a refrigerant line set and a communications cable. Unlike a central system, there is no ductwork to run through walls or attics. That eliminates duct losses and makes the system a strong fit for older homes, additions, and single rooms that never got ducted. It also means the installation quality depends heavily on a few precise tasks: mounting, line set routing, flare connections, vacuuming, and electrical work.
Because the indoor and outdoor units are separated by only a small wall penetration, the installation is less invasive than a full ductwork design project. But it is not a plug-and-play appliance. Refrigerant handling, torque on flare nuts, and proper evacuation of the line set are the difference between a system that runs efficiently for a decade and one that loses charge and struggles within a season.
Professional Installation vs. DIY: An Honest Comparison
Many homeowners ask whether a ductless mini split can be installed without a licensed technician. The honest answer: the mechanical mounting, hole drilling, and indoor unit placement are within reach of a confident DIYer. The refrigerant and electrical portions are not, in most jurisdictions.
| Task | DIY Feasibility | Why |
|---|---|---|
| Selecting indoor/outdoor unit positions | Yes, with research | Requires understanding of airflow, clearance, and line set length limits. |
| Mounting the indoor wall bracket and outdoor pad | Yes | Straightforward with a level, drill, and correct anchors. |
| Drilling the wall penetration and routing the line set | Yes, carefully | Needs correct slope for condensate drainage and sealing against air/water intrusion. |
| Bending and connecting refrigerant lines | Not recommended | Kinked lines or over-torqued flares cause leaks that are hard to diagnose. |
| Vacuuming and pressure testing the system | No (requires gauges and pump) | Moisture left in the line set forms acids that damage the compressor. |
| Electrical connection and breaker sizing | No (licensed electrician in most areas) | Dedicated circuit, correct wire gauge, and code compliance are safety-critical. |
| Refrigerant charge adjustment | No (EPA certification required) | Handling refrigerant is regulated and requires certification. |
If you want to handle part of the work yourself, the realistic split is: you prepare the site, mount the hardware, and route the line set and drain; a licensed technician performs the flare connections, evacuation, charge verification, and electrical hookup. Reviewing the installation cost breakdown helps you see where labor is concentrated so you can decide what to delegate.
Ductless Mini Split Installation: Step-by-Step
The sequence below reflects a standard single-zone wall-mounted installation. Multi-zone systems follow the same logic but multiply the line set and indoor unit work, and often require a branch box.
1 Plan the Layout and Confirm Clearances
Choose an indoor location on an exterior wall with enough room for airflow above and around the unit, and a path to the outdoor condenser that respects the maximum line set length and vertical rise specified by the manufacturer. The outdoor unit needs clearance for intake and discharge air, and should sit on a stable pad or wall bracket above snow and standing water.
At this stage, confirm the electrical circuit available at the outdoor location and the route for the condensate drain. If you are weighing this system against a conventional setup, the ductless vs ducted AC comparison clarifies the trade-offs in layout flexibility.
2 Mount the Indoor Unit Bracket
Use the manufacturer's template or backplate to mark the bracket position. The bracket must be level — a tilted indoor unit causes condensate to drip from the wrong side and can produce noise. Anchor into studs or use appropriate masonry anchors for the wall type. Leave the specified clearance from the ceiling and side walls.
3 Prepare the Wall Penetration and Route the Line Set
Drill the penetration at a slight downward angle toward the outdoors so condensate and any water intrusion drain outward. Install the wall sleeve and seal it after routing. The line set — insulated copper liquid and suction lines plus the communications cable and drain hose — should be bundled and supported along its run. Avoid sharp bends; the minimum bend radius matters for the copper.
If the run is long or the outdoor unit is on a wall bracket, plan the drip loop and the service loop so the unit can be moved for servicing without disconnecting.
4 Install the Outdoor Condenser
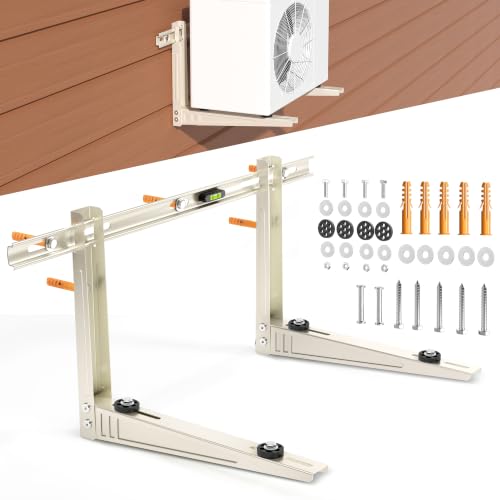
Set the condenser on a level pad or a wall bracket rated for its weight. Vibration isolation pads reduce noise transfer into the structure. Keep the service valves accessible and maintain the manufacturer's minimum clearances on all sides. Do not place the unit where discharge air recirculates back into the intake.
5 Make the Refrigerant Connections
Trim the copper ends squarely, ream, and form flares with a proper flaring tool. Apply a small amount of refrigerant oil to the flare face, align carefully, and torque to the manufacturer's specification with a torque wrench — not by feel. Over-tightening cracks flares; under-tightening leaks. This is the single most common point of failure in mini split installations.
6 Connect the Condensate Drain
Route the drain with a continuous downward slope and no traps unless the manufacturer specifies one. Terminate it where water will not pool against the foundation or create a slip hazard. On cold-climate systems, consider a drain path that will not freeze.
7 Pressure Test and Vacuum the System
Pressurize the line set with dry nitrogen and hold it to confirm no leaks at the flares and valve connections. Then evacuate with a vacuum pump to the micron level specified by the manufacturer and hold the vacuum to confirm the system is moisture-free and sealed. Skipping or rushing this step is the most common reason a new mini split underperforms.
8 Release Refrigerant and Verify Charge
Open the service valves to release the factory charge, then verify the operating pressures and temperatures against the manufacturer's charging chart. On longer line sets, additional refrigerant may be required by weight. This step requires gauges and refrigerant handling certification.
9 Complete the Electrical Work
Connect the indoor and outdoor units per the wiring diagram, on a dedicated circuit sized to the nameplate. The disconnect, breaker, and wire gauge must meet local code. Many regions require a permit and inspection for this portion. A licensed electrician or HVAC technician should sign off.
10 Commission and Test
Run the system in cooling and heating (if equipped) and confirm airflow, temperature split, drain function, and that the outdoor unit cycles correctly. Check for vibration, unusual noise, and condensate leaks. Record the pressures and temperatures for future reference.
Tools and Materials You Will See on a Professional Job
- Vacuum pump with micron gauge and manifold gauges
- Torque wrench with flare nut crowfoot attachments
- Flaring tool and tube cutter with reamer
- Dry nitrogen regulator and pressure test kit
- Core removal tools and leak detector
- Hammer drill, level, stud finder, and masonry anchors
- Line set, wall sleeve, sealant, drain hose, and insulation tape
- Dedicated circuit wiring, disconnect box, and breaker
Common Installation Mistakes That Hurt Performance
- Under-torqued or over-torqued flares: the leading cause of slow refrigerant leaks.
- Skipping the vacuum hold test: moisture in the system forms acid and damages the compressor.
- Indoor unit not level: condensate drips into the room or produces gurgling noise.
- Drain line without slope or with a trap: water backs up and overflows the indoor pan.
- Exceeding line set length or rise limits: reduced capacity and compressor stress.
- Outdoor unit recirculating its own discharge air: high head pressure and poor cooling.
- Undersized electrical circuit: nuisance trips and a safety hazard.
For a broader look at how installation choices affect efficiency, see the guide to energy-efficient mini split systems and the overview of ductless heating and cooling installation.
How to Choose an HVAC Contractor for the Job
Ask for the license and insurance certificate, and confirm the technician holds EPA Section 608 certification for refrigerant handling. Request a written scope that names the line set length, the electrical work included, permit responsibility, and the commissioning steps. A credible installer will perform a pressure test and vacuum hold and will show you the readings. Get at least two written quotes and compare the scope line by line, not just the total. The ductless mini split AC installation cost page explains what drives the labor portion of each quote.
Installation Considerations by System Type
Wall-mounted units are the most common and the simplest to install. Ceiling cassette models require ceiling clearance and a condensate pump in many retrofit situations — see ceiling mount mini split considerations. If you need heating as well, a mini split with heat uses the same installation sequence but adds a reversing valve and low-ambient considerations. Multi-zone systems and full ductless HVAC systems may require a branch box and more careful line set planning.
Frequently Asked Questions
How long does a ductless mini split installation take?
A single-zone wall-mounted system typically takes one full day for a two-person crew, including mounting, line set routing, vacuuming, and commissioning. Multi-zone systems often take two days. Retrofits that require a new electrical circuit or longer line set runs extend the timeline.
Do I need a permit for a mini split installation?
In most US jurisdictions, yes — at minimum for the electrical circuit, and often for the mechanical work as well. Permit requirements vary by city and county, so confirm with your local building department before work begins. A reputable contractor will handle this or state clearly that it is excluded.
Can a mini split be installed on an interior wall?
It can, but the line set and drain must be routed to an exterior wall or another discharge point. Interior installations usually require a condensate pump and longer line set runs, which adds complexity and may exceed manufacturer limits. Exterior walls are preferred for simplicity and drainage.
What is the maximum line set length for a mini split?
Limits vary by model and capacity, commonly in the range of 25 to 50 feet for single-zone residential systems, with a maximum vertical rise that is usually smaller. Always follow the specific manufacturer's installation manual — exceeding the limit reduces capacity and can void the warranty.
Why is vacuuming the line set so important?
Moisture and non-condensable gases left in the line set react with refrigerant to form acids that corrode the compressor and reduce efficiency. A proper evacuation to the manufacturer's micron level, followed by a hold test, confirms the system is dry and leak-free before refrigerant is released.
Can I install a mini split myself and have a technician commission it?
Some homeowners do the mounting and routing themselves and hire a licensed technician for the flare connections, evacuation, and electrical hookup. Confirm with the technician and your local authority first, and check whether the manufacturer's warranty requires professional installation.
Ready to Choose the Right Ductless System?
Compare system types, capacities, and installation requirements before you commit. Our guides help you match the equipment to your space and understand what a correct installation should include.
Explore Ductless Mini Split Systems