Ductless Mini Split AC Installation: Planning Your Project
Discover what shapes a ductless mini split installation project, from zone count and line routing to electrical readiness, so you can plan a smooth, code-compliant setup.
Explore the Key FactorsDuctless mini split systems have become one of the most popular choices for efficient, room-by-room comfort. They avoid ductwork entirely, deliver conditioned air directly into each space, and pair well with inverter compressor technology. But before you commit, it helps to understand what actually drives the shape of an installation project. This guide walks through the variables that affect planning, site preparation, and the overall effort involved—so you can approach the process with clear expectations.
Why Ductless Mini Splits Are Popular
A ductless mini split consists of an outdoor condenser connected by a refrigerant line set to one or more indoor air handlers. Because there are no ducts, the system avoids the energy losses associated with leaky or poorly insulated ductwork. Each indoor unit can be controlled independently, which makes the format ideal for additions, older homes without ducts, and spaces that need targeted comfort.
For a broader look at the format, see our guide on ductless mini split systems. If you are weighing options for a home that was never built with ductwork, our article on ductless air conditioning for older homes covers the practical considerations in detail.
Many modern mini splits also provide heating through a reversing valve, blurring the line between cooling and heat pump function. Our overview of ductless mini split air conditioners and heat pumps explains how the two capabilities combine in a single system.
What Influences Installation Project Scope
Every mini split installation is unique, and the scope of a project is shaped by a handful of interdependent factors. Understanding them helps you anticipate what a contractor will evaluate during a site survey.
Number of Zones
Each indoor air handler requires its own line set and mounting location. More zones mean more indoor units, longer line runs, and additional branch connections at the outdoor unit.
Line Set Length and Routing
Short, direct runs are simpler than long runs that navigate around obstacles. Routing through finished walls or around structural elements adds labor and may require extra line protection.
Electrical Capacity
Mini splits need a dedicated circuit. If the electrical panel lacks spare capacity, an upgrade may be needed before the system can be commissioned.
Wall and Mounting Conditions
Masonry, brick, and older plaster walls require different mounting methods than modern drywall. Outdoor condenser placement also depends on clearance and drainage.
Permits and Inspections
Local codes may require mechanical and electrical permits. Inspection scheduling can extend the project timeline and adds coordination work.
Site Access and Cleanup
Difficult access to the outdoor location, tight indoor spaces, or the need for lifting equipment all influence the labor and planning involved.
Single-Zone vs Multi-Zone Planning
The number of indoor units is one of the biggest structural decisions in any mini split project. A single-zone system serves one room and is the simplest to install. A multi-zone system connects two or more indoor units to one outdoor condenser, which can be efficient but requires more careful design.
Multi-zone systems use branch boxes or multi-port outdoor units, and each zone needs its own line set. The combined capacity of the indoor units must be matched to the outdoor condenser's range, and the contractor must balance refrigerant distribution across zones. For larger homes, our guide on a five-zone mini split illustrates how these systems scale.
Room-specific sizing is also important. A common mistake is to install a unit that is larger than the room needs, which undermines the efficiency gains of an inverter compressor. If you are planning a single room, our article on a mini air conditioner for a room explains how to size the unit properly.
Electrical Readiness
Ductless mini splits require a dedicated electrical circuit sized for the outdoor unit. Before installation, the contractor or an electrician will check the home's electrical panel for available capacity and confirm the wire gauge and breaker rating match the unit's requirements.
Older homes sometimes have panels that are full or wiring that is not rated for the new circuit. In those cases, an electrical upgrade becomes part of the project. This is one of the reasons an on-site evaluation matters more than a remote estimate. For context on outlet and plug types, our article on electrical outlet plugs explains common configurations.
If the electrical work is extensive, pairing the mini split with a smart thermostat can add convenience. Our overview of an electronic home thermostat describes the options available for modern systems.
The Installation Process Step by Step
While every project differs, most ductless mini split installations follow a similar sequence. Understanding the stages helps you anticipate what happens on install day and what to prepare in advance.
- Site survey and load calculation. The contractor measures the space, reviews insulation and window area, and calculates the required capacity for each zone.
- Electrical assessment. The panel is inspected to confirm a dedicated circuit can be installed or that existing capacity is sufficient.
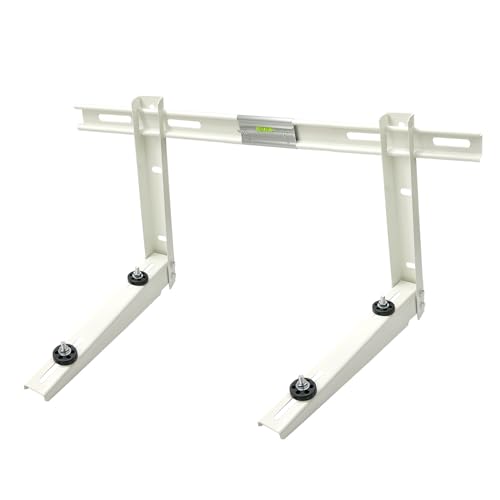
- Indoor and outdoor unit placement. Wall mounting locations are chosen for airflow and aesthetics; the outdoor condenser is positioned with proper clearance and drainage.
- Line set and drain routing. Refrigerant lines and condensate drains are routed through the wall or along a protected path to the outdoor unit.
- Vacuum and charge. The line set is evacuated to remove moisture and air, then refrigerant is released or charged according to the manufacturer's specification.
- Electrical connection and commissioning. The circuit is connected, the system is powered up, and performance is verified across cooling and heating modes.
- Walkthrough and documentation. The installer reviews operation, maintenance tasks, and warranty registration, and leaves documentation on the system.
For a more detailed walkthrough of the process, our guide on installing a mini split covers each stage in depth.
Installation Service Tiers
Installation services vary in scope and quality of workmanship. To compare them without referencing numeric figures, consider three broad tiers.
Essential Tier
Straightforward installation for a single-zone system in an accessible location. Covers standard mounting, line routing, and commissioning. A solid choice for simple residential projects.
Balanced Tier
Mid-tier installations add careful line routing through finished spaces, coordination with an electrician, and permit handling. Well-specified for the category and a good fit for most multi-room homes.
Professional-Grade Tier
High-end tier service emphasizes detailed site planning, premium line protection, meticulous commissioning, and after-install support. Suited to complex layouts, older homes, and buyers who prioritize long-term reliability.
When comparing quotes, ask each contractor to break down labor, materials, permits, and cleanup separately so you can compare like with like. The article on HVAC quotes explains how to read a proposal and what to ask before signing.
Mistakes to Avoid
Skipping the load calculation
Guessing capacity leads to oversized or undersized systems. An oversized unit short-cycles and loses efficiency; an undersized unit never keeps up on hot days. Always insist on a proper load calculation.
Overlooking electrical capacity
Discovering a panel limitation after the unit arrives delays the project. Have the electrical assessment done during the survey phase, not after equipment is purchased.
Underestimating line routing
Long runs, tight corners, and finished wall surfaces all add work. Review the proposed route with the contractor and ask how the line set will be protected and hidden.
Skipping permits
Permits protect you as a homeowner and are often tied to warranty coverage. Confirm in writing who will pull the permit and coordinate the inspection.
Neglecting the first week
New systems benefit from a short observation period. Our guide on the first week after AC installation explains what to watch for and when to call the installer.
Frequently Asked Questions
What factors influence a ductless mini split installation project?
The main factors are the number of indoor zones, the length and routing of refrigerant lines, the electrical capacity available at the site, the wall construction and mounting method, and whether any permits or inspections are required by local codes. Each factor changes the labor and materials involved.
Can I install a ductless mini split myself?
Some homeowners handle basic mounting and line routing, but refrigerant handling, vacuuming the line set, and electrical connections are regulated tasks in most jurisdictions. A licensed HVAC technician and, where required, an electrician should handle those steps to keep the system safe and warranty compliant.
How long does a ductless mini split installation take?
A single-zone system in a straightforward wall location is often completed in a day. Multi-zone systems or installations that require long line runs, electrical upgrades, or permit inspections typically extend across two or more days depending on site conditions.
Do I need a permit for a ductless mini split installation?
Permit rules vary by state and municipality. Many jurisdictions require a mechanical permit and, in some cases, an electrical permit for new circuits. Checking with the local building department before work begins is the safest approach and is often required to keep the warranty valid.
Ready to Compare Ductless Mini Split Systems?
Review our curated selection of ductless mini split air conditioners to find a model that fits your rooms, layout, and efficiency goals.
View Recommended Models