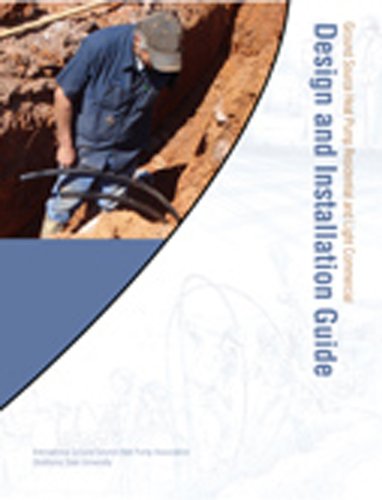
Ground Source Heating Installation: Complete Guide
Everything you need to know about installing a geothermal heat pump system — how it works, loop configurations, the installation process, site requirements, and the benefits that make it a long-term investment for efficient home heating and cooling.
Ground source heating installation is the process of burying a closed loop of pipes underground to exchange heat with the earth, then connecting that loop to a geothermal heat pump inside your home. Because the ground stays at a relatively stable temperature year-round, this system can heat in winter and cool in summer far more efficiently than conventional air-source equipment. This guide walks you through every stage so you can evaluate whether a ground source system fits your property and your goals.
How Ground Source Heating Works
A ground source heat pump — also called a geothermal heat pump — does not burn fuel to create heat. Instead, it moves thermal energy between your home and the ground using a sealed loop of pipe filled with a water-and-antifreeze mixture. In heating mode, the loop absorbs heat from the earth (which stays warmer than the winter air) and the heat pump concentrates that heat for distribution through ducts, radiators, or radiant floors. In cooling mode, the process reverses: the system pulls heat out of your home and rejects it into the cooler ground.
This is the same refrigeration cycle used by any heat pump versus air conditioner comparison, except the outdoor "coil" is buried underground where temperatures are more favorable. That stable ground temperature is why geothermal systems can deliver strong efficiency even on the coldest nights and hottest afternoons.
The Four Core Components
- Ground loop: The buried pipe network that exchanges heat with the soil or groundwater.
- Heat pump unit: The indoor compressor and refrigerant circuit that raises or lowers the loop temperature to a usable level.
- Distribution system: Ductwork, hydronic radiators, or in-floor tubing that delivers conditioned air or water to living spaces.
- Desuperheater or water-heating module (optional): A component that redirects waste heat to preheat domestic hot water.
Ground Loop Configurations
The loop is the most site-specific part of any ground source heating installation. The right configuration depends on available land area, soil and rock conditions, local drilling regulations, and the heating and cooling load of your home. Below is a comparison of the main options.
| Loop Type | Best For | Land Requirement | Installation Method |
|---|---|---|---|
| Horizontal loop | Properties with ample open land | Large — trenches typically 4–6 ft deep and several hundred feet long | Excavation with a trencher; multiple parallel trenches |
| Vertical loop | Small lots, urban homes, rocky terrain | Minimal surface area — several boreholes 150–300 ft deep | Drilling rig; more specialized equipment |
| Pond or lake loop | Properties with a suitable body of water | Requires a pond or lake at least 8–10 ft deep | Loop weighted and sunk to the bottom |
| Open loop | Homes with an abundant clean well or groundwater source | Requires two wells (supply and return) | Groundwater pumped through the heat pump and returned |
The Ground Source Heating Installation Process
A professional installation follows a defined sequence. Knowing these stages helps you plan for access, scheduling, and inspections.
- Load calculation and system design. The installer performs a room-by-room heating and cooling load calculation and a site survey, then sizes the heat pump and loop length. This step determines whether a horizontal, vertical, or pond loop is practical.
- Permits and utility checks. Local permits are secured, and the installer calls 811 or the local one-call service to mark underground utilities before any digging or drilling.
- Loop excavation or drilling. Trenches are dug with a trencher or boreholes are drilled with a rig. This is typically the most disruptive stage, taking one to several days depending on loop type and soil conditions.
- Loop placement and backfilling. The pipe is laid or lowered, fused or manifolded, and the trench is backfilled. For vertical loops, boreholes are grouted to ensure good thermal contact and protect groundwater.
- Pressure testing and flushing. The closed loop is pressure-tested for leaks and flushed to remove air before being charged with the antifreeze mixture.
- Indoor unit installation. The heat pump is set on a pad or mounted, and connections are made to the loop, ductwork or hydronic distribution, electrical panel, and condensate drain.
- Commissioning and handover. The installer verifies refrigerant charge, airflow, and temperature rise, then walks you through operation, filter maintenance, and warranty registration.
Scheduling tip
Ground loop work is weather-sensitive. In cold climates, plan excavation before the ground freezes, and coordinate the indoor installation so the system can be commissioned before the first heating season. If you are also upgrading a forced-air system, ask whether the project can be bundled with furnace and AC installation to reduce mobilization time.
What to Expect During and After Installation
Most residential ground source heating installations take between one and three weeks from the first dig to commissioning, with the loop work concentrated in the early days. Expect some yard disruption — trenches, spoil piles, and equipment access — and plan for reseeding or landscaping afterward. Vertical loop installations leave a smaller surface footprint but require a drilling rig, which may need a clear path to the borehole locations.
After commissioning, the system runs quietly and requires modest routine care: checking the loop pressure and antifreeze concentration periodically, replacing air filters on the distribution side, and scheduling an annual checkup. Many homeowners pair the heat pump with a smart thermostat to optimize run times. For related efficiency topics, see our guidance on high-efficiency heating and air conditioning and preventative HVAC maintenance.
Typical Timeline at a Glance
| Stage | Typical Duration | Notes |
|---|---|---|
| Design and permitting | 1–3 weeks | Load calculation and utility locate |
| Loop excavation or drilling | 1–5 days | Depends on loop type and soil |
| Indoor unit and connections | 1–3 days | Ductwork or hydronic tie-in |
| Flushing, testing, commissioning | 1–2 days |
Benefits and Considerations
Ground source systems are widely regarded as a long-term investment. Because they exchange heat with stable ground temperatures rather than outdoor air, they typically deliver higher seasonal efficiency than air-source heat pumps and can reduce reliance on supplementary electric resistance heat in cold climates. They also eliminate outdoor condenser noise and are not exposed to weather.
- Efficiency: Stable ground temperatures support consistent performance across seasons.
- Durability: Buried loop pipe is protected from UV, weather, and vandalism, and has a long service life.
- Quiet operation: No outdoor fan or compressor noise.
- Dual function: One system provides both heating and cooling, and optional modules can preheat domestic hot water.
On the consideration side, ground source installation is more involved than a conventional replacement, requires adequate land or drilling access, and depends on a qualified geothermal contractor. If you are weighing alternatives, our heat pump vs air conditioner overview and HVAC and heat pump guide can help you compare system families before committing to a design.
Choosing a Qualified Installer
Ground source work spans excavation, drilling, refrigeration, and electrical trades, so look for a contractor with documented geothermal experience and credentials such as IGSHPA (International Ground Source Heat Pump Association) certification or equivalent. Ask for:
- Proof of licensing and insurance for all trades involved
- A written load calculation and loop design
- References from comparable local projects
- A clear scope covering loop, indoor unit, distribution, electrical, and commissioning
- Warranty terms for the loop, compressor, and labor
For broader contractor-vetting advice, see our HVAC contracting and HVAC experts resources. If your project also involves duct sealing or airflow improvements, review HVAC air duct sealing before the final design is locked in.
Frequently Asked Questions
How long does a ground source heating installation take?
Most residential projects run one to three weeks from the first excavation to commissioning. Design and permitting can add one to three weeks before work begins. Vertical loop drilling is usually faster on the surface but requires specialized equipment.
Do I need a large yard for a ground source system?
Not necessarily. Horizontal loops need more land area, but vertical loops use a small surface footprint with deep boreholes, making them suitable for smaller lots. A site survey and thermal conductivity test determine which configuration fits your property.
Can a ground source heat pump also cool my home?
Yes. The same loop and heat pump provide cooling in summer by rejecting heat into the ground. Distribution can be through ducts, radiators, or radiant flooring depending on the system design.
What maintenance does the system need?
Routine care includes periodic checks of loop pressure and antifreeze concentration, filter replacement on the air-distribution side, and an annual professional checkup. The buried loop itself requires no regular maintenance.
Is ground source heating suitable for every climate?
It performs well across a wide range of climates because ground temperatures are more stable than air temperatures. Cold-climate designs may include supplemental heat or a larger loop, and the installer's load calculation determines the right sizing.