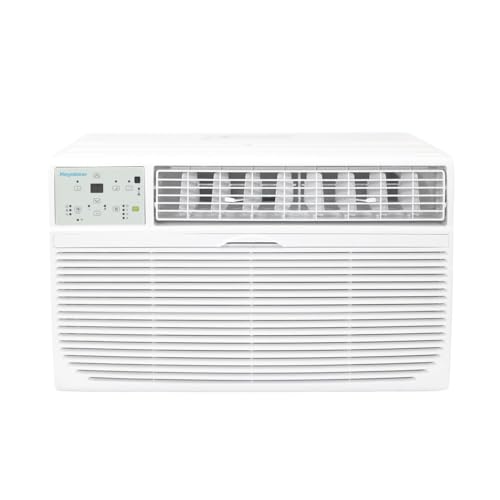
How to Install a Wall Mounted AC Unit
A complete step-by-step guide to installing a wall mounted air conditioner safely and correctly, from choosing the right location to testing the finished system.
START THE GUIDEWall Mounted AC Overview
A wall mounted air conditioner, often referred to as a ductless mini-split, is a popular cooling solution for homes without existing ductwork. The system consists of an indoor air-handling unit mounted high on a wall and an outdoor condenser unit connected by refrigerant lines, a drain hose, and electrical wiring. Understanding how an air conditioner works helps you appreciate why each installation step matters.
Wall mounted units are available across several market tiers, from entry-level single-zone models to premium multi-zone systems. Mid-range and high-end tier units often include inverter compressors, which adjust speed for steady temperature control. If you want to understand the technology, our guide on how inverter AC works explains the difference in efficiency and comfort.
Compared with a whole-house air conditioner, a wall mounted unit is simpler to install because it requires only a small wall penetration rather than a full duct network. This makes it a practical choice for additions, converted garages, and older homes.
Tools and Materials You Need
Before starting, gather everything required so the installation proceeds without interruption. Working with a complete set of tools reduces errors and keeps the job safe.
| Category | Items | Purpose |
|---|---|---|
| Measuring and layout | Stud finder, tape measure, spirit level, pencil | Locate studs and mark bracket positions accurately |
| Drilling and fastening | Hammer drill with masonry bits, hole saw, lag bolts, anchor sleeves | Create the wall penetration and secure the bracket |
| Refrigerant work | Torque wrench, flaring tool, pipe cutter, vacuum pump, manifold gauge set | Connect and evacuate the refrigerant lines safely |
| Electrical | Wire stripper, voltage tester, cable gland, outdoor-rated cable | Route and verify the power supply connection |
| Finishing | Sealant or expanding foam, drain hose, insulation tape, UV-resistant tape | Weatherproof the penetration and insulate the lines |
Many mid-range and premium kits include a basic mounting bracket and a line set. Entry-level kits may require you to buy the line set separately. Always confirm what is included before beginning.
Safety Precautions
- Switch off power at the breaker before any electrical work and verify with a voltage tester.
- Wear safety glasses and gloves when drilling and handling metal parts.
- Use a stable ladder and have a helper for lifting the indoor unit.
- Never release refrigerant into the atmosphere; follow local environmental regulations.
- Confirm the wall can support the weight of the indoor unit and bracket.
- Check local permits before starting; some jurisdictions require an electrical or mechanical permit.
Choosing the Installation Location
Location affects performance, efficiency, and how easy the system is to service. Both the indoor and outdoor units need thoughtful placement.
Indoor Unit Placement
- Mount high on an interior wall, ideally 6 to 8 inches below the ceiling.
- Provide at least 6 inches of clearance above the unit and 12 inches on each side for airflow.
- Avoid direct sunlight and heat sources such as lamps, ovens, or radiators.
- Choose a wall that shares an exterior wall for the shortest, most efficient line run.
- Ensure the drain hose can slope downward continuously to the outside.
- Keep the unit away from doorways where airflow could be obstructed.
Outdoor Unit Placement
- Place the condenser on a level pad or wall bracket with at least 12 inches of clearance on all sides.
- Avoid enclosed spaces that recirculate hot air.
- Choose a shaded area if possible to improve efficiency.
- Keep the unit accessible for future maintenance and cleaning.
- Ensure the outdoor unit is not below ground level where water can pool.
Mounting the Indoor Unit Bracket
The mounting bracket holds the entire weight of the indoor unit, so it must be secured to solid framing.
- Use a stud finder to locate wall studs in the chosen area.
- Hold the bracket against the wall and mark the mounting holes with a pencil.
- Confirm the bracket is level using a spirit level; an unlevel bracket causes condensate to drip inside the room.
- Drill pilot holes and secure the bracket with lag bolts into studs. If studs are not available, use heavy-duty anchor sleeves rated for the unit weight.
- Give the bracket a firm tug to confirm it is secure before hanging the unit.
Do not hang the indoor unit yet. It is easier to drill the wall hole and route lines before the unit is in place.
Drilling the Wall Hole
The wall penetration carries the refrigerant lines, drain hose, and electrical cable to the outside.
- Mark the hole position on the wall, typically just below and to one side of the bracket.
- The hole should slope slightly downward toward the outside so condensate drains properly.
- Use a hole saw sized for the line set, commonly 2.5 to 3 inches in diameter.
- Drill from inside to outside, or start from both sides if the wall is thick, to avoid chipping the exterior.
- Insert a wall sleeve to protect the lines from sharp edges.
- Seal the gap around the sleeve with expanding foam or sealant after the lines are routed.
Installing the Outdoor Unit
The condenser needs a stable, level base to operate quietly and efficiently.
- Prepare a concrete pad or install a wall-mounted bracket rated for the condenser weight.
- Set the unit on the pad and verify it is level in both directions.
- Use vibration pads under the feet to reduce noise and prevent corrosion.
- Maintain the required clearance from walls, fences, and other obstructions.
- Bolt the unit down if it is in an area exposed to strong winds.
If your unit is a house air conditioner condenser, it may look similar to a mini-split condenser, but multi-zone systems can have one outdoor unit serving several indoor heads. Plan the line routes accordingly.
Connecting Lines and Wiring
This stage is the most technical and demands precision. Careless connections lead to refrigerant leaks and poor performance.
Routing the Line Set
- Feed the insulated copper lines, drain hose, and electrical cable through the wall sleeve.
- Keep bends gentle; avoid kinking the copper tubing.
- Secure the line set to the wall with clamps at regular intervals.
- Slope the drain hose continuously downward so water does not pool.
- Insulate any exposed line section to prevent condensation and energy loss.
Connecting the Refrigerant Lines
- Cut the copper tubing squarely with a pipe cutter and remove burrs.
- Create flares with a flaring tool and inspect each flare for cracks.
- Apply a small amount of refrigerant oil to the flare faces.
- Hand-tighten the flare nuts, then torque them to the manufacturer specification.
- Connect both the liquid and suction lines to the indoor and outdoor units.
Electrical Connections
- Use the electrical cable specified by the manufacturer.
- Connect the indoor unit to the outdoor unit following the wiring diagram on the unit panels.
- Connect the outdoor unit to the dedicated circuit breaker.
- Use cable glands to protect the wiring at entry points.
- Double-check every connection with a voltage tester before restoring power.
Evacuating the System
Evacuation removes air and moisture from the refrigerant lines. Skipping this step is one of the most common causes of premature system failure.
- Connect the manifold gauge set to the service ports on the outdoor unit.
- Connect the vacuum pump to the manifold gauge set.
- Run the pump until the gauge reads the target vacuum level recommended by the manufacturer.
- Close the valves and shut off the pump, then observe the gauge for several minutes to confirm the vacuum holds.
- If the vacuum drops, there is a leak that must be found and repaired.
- Once the vacuum is stable, open the service valves to release the refrigerant charge.
The process is explained in more detail in our guide on how to vacuum an AC system.
Testing and Final Checks
After assembly, the system must be tested for cooling performance, drainage, and electrical safety.
- Restore power at the breaker.
- Turn on the unit in cooling mode and set a temperature several degrees below room temperature.
- Check that the indoor unit blows cold air within a few minutes.
- Verify the outdoor unit runs smoothly and the fan spins freely.
- Inspect the drain line for steady water flow.
- Use a leak detector or soapy water on the flare connections to confirm no leaks.
- Measure the temperature difference between return and supply air; a healthy split confirms correct operation.
- Seal the wall penetration with foam and finish with a decorative cover plate if desired.
Our article on how to test a new AC covers performance checks in more depth.
Common Installation Mistakes
- Unlevel indoor bracket: Causes condensate to drip inside the room instead of draining outside.
- Skipping the vacuum: Trapped moisture forms acid that destroys the compressor over time.
- Poor flare connections: The leading cause of slow refrigerant leaks.
- Insufficient clearance: Restricts airflow and reduces efficiency.
- Upward-sloping drain line: Water backs up and leaks from the indoor unit.
- Undersized electrical circuit: Trips breakers and risks overheating.
- Sealing the wall hole before testing: Makes repairs more difficult if a leak is found.
For a broader view of installation pitfalls, see our guide on common AC installation mistakes. Also, comparing quotes from licensed professionals is always wise; our article on how to get an installation quote explains what to ask.
Frequently Asked Questions
How long does a wall mounted AC installation take?
A single-zone system typically takes three to five hours for an experienced installer. First-time DIY installations often take a full day, especially if electrical work and wall penetration are involved.
Can I install a wall mounted AC unit myself?
Mechanical mounting and line routing are achievable for a confident DIYer. Refrigerant handling and final electrical connections are best left to licensed professionals in most jurisdictions.
Do I need a permit for a wall mounted AC?
Requirements vary by location. Many municipalities require an electrical permit, and some require a mechanical permit. Check with your local building department before starting.
How high should the indoor unit be mounted?
Mount the indoor unit 6 to 8 inches below the ceiling, with at least 6 inches of clearance above and 12 inches on each side for proper airflow.
What size wall hole is needed?
Most residential mini-split line sets require a 2.5 to 3 inch hole. Confirm the required diameter in your unit's installation manual before drilling.
How long does a wall mounted AC last?
With proper installation and regular maintenance, a quality unit can last 15 to 20 years. Learn more in our guide on how long an AC lasts.