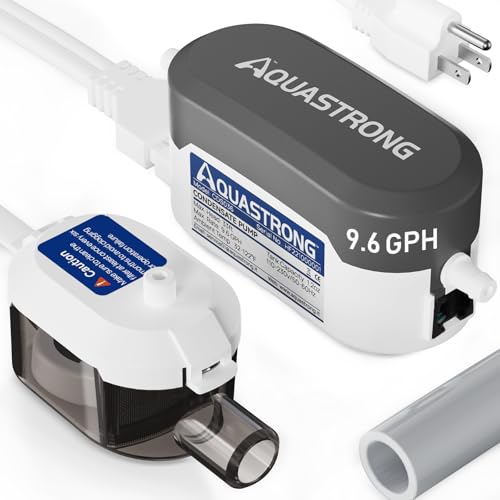
Installing a Condensate Pump on a Mini Split
A complete, practical guide to adding a condensate pump to your ductless mini split system — covering pump selection, placement, tubing, wiring, testing, and long-term maintenance.
A ductless mini split removes moisture from the air as it cools. That moisture collects in the indoor unit's drain pan and must be routed away from the building. In many installations, gravity does the job: the indoor unit is mounted high enough that a gently sloping drain line can carry water outside. But in plenty of real-world layouts — basement wall mounts, interior closet air handlers, ceiling cassettes, or long horizontal runs — gravity drainage is not possible. That is exactly where installing a condensate pump on a mini split becomes the practical solution.
A condensate pump is a small, quiet device that collects water in a reservoir and pushes it uphill or over a distance to a suitable discharge point. Done correctly, it is reliable, invisible, and code-compliant. Done poorly, it becomes a source of leaks, noise, and repeat service calls. This guide walks through the entire process so you can decide whether to install one yourself or hand it to a professional with confidence.
1. Why a Mini Split Needs a Condensate Pump
When warm, humid air passes over the cold evaporator coil inside the indoor unit, moisture condenses on the coil and drips into a shallow drain pan. From there, water has to leave the building. Standard mini splits rely on a gravity drain: a flexible hose runs from the pan outlet, through the wall, and down to the exterior, where water drips away.
Gravity drainage fails or becomes impractical when:
- The indoor unit is mounted low on a wall, in a basement, or in a closet where the drain outlet is below the exterior exit point.
- The outdoor unit and drain termination are higher than the indoor unit.
- The drain route is long, horizontal, or must pass through finished spaces where a continuous slope is impossible.
- You are using a ceiling cassette or a concealed ducted air handler where a gravity line would be visible or unworkable.
- Local codes or the building layout require a controlled, terminated discharge rather than an open drip line.
In these situations, a condensate pump provides the lift and directional control needed to move water to a safe discharge point — typically a utility sink, a floor drain, a washing machine standpipe, or an exterior wall at a higher elevation.
2. How a Condensate Pump Works
Most mini split condensate pumps are small, tank-style units. Water flows from the indoor unit's drain pan into the pump's reservoir through a short inlet hose. Inside the reservoir, a float switch monitors the water level. When the level rises to a set point, the pump motor starts and pushes water out through a discharge tube.
There are two key safety features to understand:
- Float switch (high-level): If water rises above the normal start level — for example, because the discharge line is blocked — the float switch triggers an alarm or, in many systems, interrupts the cooling signal to the indoor unit. This prevents overflow.
- Check valve: Most pumps include an internal or external check valve that prevents water from flowing back into the reservoir after the pump stops.
Pumps are rated by lift (the vertical height they can push water) and flow rate. For a mini split, the condensate volume is typically modest — a few gallons per day in humid conditions — so the critical specification is lift, not flow. Choose a pump whose rated lift comfortably exceeds your actual vertical rise.
| Pump Tier | Best For | Key Characteristics |
|---|---|---|
| Entry-level | Short lift, single indoor unit, occasional use | Compact reservoir, basic float switch, simple inlet/outlet |
| Mid-range | Most residential mini splits, moderate lift | Quieter operation, integrated check valve, better float reliability |
| Premium | Long runs, high lift, concealed installations | High-lift capability, advanced float safety, sound-dampening design |
| Professional-grade | Multi-zone systems, ducted air handlers, commercial spaces | Tankless or high-capacity designs, robust switching, serviceable components |
3. Types of Condensate Pumps and How to Choose
Not every pump suits every mini split. The main categories are:
Reservoir (tank-style) pumps
These are the most common choice for residential mini splits. Water collects in a small tank, and the pump activates when the float rises. They are easy to install, relatively quiet, and forgiving of minor flow variations. They are best mounted near the indoor unit, where the tank can be checked and cleaned.
Tankless pumps
Tankless designs use a small collection chamber and a more responsive switching mechanism. They are compact and well suited to tight wall cavities or concealed installations. They can be less tolerant of debris, so a clean drain pan and a strainer are important.
In-line or duct-mounted pumps
Used more often with ducted air handlers and ceiling cassettes, these pumps sit in the drain line or attach to the unit. They are a good fit when the indoor unit is not easily accessible for a tank-style pump.
Choosing the right pump
- Lift: Measure the vertical distance from the pump outlet to the highest point of the discharge run. Add a safety margin — choose a pump rated for more lift than you need.
- Noise: If the pump is near a bedroom or living area, prioritize a quiet model. Premium tiers are noticeably quieter than entry-level units.
- Safety switch: Choose a pump with a high-level float switch that can shut down the indoor unit or trigger an alarm.
- Serviceability: A reservoir you can open and clean without disconnecting everything saves time over the life of the system.
- Compatibility: Confirm the pump is designed for mini split condensate (low flow, intermittent operation) rather than for a furnace or whole-home application.
4. Planning the Installation
Good planning prevents most condensate pump problems. Before you buy or mount anything, work through the following:
Locate the pump
The pump should sit close to the indoor unit, ideally within a few feet of the drain pan outlet. It must be mounted level — a tilted pump can cause the float to hang up or the reservoir to overflow on one side. Common locations include:
- Inside a wall cavity next to the indoor unit (ensure access for service).
- On an adjacent wall in a closet or utility space.
- On a sturdy bracket below or beside the indoor unit, where it is visible but protected.
Plan the inlet route
The inlet hose from the drain pan to the pump should slope gently downward toward the pump. Avoid loops, kinks, and uphill sections that can trap water. Keep the run as short as practical.
Plan the discharge route
The discharge tube carries water away from the pump. It should rise to the pump's rated lift, then run to an approved discharge point. Keep the following in mind:
- Use tubing rated for the pump's pressure and compatible with condensate (often a flexible vinyl or reinforced tube).
- Avoid sharp bends that can kink the tube and restrict flow.
- Insulate the discharge tube where it passes through unconditioned spaces to prevent condensation on the outside of the tube.
- Terminate at a utility sink, floor drain, standpipe, or exterior location that will not cause water damage or a slip hazard.
Plan the electrical supply
Most mini split condensate pumps run on low voltage or line voltage, depending on the model. Check the pump's requirements and confirm you have a suitable power source. If the pump needs a new circuit, involve a licensed electrician. For wiring details, see section 6 below.
Check local codes
Condensate disposal is regulated in many jurisdictions. Requirements can cover the discharge location, the use of a trap, and the presence of a safety switch. Before installing, confirm the rules with your local building department or a licensed HVAC contractor. Our article on licensed HVAC professionals explains why this step matters and how to verify credentials.
5. Step-by-Step Installation
The exact steps vary by pump model and mini split design, but the sequence below covers a typical residential installation. Read the pump and mini split manuals before starting — they take precedence over any general guide.
Tools and materials
- Condensate pump with high-level safety switch
- Flexible inlet hose and discharge tubing
- Hose clamps
- Mounting bracket or screws appropriate for the mounting surface
- Level
- Drill and bits (for wall penetrations, if needed)
- Wire nuts or connectors (if wiring is required)
- Insulation for the discharge tube
- Pan tablets or a drain pan cleaner (for maintenance)
- Safety glasses and gloves
- Turn off power to the mini split. Shut off the indoor unit at the breaker or disconnect. Confirm the unit is de-energized before opening any panels or making connections.
- Inspect the drain pan and outlet. Remove any debris from the indoor unit's drain pan. Confirm the drain outlet is clear and that the pan is not cracked. A clean pan protects the pump from sediment.
- Mount the pump. Position the pump so its reservoir is below the drain pan outlet and close enough that the inlet hose can slope down into the pump. Use a level to confirm the pump is flat, then secure it with the bracket or screws. Leave enough clearance to open the reservoir for cleaning.
- Connect the inlet hose. Attach the inlet hose from the drain pan outlet to the pump inlet. Use a hose clamp and route the hose with a continuous downward slope. Avoid sharp bends and make sure the hose does not sit in a way that traps water.
- Connect the discharge tube. Attach the discharge tube to the pump outlet, again using a clamp. Route the tube to the discharge point, keeping bends gentle and the run as short as practical. Insulate any section that passes through an unconditioned space.
- Install a check valve if not built in. If your pump does not include an internal check valve, install one on the discharge side to prevent water from flowing back into the reservoir. Follow the pump manual for the correct orientation.
- Wire the pump. Follow the pump's wiring diagram exactly. If the pump has a high-level safety switch, wire it in series with the indoor unit's control signal so the unit stops when the reservoir is full. See section 6 for details.
- Test the float and pump. Before restoring full operation, pour a small amount of clean water into the reservoir and confirm the pump activates, moves water through the discharge tube, and stops when the reservoir empties. Test the high-level float by holding it up and confirming the safety circuit responds.
- Restore power and run the system. Turn the mini split back on, set it to cooling, and let it run for at least 30 minutes. Watch for water movement in the inlet hose and confirm the pump cycles normally. Check the discharge termination for proper drainage.
- Clean up and label. Secure loose tubing, label the pump and any new wiring, and leave the manuals with the system documentation. Note the installation date for your maintenance records.
Need a professional to handle the electrical and drainage work? Get matched with qualified HVAC contractors in your area.
Request HVAC Quotes6. Wiring and Electrical Safety
Wiring is the part of installing a condensate pump on a mini split where mistakes are most consequential. Pump models vary widely: some use line voltage (120V or 240V), some use low voltage control wiring, and some are powered directly from the indoor unit's control board. Always follow the pump manufacturer's instructions and the mini split's wiring diagram.
Typical wiring scenarios
- Pump powered from a dedicated circuit: The pump has its own line-voltage supply. The high-level safety switch is wired to interrupt the indoor unit's control signal (often a low-voltage thermostat or communication wire).
- Pump powered from the indoor unit: Some mini splits provide a condensate pump power terminal. The pump draws power from the unit and the safety switch is integrated into the control wiring.
- Low-voltage signal only: The pump includes a relay or dry contact that signals the indoor unit to stop when the reservoir is full. The pump itself may be powered separately.
Safety rules
- De-energize the circuit before making any connections.
- Use wire connectors rated for the voltage and environment.
- Keep line-voltage wiring in appropriate conduit or raceway where required.
- Do not exceed the pump's rated electrical specifications.
- Test the safety switch after wiring — it is your primary protection against water damage.
If the wiring is not straightforward, or if your local code requires a permit for the electrical work, bring in a licensed electrician or HVAC technician. Our guide to local HVAC services can help you find qualified help, and our article on questions to ask an installer covers what to verify before work begins.
7. Testing and Commissioning
Testing is not optional. A pump that appears to work in a quick check can still fail under real condensate load. Run through the following checks:
Bench test
- Pour clean water into the reservoir and confirm the pump starts at the intended level.
- Confirm water flows freely through the discharge tube and exits at the termination point.
- Confirm the pump stops when the reservoir is empty and does not short-cycle.
- Lift the high-level float and confirm the safety switch triggers the intended response (unit shutdown or alarm).
Live test
- Run the mini split in cooling mode for at least 30–60 minutes in humid conditions.
- Watch the inlet hose for steady water flow and confirm the pump cycles periodically.
- Check for leaks at every connection — pan outlet, pump inlet, pump outlet, and discharge termination.
- Listen for unusual noise or vibration from the pump.
- Confirm the discharge point drains freely and does not back up.
Documentation
Record the pump model, installation date, and test results in your HVAC maintenance log. This information is useful for warranty claims and future service. Our guide to maintenance of HVAC systems explains how to build a simple log that covers both the mini split and its accessories.
8. Troubleshooting Common Condensate Pump Problems
Most issues fall into a few predictable categories. Use the table below as a starting point, and always disconnect power before investigating.
| Symptom | Likely Cause | What to Check |
|---|---|---|
| Pump runs but no water moves | Clogged inlet, blocked discharge, or air lock | Inspect the inlet hose and discharge tube for kinks or debris; prime the pump if the manual allows |
| Pump short-cycles | Check valve missing or stuck; float adjusted too low | Confirm the check valve is installed correctly; adjust the float per the manual |
| Water overflows the reservoir | Pump failure, blocked discharge, or float stuck | Test the float manually; clear the discharge line; replace the pump if the motor does not run |
| Pump is noisy | Loose mounting, vibration against a wall, or debris in the reservoir | Tighten the mount, add vibration isolation, clean the reservoir |
| Mini split shuts down unexpectedly | High-level float triggered by a drainage problem | Check for a blocked discharge line and confirm the pump is moving water; reset the safety switch |
| Water leaks around the pump | Loose hose clamp, cracked reservoir, or damaged inlet | Tighten or replace clamps; inspect the reservoir for cracks; replace damaged parts |
If the problem is not obvious after basic checks, stop and call a technician. Continuing to run a system with a failed pump can cause water damage inside the wall or ceiling. Our article on mini split air conditioner repair covers when a repair is the right call versus when replacement makes more sense.
9. Maintenance Schedule
A condensate pump is a low-maintenance device, but it does need attention. Build these tasks into your seasonal routine:
Monthly (during cooling season)
- Visually check the reservoir for slime or debris.
- Confirm the discharge line is not kinked or blocked.
- Listen for unusual pump noise.
Every 3–6 months
- Clean the reservoir with mild soap and water; rinse thoroughly.
- Inspect the inlet hose and discharge tube for cracks or buildup.
- Test the high-level float switch.
- Check hose clamps for tightness.
Annually (before cooling season)
- Run a full live test with the mini split in cooling mode.
- Clean or replace the drain pan tablets if used.
- Inspect the discharge termination for proper drainage.
- Confirm the pump's electrical connections are secure.
Regular maintenance keeps the pump reliable and protects the mini split. For a broader seasonal checklist, see our tips and maintenance section, and for whole-system care, review our guide to maintenance of HVAC systems.
10. Frequently Asked Questions
Do I need a condensate pump for my mini split?
Only if gravity drainage is not possible. If the indoor unit can drain downhill to a safe exterior location, a gravity line is simpler and has no moving parts. If the unit is low-mounted, in a basement, or the drain route requires lift, a pump is the practical solution.
Where should I mount the pump?
Mount it close to the indoor unit, level, and with enough clearance to service the reservoir. The inlet hose should slope down from the drain pan to the pump. Keep the pump protected from freezing and accessible for cleaning.
Can I install a condensate pump myself?
If you are comfortable with basic plumbing and electrical work and your local code allows it, yes. However, if the installation requires a new electrical circuit or involves opening the indoor unit's control wiring, a licensed HVAC technician or electrician is the safer choice.
What happens if the pump fails?
A pump with a high-level safety switch will typically shut down the indoor unit before the reservoir overflows. Pumps without a safety switch can overflow and cause water damage. This is why a safety switch is strongly recommended.
How often should I clean the pump?
Clean the reservoir every 3–6 months during the cooling season, and test the float switch before each cooling season. In dusty or high-humidity environments, more frequent checks may be needed.
Can I use a furnace condensate pump for a mini split?
Not ideally. Furnace pumps are designed for different flow and operating patterns. Use a pump specifically rated for mini split condensate, with appropriate lift and a compatible safety switch.