Outside Air Conditioner Unit: The Complete Guide
Everything you need to know about the outdoor condenser unit — placement, maintenance, troubleshooting, and efficiency tips to keep your system running smoothly for years.
START LEARNINGWhy the outside unit matters: The outdoor condenser is the heart of your split-system air conditioner. It releases heat absorbed from your home into the outside air. If it is poorly placed, dirty, or damaged, your entire system works harder — reducing efficiency and shortening its lifespan.
What Is an Outside Air Conditioner Unit?
The outside air conditioner unit — also called the condenser unit or outdoor unit — is the large metal box typically installed beside your home. It contains the compressor, condenser coils, and condenser fan. Together, these components release the heat that was absorbed from inside your home into the outdoor air.
In a standard split-system setup, the outdoor unit works in tandem with an indoor evaporator coil and air handler. Refrigerant travels between the two through copper lines, absorbing heat indoors and releasing it outdoors. Understanding how this cycle works helps you appreciate why proper placement and maintenance of the outdoor unit are so critical.
If you want a deeper explanation of how the entire system operates, see our guide on split systems and how the indoor and outdoor components interact.
Key Components Inside the Outdoor Unit
Compressor
The compressor is the pump that circulates refrigerant through the system. It compresses low-pressure gas into high-pressure, high-temperature gas, which then flows to the condenser coils. A failing compressor is one of the most serious and costly repairs — proper maintenance helps prevent it.
Condenser Coils
These coils wrap around the unit and release heat from the refrigerant into the outside air. When they are clogged with dirt, leaves, or pet hair, heat exchange drops dramatically, forcing the compressor to work harder and increasing energy consumption.
Condenser Fan
The large fan on top pulls air through the coils and pushes it upward. A bent blade, worn motor bearing, or debris trapped in the fan cage can cause loud noise and reduce airflow. Regular inspection keeps the fan running quietly and efficiently.
Refrigerant Lines & Service Valves
Two copper lines connect the outdoor unit to the indoor coil. The service valves allow technicians to check refrigerant levels. Leaks in these lines or valves can cause low refrigerant, leading to poor cooling and potential compressor damage.
Electrical Disconnect & Capacitor
The electrical disconnect box lets you safely cut power to the unit during maintenance. The capacitor provides the boost needed to start the compressor and fan motor. A weak capacitor is a common cause of the unit not starting.
Unit Housing & Base Pan
The metal cabinet protects internal components from weather and debris. The base pan collects condensate that drips from the coils. A rusted or damaged housing or a clogged drain can lead to water pooling and corrosion.
Proper Placement of the Outside AC Unit
Where you place the outdoor unit directly affects its efficiency, noise level, and longevity. Whether you are installing a new unit or evaluating an existing setup, these guidelines will help you get it right.
Clearance and Airflow
The outdoor unit needs unobstructed airflow on all sides. As a rule of thumb:
- 12–24 inches of clearance from the house wall or fence
- 24–36 inches of clear space above the unit (for the fan exhaust)
- 18–24 inches on the remaining sides
These distances prevent hot exhaust air from recirculating into the unit, which would reduce its ability to reject heat. Always check the manufacturer's installation manual for specific clearance requirements.
Ground Level and Elevation
The unit should sit on a level, solid surface — typically a concrete pad or composite riser. Elevating the unit a few inches above grade helps prevent water pooling, snow accumulation, and debris from entering the base. A slightly elevated position also keeps the unit drier during heavy rain.
Shade and Sun Exposure
While the outdoor unit is designed to operate in direct sunlight, shading it with a tree or an awning can improve efficiency by reducing the ambient temperature around the coils. However, the shade structure must not block airflow. Plant trees or shrubs at a safe distance — at least 3 feet from the unit — and keep them trimmed. For more on this topic, read our guide on shading an AC unit.
Avoid Enclosed Spaces
Never enclose the outdoor unit in a small, tight space such as a narrow closet, under a deck with limited clearance, or behind solid fencing without ventilation. Trapped heat causes the compressor to overheat and eventually fail. Decorative lattice or slatted screens are acceptable only if they allow generous airflow.
💡 Placement tip: Position the unit where service technicians can easily access it. A unit squeezed into a tight corner makes routine maintenance difficult and may lead to skipped service calls.
Outdoor Unit Maintenance Checklist
Regular maintenance of the outside unit is the single best way to protect your investment and keep energy bills in check. Aim for a thorough check at least twice a year — in spring before cooling season and in fall after it ends.
Seasonal Maintenance Tasks
- Clear debris: Remove leaves, grass clippings, dirt, and pet hair from around and on top of the unit. Debris blocks airflow and can be pulled into the coils.
- Clean condenser coils: Gently rinse the coils with a garden hose from the inside out. For stubborn dirt, use a coil cleaner recommended by the manufacturer. Avoid high-pressure washing, which can bend the fins.
- Straighten bent fins: Use a fin comb to gently straighten flattened fins. Bent fins restrict airflow and reduce heat exchange efficiency.
- Inspect the fan: Check for cracks, wobbles, or debris trapped in the blades. A damaged fan should be replaced promptly to avoid motor strain.
- Check the base pan: Ensure the drain holes are clear so condensate can escape. Standing water can rust the pan and attract insects.
- Tighten electrical connections: Loose connections can cause arcing and overheating. This is best left to a technician, but a visual check for burnt wires or loose screws is worth doing.
- Check refrigerant lines: Look for oil stains or frost on the copper lines, which may indicate a leak or low refrigerant. If you suspect a leak, call a professional.
For a full seasonal checklist that covers both indoor and outdoor components, see our tips and maintenance section.
⚠️ Safety first: Always turn off power at the breaker and the outdoor disconnect before performing any maintenance beyond a simple visual inspection. The capacitor can hold a dangerous charge even after power is cut.
Common Outside Unit Problems and What They Mean
Many cooling problems trace back to the outdoor unit. Recognizing the symptoms early can save you from a major repair later.
| Symptom | Likely Cause | Action |
|---|---|---|
| Unit not running at all | Tripped breaker, blown capacitor, or faulty contactor | Check breaker; if it trips again, call a technician |
| Loud buzzing or humming | Failing compressor or weak capacitor | Turn off power and call a professional |
| Fan not spinning | Bad fan motor, capacitor, or obstructed blade | Check for debris; replace motor or capacitor if needed |
| Ice on the unit or refrigerant lines | Low refrigerant, restricted airflow, or dirty coils | Clean coils; if ice persists, check refrigerant charge |
| Water pooling around the base | Clogged drain holes or a cracked base pan | Clear drain holes; replace pan if cracked |
| Excessive vibration or noise | Loose panels, worn fan bearing, or debris | Tighten panels; remove debris; replace bearing if needed |
If your outdoor unit is making unusual noise or not cooling properly, our detailed guide on outside AC unit making loud noise and not cooling walks through diagnostic steps. For broader cooling issues, see my AC unit isn't blowing cold air.
Maximizing Outdoor Unit Efficiency
A well-maintained outdoor unit can operate at peak efficiency for many years. Here are practical steps to get the most from it:
- Keep the area clean: A 2–3 foot clearance around the unit prevents debris from being pulled into the coils.
- Schedule professional tune-ups: An annual HVAC service visit includes refrigerant level checks, electrical inspections, and deep coil cleaning that go beyond DIY maintenance.
- Upgrade to a high-efficiency unit when replacing: Modern units with higher SEER2 ratings use less energy for the same cooling output. Learn more about efficiency ratings on our SEER explained page.
- Pair with a smart thermostat: Proper temperature scheduling reduces runtime and wear on the outdoor unit. See our guide on the ideal AC temperature setting.
- Consider a heat pump: If you are replacing an older AC, a heat pump can provide both cooling and heating. Explore HVAC pump options.
For a broader look at reducing energy use across your whole system, read our article on how to reduce AC electricity bill.
When to Call a Professional
While basic cleaning and visual inspections are safe for most homeowners, some tasks require a licensed technician:
- Refrigerant leaks or low charge — handling refrigerant is regulated and requires certification
- Compressor replacement or major electrical repairs
- Persistent loud noise or vibration that does not resolve after basic checks
- Ice buildup that returns after cleaning
- Any work inside the electrical disconnect box
If you need help finding a qualified professional, our guide on licensed HVAC technicians explains what credentials to look for. You can also explore HVAC quotes to understand what a service visit typically involves.
Frequently Asked Questions
The outside AC unit should typically be placed at least 12 to 24 inches away from the house wall to allow proper airflow. The exact clearance depends on the manufacturer's specifications and local building codes. This spacing prevents hot exhaust air from recirculating and ensures the condenser can draw in enough ambient air for efficient heat exchange. Always check your installation manual for the specific requirements of your model.
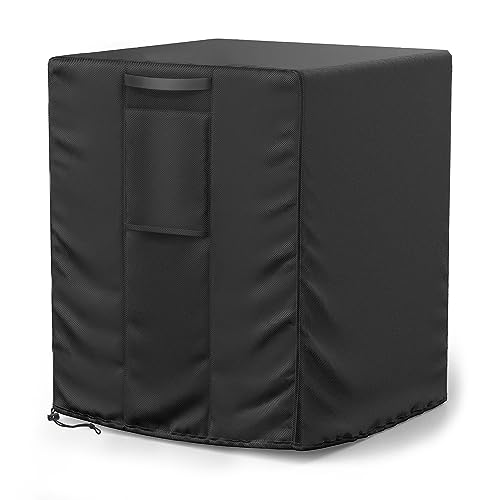
Covering the top of the outside AC unit during winter is generally recommended to prevent debris, snow, and ice from entering the unit. However, avoid wrapping the entire unit in plastic or tight covers that trap moisture, which can cause rust and corrosion. Use a breathable cover or a simple piece of plywood on top for protection. If you use a heat pump, never cover the unit — it runs year-round.
Loud noise from an outside AC unit can be caused by several issues: debris stuck in the fan blades, a failing fan motor bearing, loose panels vibrating, a failing compressor, or an unbalanced fan blade. If the noise is persistent or accompanied by reduced cooling, contact a licensed HVAC technician to diagnose and repair the problem. Ignoring unusual noise can lead to more extensive damage over time.
The outside AC unit should be cleaned at least twice a year, ideally in spring before cooling season and in fall after it ends. Remove debris from around the unit, gently rinse the condenser coils with a garden hose, and straighten any bent fins with a fin comb. In dusty or high-pollen areas, more frequent cleaning may be necessary. Regular cleaning keeps airflow unrestricted and reduces strain on the compressor.
Yes, shading the outside AC unit can improve its efficiency by reducing the ambient temperature around the condenser. However, the shade structure must not block airflow to the unit. Plant shrubs or trees at a safe distance — at least 3 feet away — or use a specially designed shade screen that allows proper ventilation. Never enclose the unit completely, as trapped heat will cause the compressor to overheat and fail prematurely.
Ready to Choose the Right Outdoor Unit?
Now that you understand how the outside unit works and how to care for it, explore our curated recommendations for reliable outdoor air conditioners that suit different needs and efficiency goals.
View Recommendations