
Recharging AC System in Car: The Complete Guide
Everything you need to know about restoring cold air in your vehicle — from diagnosing low refrigerant to performing a safe, effective recharge at home.
START THE GUIDEWhy This Guide Matters: A car air conditioning system that blows warm air is one of the most common complaints among drivers. Before you assume the compressor has failed or the system needs a full replacement, understand that a simple recharge is often all that is required. This guide walks you through the entire process — diagnosis, tools, step-by-step recharging, and when to call a professional — so you can make an informed decision and restore cold air safely.
What You Will Learn
How Your Car AC System Works
A vehicle air conditioning system is a closed-loop circuit that moves refrigerant through four main components: the compressor, condenser, expansion valve (or orifice tube), and evaporator. The compressor pressurizes refrigerant gas and sends it to the condenser, where heat is released to the outside air. The refrigerant then passes through the expansion valve, where it rapidly cools and becomes a low-pressure mist. Inside the evaporator, this cold refrigerant absorbs heat from the cabin air, and the blower fan pushes that chilled air through your vents. Finally, the refrigerant returns to the compressor to repeat the cycle.
When the system is low on refrigerant — usually due to a slow leak — the compressor cannot build enough pressure to cool the cabin effectively. That is when you notice warm air, weak airflow, or the compressor cycling on and off rapidly. Understanding this cycle helps you appreciate why recharging the AC system in your car is not simply a matter of adding gas, but rather restoring the correct operating pressure for the entire loop.
It is also worth noting that the cabin air filter plays a supporting role. A clogged filter restricts airflow across the evaporator, reducing cooling performance even when refrigerant levels are correct. If you notice reduced airflow alongside warm air, check both the refrigerant charge and the cabin filter before proceeding with a recharge.
Signs Your Car AC Needs a Recharge
Recognizing the symptoms early can save you from unnecessary repairs. Here are the most reliable indicators that your system is low on refrigerant:
- Warm air from the vents: The most obvious sign. If the air is only slightly cool or room temperature, the refrigerant charge is likely low.
- Weak cooling at idle: If the AC works while driving but turns warm at stoplights, the system may be undercharged and unable to maintain pressure at low engine speeds.
- Rapid compressor cycling: The compressor clutch engaging and disengaging every few seconds is a classic symptom of low refrigerant.
- Visible bubbles in the sight glass: On vehicles equipped with a sight glass on the receiver-drier, continuous bubbles indicate a low charge.
- Frost on the low-side line: In some cases, a partially charged system can cause frost to form on the suction line.
If you experience these symptoms, it is tempting to reach for a DIY recharge kit immediately. However, it is essential to first confirm that low refrigerant is the actual cause. A failing compressor, a blocked expansion valve, or a faulty blend door actuator can produce similar symptoms. Using a manifold gauge set to check both high and low-side pressures is the most reliable way to diagnose the issue before adding refrigerant.
For related diagnostic help, see our guide on what to do when your car AC blows cool but not cold air, which covers additional causes beyond low refrigerant.
Refrigerant Types: R-134a vs R-1234yf
Before you purchase any recharge kit, you must identify which refrigerant your vehicle uses. Using the wrong type can damage the system and pose safety risks.
R-134a (HFC-134a)
Used in most vehicles manufactured from the early 1990s through roughly 2017. Widely available in DIY recharge kits. Operates at moderate pressures and is compatible with PAG oil.
R-1234yf (HFO-1234yf)
Required in most vehicles from 2017 onward due to lower global warming potential. More expensive and typically requires professional equipment. Not interchangeable with R-134a.
R-12 (CFC-12)
Used in older vehicles (pre-1995). Phased out due to ozone depletion. Requires a retrofit to R-134a before any recharge. Never mix R-12 with modern refrigerants.
Check the sticker under your hood or consult your owner's manual to confirm the correct refrigerant. If your vehicle uses R-1234yf, DIY recharge kits are less common and often require a professional service due to the cost of the refrigerant and the need for precise handling equipment. For R-134a systems, a DIY recharge is a realistic option for many drivers.
Tools and Supplies You Need
Gathering the right tools before you start makes the process smoother and safer. Here is what you need for a typical R-134a recharge:
Manifold Gauge Set
Essential for reading both high and low-side pressures. This is the single most important tool for diagnosing and confirming a proper charge.
Refrigerant (R-134a)
Purchase cans that include UV dye and leak sealer if you suspect a slow leak. Always verify the refrigerant type matches your vehicle.
Recharge Hose and Valve
A dedicated charging hose with a piercing valve for the refrigerant can. Many DIY kits include this.
Safety Glasses and Gloves
Refrigerant can cause frostbite on contact with skin. Eye protection is non-negotiable.
UV Leak Detection Flashlight
If you add UV dye, this helps you spot leaks around fittings, hoses, and the compressor.
Thermometer
An inexpensive vent thermometer lets you verify the air temperature before and after the recharge.
Quality tools matter. A manifold gauge set from the mid-range or professional-grade tier will provide more accurate readings and last longer than an entry-level set. If you plan to maintain your vehicle's AC system over multiple seasons, investing in a solid gauge set is a worthwhile long-term investment.
Never open the high-side port while the system is pressurized. Always wear safety glasses. Do not vent refrigerant into the atmosphere — it is harmful to the environment and illegal in many jurisdictions. If you are unsure about any step, stop and consult a certified technician.
Step-by-Step Recharge Process
Follow these steps in order. Rushing the process can lead to overcharging, which is just as detrimental as undercharging.
Start the Engine and Turn On the AC
Run the engine at idle and set the AC to maximum cold with the fan on high. Open all vents and set the system to recirculate. Let it run for at least five minutes so the system stabilizes.
Connect the Manifold Gauges
With the system running, connect the low-side (blue) coupler to the low-side service port and the high-side (red) coupler to the high-side port. Read the pressures and compare them to the manufacturer's specification for the ambient temperature. Low low-side pressure combined with low high-side pressure confirms an undercharge.
Prepare the Refrigerant Can
If your kit includes a separate charging hose, connect it to the refrigerant can and purge the line briefly to remove air. Follow the kit instructions for piercing the can. Keep the can upright to avoid drawing liquid refrigerant into the compressor.
Add Refrigerant Slowly
With the engine running and AC on max, open the low-side valve on the manifold gauge set. Add refrigerant in short bursts, monitoring the gauges and the vent temperature. Stop periodically to let the system equalize. Never exceed the manufacturer's specified charge weight.
Monitor Pressures and Vent Temperature
As you add refrigerant, watch the low-side pressure rise toward the specification. The vent temperature should drop noticeably. Once the pressures are within range and the vent air is cold, close the valve and disconnect the hose.
Disconnect and Verify
Close all valves, disconnect the gauges in reverse order, and replace the service port caps. Take a final vent temperature reading. A properly charged system typically delivers air in the range specified by the manufacturer — often around 40°F to 45°F at the center vent under normal conditions.
Why a Leak Check Comes First
If your system is low on refrigerant, it did not evaporate on its own — it leaked out. Adding refrigerant without addressing the leak is a temporary fix at best. The refrigerant will escape again, and you will be back to square one within weeks or months.
Before recharging, perform a basic leak inspection. Look for oily residue around fittings, hoses, and the compressor — refrigerant oil often escapes with the gas and leaves a visible trace. If your recharge kit includes UV dye, add it and run the system for a few days, then inspect with a UV flashlight. For more detailed guidance on leak diagnosis, see our article on how to fix a leak in car AC.
If a leak is confirmed, repair it before recharging. Common leak points include O-rings at hose connections, the condenser (prone to stone damage), and the compressor shaft seal. A professional leak test with nitrogen or a vacuum pump is the most thorough approach.
DIY Recharge vs Professional Service
Deciding whether to recharge your car AC yourself or take it to a shop depends on your comfort level, the refrigerant type, and whether a leak is present.
| Consideration | DIY Recharge | Professional Service |
|---|---|---|
| Refrigerant type | Best suited for R-134a systems | Handles R-134a and R-1234yf |
| Leak detection | Basic (visual, UV dye) | Comprehensive (vacuum, nitrogen, electronic) |
| System evacuation | Not performed | Vacuum pump removes moisture and air |
| Charge accuracy | Approximate (pressure-based) | Exact (weight-based) |
| Best for | Minor top-offs, confident DIYers | Leaks, R-1234yf, full service |
A DIY recharge is a reasonable option for a minor top-off on an R-134a system that you suspect is slightly low. However, if the system is completely empty, if a leak is present, or if your vehicle uses R-1234yf, professional service is the safer and more effective choice. A technician will evacuate the system, repair leaks, and recharge by weight for precise results.
Aftercare and Maintenance Tips
Once your system is recharged and blowing cold, a few simple habits will help it stay that way:
- Run the AC regularly: Even in cooler months, run the AC for a few minutes each week. This circulates refrigerant oil and keeps seals lubricated, preventing leaks.
- Keep the condenser clean: The condenser sits in front of the radiator and accumulates bugs, leaves, and road debris. Gently rinse it with a garden hose a few times a year. For broader coil-cleaning guidance, see our guide on how to clean the coils of an air conditioner.
- Replace the cabin air filter: A clogged cabin filter reduces airflow and makes the system work harder. Check it annually and replace as needed.
- Listen for unusual noises: Squealing or grinding from the compressor area can indicate a failing clutch or bearing. Address these early before they cause larger problems.
- Schedule an annual check: A professional inspection each spring can catch small leaks and pressure issues before they become major repairs.
If you notice the AC performance declining again within a few weeks of recharging, a leak is almost certainly the culprit. Do not simply add more refrigerant — investigate and repair the leak first. For related issues, our guide on car AC blows cool but not cold air covers additional diagnostic steps.
Frequently Asked Questions
How do I know if my car AC needs recharging?
Common signs include weak airflow, warm air from the vents, rapid compressor cycling, and visible bubbles in the sight glass. A manifold gauge reading below the manufacturer's specification confirms low refrigerant. If the system works while driving but turns warm at idle, an undercharge is likely.
Can I recharge my car AC system myself?
Yes, basic recharging with a DIY kit is possible for vehicles using R-134a. However, if your car uses R-1234yf or the system has a leak, professional service is strongly recommended due to safety and equipment requirements. Always use a manifold gauge set to avoid overcharging.
How often should a car AC system be recharged?
A properly sealed system typically does not need recharging for several years. If you need a recharge more than once every two to three years, a leak is likely present and should be repaired. Regular use of the AC keeps seals lubricated and helps prevent leaks.
What is the difference between R-134a and R-1234yf?
R-1234yf is the newer refrigerant with a much lower global warming potential. It is required in most vehicles manufactured after 2017. The two refrigerants are not interchangeable, and using the wrong type can damage the system. Check your owner's manual or under-hood sticker to confirm the correct type.
Is it safe to add refrigerant without checking for leaks first?
It is not ideal. Adding refrigerant without addressing the underlying leak provides only temporary relief. The refrigerant will escape again, and repeated top-offs can introduce moisture and air into the system, reducing performance and potentially damaging components. Perform a basic leak inspection or use UV dye before recharging.
Can I use a recharge kit with leak sealer?
Leak sealer products can be effective for very small leaks, but they are not a permanent fix and can sometimes clog components in the system. They are best used as a short-term measure. If you know where the leak is, a proper repair is always the better long-term investment.
Recommended Car AC Recharge Kits and Tools
⚠️ AFFILIATE DISCLOSURE: This website contains affiliate links. As an Amazon Associate, we earn from qualifying purchases. If you make a purchase through these links, we may receive a small commission at no additional cost to you. Read our full affiliate policy.
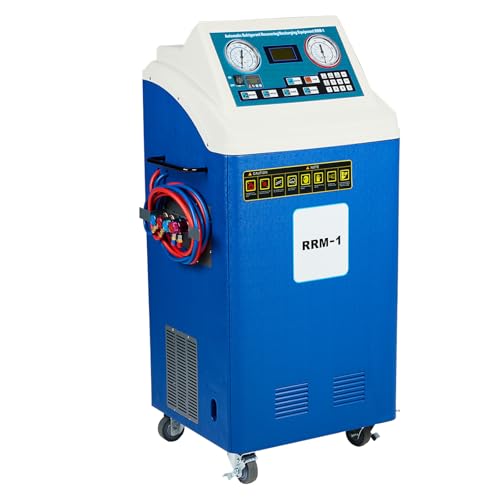
R134a and R1234yf Refrigerant Recovery, Recycling, and Recharging Machine | AC-Dual Fully Automatic Refrigerant Recovery Machine for Standard Automotive A/C Systems
Check price on Amazon
Universal Under Dash Electric Air Conditioner Heating and Cooling 12 Volt DC 10000 BTU A/C Unit Kit, AC Heater System with Evaporator Condenser Compressor for Car RV Van Truck ATV Pickup Tractor
Check price on Amazon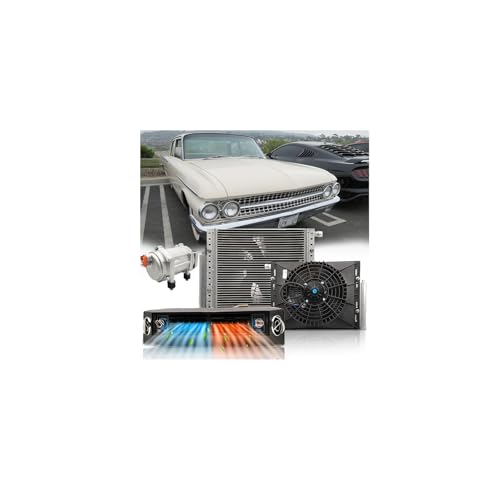
12V 12000 BTU Under Dash Air Conditioner with Heating, Universal 12 Volt A/C Kit System, Electric 12V DC Underdash AC Unit Quiet, Fast Cooling for Classica Car, Automotive, Truck, ATV, Pickup,Tractor
Check price on Amazon
12V Under Dash Air Conditioner 137000 BTU, Universal 12 Volt A/C Kit System, Electric 12V DC Underdash AC Unit Quiet, Fast Cooling &Heating for Classica Car, Automotive, Truck, ATV, Pickup,Tractor
Check price on Amazon
Universal 12 Volt DC Under Dash Air Conditioner Heating and Cooling 10000 BTU A/C Unit Kit, Electric Heater System with Evaporator Condenser Compressor for Classical Car Van Truck ATV Pickup Tractor
Check price on Amazon
Vehicle AC Refrigerant | R134a Replacement | 3 Cans with Piercing Top for AC Recharging (21oz with Stop Leak)
Check price on AmazonDisclaimer
Some of the content on this site uses AI assistance. Information is provided for educational purposes only. We are not responsible for any losses resulting from the use of this information. By using this site, you waive any right to bring legal claims against us arising from your use of the information provided. If you do not agree, please do not use this site. Read the full disclaimer.