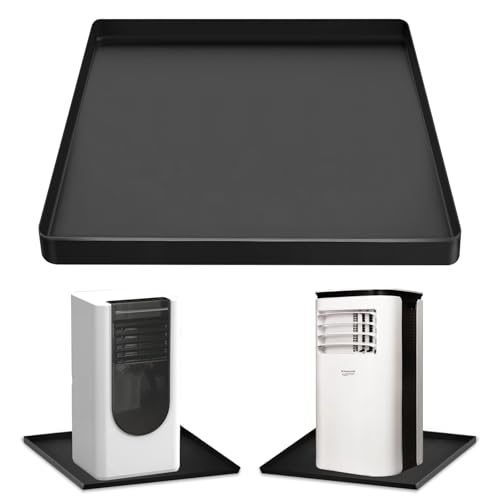
AC Drip Pan Replacement: The Complete Guide
An air conditioner's drip pan — also called a condensate pan or drain pan — is the shallow tray that sits beneath the indoor evaporator coil and collects the water that condenses out of the air as the system cools your home. It is one of the least glamorous parts of an HVAC system, but when it fails, the consequences are immediate: water stains on ceilings, soggy insulation, rusted cabinet panels, and in severe cases structural damage or mold growth. If you have noticed water pooling around the indoor unit or dripping from the ceiling, a worn or cracked pan is one of the first components to investigate.
Replacing an AC drip pan is a manageable repair for a confident DIY homeowner when the pan is accessible, but it is also a job where doing it wrong can turn a small leak into a much larger water-damage problem. This guide walks you through how the pan works, how to recognize the signs that replacement is due, how to choose the right pan for your system, and how to install it correctly so the condensate drains where it should. If you are still confirming that the water you are seeing is coming from the pan rather than a clogged drain line or a frozen coil, start with our broader troubleshooting reference on air conditioner leaking water solutions before you commit to a replacement.
What This Guide Covers
- What an AC drip pan does and why it fails
- Signs that your drip pan needs replacement
- Types of drip pans and how to choose the right one
- Tools and materials you will need
- Step-by-step replacement process
- Preventing future pan problems
- Frequently asked questions
What Does an AC Drip Pan Actually Do?
As warm household air moves across the cold evaporator coil, moisture in the air condenses on the coil's fins in the same way water beads on a glass of ice water. That condensate drips downward, and the drip pan catches it. From the pan, water flows — usually through a sloped bottom and a drain fitting — into a condensate drain line that carries it away to a floor drain, a condensate pump, or the outdoors.
The pan itself is therefore doing two jobs: it captures the water, and it directs the water toward the drain. A pan that has lost its slope, developed a crack along a seam, or rusted through at the drain fitting will still catch water but will no longer move it out of the system. Many replacement pans are made from galvanized steel, ABS plastic, or molded polymer, and each material behaves differently in a wet, constantly humid environment. If you want to understand the component sitting directly above the pan, our explainer on the air conditioner evaporator coil covers how the coil produces condensate in the first place.
Key point: The drip pan is a passive component, but it sits inside a cabinet that is often dark and damp. Small leaks frequently go unnoticed for weeks, which is why water damage from a failed pan is usually discovered late — after the ceiling stain or the musty smell appears.
Signs Your AC Drip Pan Needs Replacement
Not every wet spot near an air handler means the pan is finished. Sometimes the pan is intact but the drain line is clogged, the pan is not level, or the coil is freezing and then thawing in large volumes. Still, the following symptoms point strongly toward a pan that should be replaced rather than patched:
- Visible cracks, splits, or holes in the pan floor or side walls, especially near seams and the drain fitting.
- Rust-through or severe corrosion on a metal pan, which creates pinhole leaks that are difficult to seal reliably.
- Standing water that does not drain even after you clear the drain line, suggesting the pan bottom has lost its slope or the fitting is cracked.
- Water stains on the cabinet or ceiling below the indoor unit, which often indicate the pan is overflowing or leaking from its underside.
- A musty or mildew odor near the air handler, which can signal long-term moisture trapped in or under a failing pan.
- Previous patch attempts using tape, sealant, or epoxy that have begun to peel — once a pan has been patched, a second failure is usually not far behind.
If the pan looks intact but the unit is still leaking, the problem may lie elsewhere. Our article on an air conditioner leaking water inside the wall explores the other common paths water takes when the pan is not the culprit, and our guide to an air conditioner leak repair covers general leak diagnosis before you start disassembling anything.
Types of AC Drip Pans and How to Choose
Drip pans are not universal. The right replacement depends on whether you have a vertical (upflow) or horizontal air handler, the exact footprint of the coil cabinet, and the position of the drain connection. The three broad categories below cover most residential systems.
| Pan Type | Best For | Notes |
|---|---|---|
| Entry-level galvanized steel pan | Standard vertical air handlers in dry climates | Solid build but prone to corrosion over time; requires a well-sloped installation and a good drain fitting |
| Mid-range ABS or polymer pan | Most residential upflow and horizontal cabinets | Resists rust, molded slope directs water to the drain, easier to drill for a new fitting position |
| Premium molded pan with integrated drain | High-humidity climates and hard-to-access attic installations | Feature-rich for its class, with reinforced ribs and a pre-formed drain outlet; a worthwhile investment where access for future service is difficult |
When ordering, measure the inside dimensions of the coil cabinet and the distance from the cabinet front to the drain connection. Buy a pan that matches the cabinet footprint as closely as possible — a pan that is too small will miss condensate that drips off the edge of the coil, and a pan that is too large may not fit under the coil without modifying the cabinet. Also confirm the drain outlet diameter matches your existing drain line or the adapter you plan to use. For systems where the drain relies on gravity to a distant point, verify the pan's built-in slope runs toward the outlet rather than away from it.
If your unit is mounted in an attic or another space where a pan overflow would be especially damaging, consider pairing the replacement pan with a secondary pan or a float switch that shuts the system down before water escapes. Our article on an air conditioner in the attic discusses the specific risks of that installation location, and our guide to air conditioner pipe dripping water inside helps you distinguish pan overflow from a dripping refrigerant or drain line.
Tools and Materials You Will Need
- Replacement drip pan sized to your cabinet
- Adjustable wrench and screwdrivers (Phillips and flathead)
- Nut driver set for cabinet screws
- PVC primer and cement if you are reworking a glued drain connection
- Thread seal tape or a rubber drain gasket
- Flexible drain tubing or a short length of PVC pipe
- Level
- Shop vacuum and towels for cleanup
- Nitrile gloves and safety glasses
- Optional: pan treatment tablets or a condensate pan strip to inhibit biological growth
Step-by-Step AC Drip Pan Replacement
The process below assumes a standard upflow air handler with an accessible coil cabinet. Horizontal installations and attic units follow the same logic but may require additional support for the coil while the pan is out.
- Turn off power to the unit. Shut off the air conditioner at the thermostat and then at the dedicated breaker or disconnect switch serving the indoor unit. Confirm the blower and outdoor unit are fully off before you open any panels.
- Remove the access panel and inspect. Take off the coil cabinet panel to expose the evaporator coil and the pan beneath it. Photograph the drain connection and any wiring before you disconnect anything.
- Disconnect the drain line. Loosen the fitting or cut the PVC at a convenient joint. Have towels and a shallow tray ready — the pan and line will hold residual water.
- Support the coil if necessary. In some cabinets the coil rests on rails above the pan. If removing the pan requires lifting the coil, support it securely with blocks or a strap so it does not shift or stress the refrigerant lines.
- Slide out the old pan. Remove any retaining screws and work the pan free. Note how it was oriented and where the drain outlet sat relative to the cabinet.
- Clean the cabinet floor. Vacuum out debris, rust flakes, and standing water. If the cabinet floor is rusted, treat it with a rust-inhibiting coating before installing the new pan.
- Test-fit the new pan. Set the pan in place and check that it sits level front-to-back and side-to-side, with the built-in slope running toward the drain outlet. Use shims if the cabinet floor is uneven.
- Connect the drain. Install the drain fitting with a gasket or thread seal tape, then reconnect the drain line. If you are gluing PVC, let the cement cure fully before adding water.
- Secure the pan and reassemble. Replace retaining screws, reinstall the coil if you lifted it, and refit the access panel.
- Test the system. Restore power, run the air conditioner for at least 30 minutes, and check the pan and drain connection for drips. Pour a cup of water into the pan to confirm it flows freely to the drain.
Safety note: If the refrigerant lines must be moved to remove the pan, stop and call a licensed technician. Bending or kinking a line set can cause a refrigerant leak, and refrigerant handling is regulated. If you are unsure whether your installation allows the pan to come out without disturbing the lines, our guide on the condenser and air handler explains how the indoor and outdoor halves connect.
Preventing Future Drip Pan Problems
A replacement pan will last far longer if the conditions that ruined the old one are corrected. Three habits make the biggest difference:
- Keep the drain line clear. Flush the condensate line at the start of each cooling season. A clogged line backs water up into the pan, and standing water accelerates corrosion and biological growth.
- Check the pan slope annually. Cabinets settle and pans can shift. A pan that was level at installation may develop a low spot that traps water; re-shim as needed.
- Treat the pan for growth. Pan tablets or strips slow the algae and mold that clog drains and stain pans. Avoid harsh chemicals that can attack plastic or galvanized coatings.
It also helps to know the early warning signs of a failing pan before water reaches the ceiling. Our guide on an air conditioner leaking water through the ceiling describes what to do when a leak has already spread, and our article on air conditioner leaking water in the basement covers below-grade installations where pan failures are especially common.
Frequently Asked Questions
How long does an AC drip pan last?
A galvanized steel pan in a well-maintained system may last a decade or more, while plastic pans often outlast metal because they do not rust. Pans in humid climates or with chronically clogged drains fail sooner. Inspect the pan annually and replace it at the first sign of cracks or rust-through.
Can I repair a cracked drip pan instead of replacing it?
Small cracks can sometimes be sealed temporarily with epoxy or a pan patch, but repairs rarely hold in a constantly wet environment. Because a failed pan can cause significant water damage, replacement is the more reliable long-term choice.
Why does water stand in the pan even after I clear the drain?
If the drain line is clear but water still pools, the pan has likely lost its slope or the drain fitting is partially blocked by debris at the pan floor. Check that the pan slopes toward the outlet and that the fitting opening is not obstructed.
Do I need a professional to replace an AC drip pan?
If the pan is accessible and the coil does not need to be moved, many homeowners can complete the replacement themselves. If refrigerant lines must be disturbed, the unit is in a tight attic space, or you are unsure about the drain connection, hire a licensed HVAC technician.
What size drip pan do I need?
Measure the inside footprint of the coil cabinet and match the pan to those dimensions, then confirm the drain outlet position and diameter match your drain line. A pan that matches the cabinet footprint and slopes toward the drain will capture condensate most effectively.
Replacing a failed drip pan is one of the more straightforward HVAC repairs, and it protects the rest of your home from water damage that is far more disruptive than the repair itself. Once the new pan is in and the drain is flowing, you can turn your attention back to keeping the system efficient — our guide on air conditioner not cooling solutions is a useful next read if the unit has been struggling while the leak was present.