The evaporator coil is the part of your air conditioning system that actually removes heat and moisture from the indoor air. It sits inside the air handler or furnace cabinet, hidden behind panels, yet it carries most of the responsibility for whether your rooms feel cool and dry. When homeowners report weak airflow, ice on the refrigerant lines, or water pooling near the air handler, the evaporator coil is often the first component a technician inspects. This guide walks through how the coil works, how it interacts with the rest of the system, and what you can do to protect it.
What Is an Air Conditioner Evaporator Coil?
The evaporator coil is a network of copper or aluminum tubing wrapped in thin metal fins, shaped like an A-frame or a slab depending on the cabinet. Low-pressure refrigerant enters the coil as a cold mixture of liquid and vapor. As indoor air is pulled across the fins by the blower, the refrigerant absorbs heat and boils into a gas. That phase change is what produces cooling. Moisture in the air condenses on the cold fins and drains away through the condensate pan and line.
The coil lives on the indoor side of the system, paired with the blower and filter. Its outdoor counterpart, described in the condenser and air handler overview, releases the absorbed heat to the outside air. Together the two coils form the refrigerant loop that makes residential cooling possible.
Key idea: The evaporator coil does not generate cold air. It transfers heat from your indoor air into the refrigerant. If the coil is dirty, blocked, or starved of refrigerant, the entire cooling cycle becomes inefficient.
How the Evaporator Coil Fits Into the Cooling Cycle
Understanding the sequence helps you interpret symptoms later. The cycle runs like this:
- The compressor pressurizes refrigerant and sends it to the outdoor condenser coil.
- The condenser releases heat and condenses the refrigerant into a liquid.
- A metering device (often a thermostatic expansion valve) drops the pressure, chilling the refrigerant.
- The cold refrigerant enters the indoor evaporator coil.
- The blower pushes warm room air across the coil; heat is absorbed and the refrigerant evaporates.
- The warmed gas returns to the compressor, and the loop repeats.
Because the evaporator coil is the point of contact with your indoor air, it also becomes the collection point for dust, pet hair, and biological growth. That is why coil condition directly affects both comfort and indoor air quality.
Common Evaporator Coil Problems
Most coil issues fall into a few predictable categories. Recognizing them early can prevent compressor damage, which is a far larger repair.
1. Frozen Coil
A layer of ice on the coil or the refrigerant lines usually means airflow is restricted or refrigerant is low. Common triggers include a clogged filter, a dirty coil, a failing blower, or a refrigerant leak. If your system is freezing outside or the indoor coil ices over, switch the unit off, let it thaw completely, and address the root cause before restarting.
2. Dirty or Clogged Coil
Dust and lint insulate the fins, so heat transfer drops and the blower has to work harder. Over time the system runs longer, cools less, and strains the compressor. Regular filter changes and an annual coil cleaning are the most effective preventive measures.
3. Refrigerant Leaks
Corrosion, vibration, and formicary corrosion can open pinholes in the coil tubing. Symptoms include weak cooling, hissing sounds, and ice formation. A technician can confirm the leak with pressure testing and electronic detection. If the system is on but producing no cold air, low refrigerant is one of several possible causes worth checking.
4. Water Leaks and Drain Issues
The coil condenses moisture, which must flow to the drain pan and out through the condensate line. A clogged drain, a cracked pan, or a poorly sloped line can cause water to pool. If you notice pipes dripping water inside, inspect the drain path before assuming the coil itself has failed.
5. Musty Odors
Moist fins are an ideal surface for mold and mildew. Persistent musty smells when the blower runs usually indicate biological growth on the coil or in the drain pan. Professional cleaning with an approved coil cleaner resolves most cases.
How to Clean an Evaporator Coil
Cleaning is the highest-value maintenance task a homeowner can perform, short of calling a technician for refrigerant work. The steps below apply to most residential air handlers.
- Turn off power at the thermostat and the breaker serving the air handler.
- Remove the access panel to expose the coil. Some cabinets require removing the filter rack first.
- Inspect the coil for ice, heavy debris, or corrosion. If ice is present, let it thaw before cleaning.
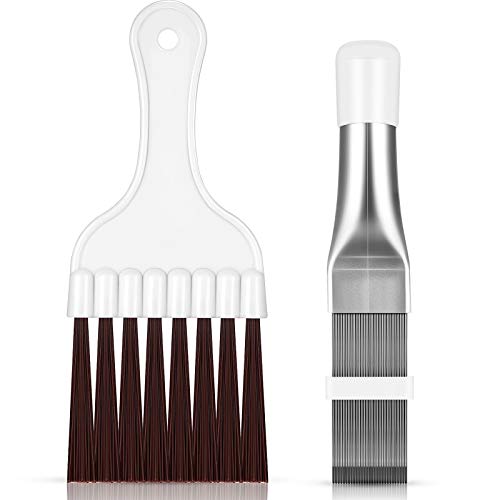
- Brush gently with a soft coil brush in the direction of the fins. Bent fins can be straightened with a fin comb.
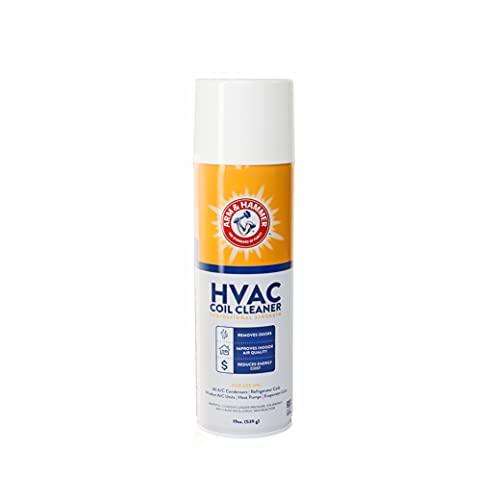
- Apply a no-rinse coil cleaner approved for indoor use, following the label directions. Avoid harsh chemicals that can corrode aluminum.
- Rinse carefully if the cleaner requires it, and confirm the condensate pan and drain are clear.
- Reassemble and restore power, then run the system and check for proper airflow and drainage.
If the coil is heavily contaminated, has physical damage, or the cleaning requires disassembly beyond the access panel, it is better to schedule professional service. A technician can clean in place with pressurized tools and verify the refrigerant charge afterward.
Evaporator Coil vs Condenser Coil
These two coils are frequently confused because both are fin-and-tube heat exchangers. Their roles are opposite.
| Feature | Evaporator Coil | Condenser Coil |
|---|---|---|
| Location | Indoors, in air handler or furnace | Outdoors, in the condenser unit |
| Function | Absorbs heat and moisture from indoor air | Releases heat to outdoor air |
| Refrigerant state | Boils from liquid to gas | Condenses from gas to liquid |
| Typical symptoms when failing | Ice, water leaks, weak cooling, musty odor | High head pressure, hot air from outdoor unit, compressor strain |
| Maintenance focus | Filter changes, coil cleaning, drain checks | Clearing debris, rinsing fins, checking fan operation |
For a closer look at the outdoor half of the system, see the guide to air conditioner condenser units.
Signs You May Need a Replacement Coil
Not every coil problem requires replacement. Repair is often reasonable when the issue is a single leak, a clogged drain, or surface contamination. Replacement becomes the better path in these situations:
- Multiple leaks across the coil tubing, especially with formicary corrosion.
- Physical damage such as crushed fins or cracked tubes.
- A coil that no longer matches the refrigerant type used by the system.
- Repeated freeze-ups that have already stressed the compressor.
- A system old enough that the coil is at the end of its service life.
When replacement is needed, the new coil must match the outdoor unit, the refrigerant type, and the airflow rating of the air handler. A mismatched coil can reduce efficiency and void warranties. If your broader system is not cooling effectively, a technician can help determine whether the coil, the compressor, or another component is the primary cause.
Evaporator Coil Maintenance Schedule
A simple routine prevents most coil failures. The schedule below reflects common manufacturer guidance for residential systems.
- Monthly: Inspect the air filter and replace or clean it when soiled.
- Every three months: Check the condensate pan and drain line for standing water or algae growth.
- Twice per year: Look for ice on the refrigerant lines and confirm airflow at supply registers is consistent.
- Annually: Schedule professional maintenance that includes coil inspection, cleaning, and refrigerant charge verification.
- After major renovations: Check the coil for drywall dust and construction debris, which can clog fins quickly.
Choosing a Replacement Evaporator Coil
Replacement coils are categorized by form factor, refrigerant compatibility, and build quality. The table below uses tier descriptors rather than numeric figures so the guidance stays relevant over time.
| Tier | Best For | Characteristics |
|---|---|---|
| Entry-level | Budget-conscious replacements in older systems nearing end of life | Standard copper tubing, basic fin coating, adequate for dry climates |
| Mid-range | Most residential replacements | Improved fin geometry, better drainage design, enhanced corrosion protection |
| Premium | Coastal homes or high-humidity regions | Advanced corrosion-resistant coating, heavier gauge tubing, optimized airflow |
| High-end tier | High-efficiency systems with matched components | Precision-matched to specific outdoor units, low pressure drop, extended warranty coverage |
When comparing options, prioritize compatibility with your existing outdoor unit and refrigerant type over tier alone. A premium coil paired with a mismatched system will underperform an entry-level coil that is correctly matched. Ask your contractor to confirm the coil's AHRI reference number when applicable.
Repair or Replace: Decision Framework
Use the following questions to guide the decision with your technician:
- Is the leak isolated to one location and repairable without cutting into the coil?
- Is the existing system still supported by the manufacturer for replacement parts?
- How old is the outdoor unit, and how many years of service remain?
- Has the compressor already been stressed by repeated freeze-ups or low charge?
- Would a matched coil improve efficiency enough to justify the additional work?
In many cases the most balanced outcome is to replace the coil while the compressor is still healthy. If the outdoor unit is already near the end of its expected life, replacing both components together often makes more sense than investing in one half of an aging system. For a broader view of system-level tradeoffs, the HVAC system overview is a useful companion read.
Indoor Air Quality and Coil Health
The evaporator coil is wet for much of the cooling season, which makes it a natural surface for dust and biological growth. Keeping the coil clean supports two goals at once: efficient heat transfer and cleaner indoor air. Consider these practices:
- Use a filter with a MERV rating appropriate for your blower; very high MERV filters can restrict airflow if the system is not designed for them.
- Address persistent humidity with proper ventilation or a dehumidifier rather than lowering the thermostat further.
- Schedule duct cleaning when registers show visible debris, since contaminants that bypass the filter often settle on the coil.
- Fix water leaks promptly; standing water in the drain pan accelerates biological growth.
If your system is blowing air but not cooling, a combination of airflow checks and coil inspection usually reveals the cause quickly.
Frequently Asked Questions
What does an air conditioner evaporator coil do?
It absorbs heat and moisture from the indoor air as refrigerant passes through it. This is the component that actually cools your home, while the condenser coil releases that heat outdoors.
How often should an evaporator coil be cleaned?
A routine filter change every one to three months keeps most debris off the coil. A deeper coil cleaning is typically recommended once a year as part of seasonal maintenance, and sooner if you notice reduced airflow or musty odors.
Why does the evaporator coil freeze up?
Frozen coils usually point to restricted airflow from a clogged filter or dirty coil, low refrigerant charge from a leak, or a faulty blower. The ice itself is a symptom, so the underlying cause must be corrected after thawing.
Can I replace an evaporator coil myself?
Coil replacement involves refrigerant recovery, brazing, vacuuming, and charging, which are regulated tasks. Most homeowners should hire a licensed HVAC technician, while cleaning and filter maintenance remain suitable DIY tasks.
How long does an evaporator coil last?
With regular filter changes and annual service, a quality coil commonly lasts ten to fifteen years. Corrosive coastal air, poor filtration, and neglected maintenance shorten that lifespan.