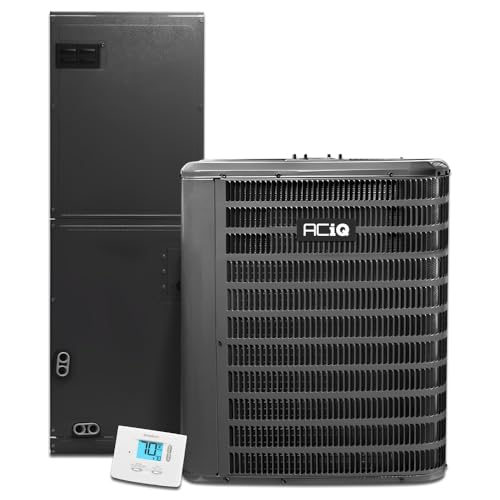
Air Conditioning Unit and Installation: The Complete Buyer's Guide
Understand how AC units and professional installation work together. Learn the factors that shape system selection, installation scope, and long-term performance so you can choose with confidence.
Explore the GuideWhy this guide matters: An air conditioning system is only as good as its installation. Even a well-specified unit can underperform if it is incorrectly sized, poorly connected, or commissioned without proper testing. This guide walks through the entire picture — from matching capacity to your home to understanding the installation stages — so you can make an informed decision and ask the right questions before committing.
Whether you are replacing an aging system or adding cooling for the first time, the information below will help you evaluate options on their merits rather than on marketing claims.
Key Factors That Shape Your AC Project
Before comparing specific models, it helps to understand the variables that influence which system suits your home. These factors apply to every installation, regardless of the equipment tier you ultimately select.
Home Size and Layout
The square footage of your home is the starting point, but layout matters just as much. Open-plan spaces, vaulted ceilings, and multi-story designs change how air distributes and how much capacity is required.
- Single-room cooling vs. whole-home coverage
- Number of windows and their orientation
- Existing ductwork condition and accessibility
Climate and Insulation
Homes in hotter climates need systems that can handle sustained load, while well-insulated homes may require less capacity. A proper load calculation accounts for local climate data and building envelope quality.
- Outdoor temperature extremes
- Attic and wall insulation levels
- Air sealing and draft prevention
System Type and Tier
Different system families suit different homes and budgets. Within each family, equipment is positioned across tiers — entry-level, mid-range, premium, and flagship — with meaningful differences in efficiency, noise, and features.
- Central ducted systems for whole-home coverage
- Ductless mini-splits for targeted zones
- Window and portable units for single rooms
Installation Scope
The installation itself is a major part of any project. Scope ranges from a straightforward replacement using existing infrastructure to a full new installation with new line sets, electrical work, and duct modifications.
- Replacement vs. new installation
- Electrical panel capacity and dedicated circuits
- Permits, inspections, and local code compliance
AC System Types and Market Positioning
Each system family occupies a different position in the market. The table below maps common configurations to their typical tier positioning and best-use scenarios. Tiers describe relative equipment positioning, not absolute figures.
| System Type | Tier Positioning | Best For | Installation Complexity |
|---|---|---|---|
| Window AC | Entry-level | Single rooms, renters, temporary cooling | Low — plug-in or simple bracket mount |
| Portable AC | Entry-level to mid-range | Rooms without window access, flexible placement | Low — vent kit and drainage setup |
| Ductless Mini-Split | Mid-range to premium | Zoned comfort, homes without ducts, additions | Moderate — line set, electrical, mounting |
| Central Ducted AC | Mid-range to flagship | Whole-home cooling with existing ductwork | High — ductwork, electrical, refrigerant lines |
| Packaged Unit | Mid-range to commercial-grade | Rooftop or slab installations, limited indoor space | High — structural and utility coordination |
If you are cooling a commercial space, review the considerations for an office building AC system, which typically involves larger capacity, zoning, and stricter ventilation requirements than residential projects.
Understanding Sizing and Efficiency
Correct sizing is the single most important technical decision in any AC project. An oversized unit cools quickly but cycles on and off frequently, which hurts humidity control and component longevity. An undersized unit runs continuously and struggles to maintain setpoint during peak conditions.
Capacity is measured in BTU (British Thermal Units) and should be determined through a proper load calculation — not a rule-of-thumb guess. Efficiency is expressed through ratings such as SEER2 and EER2, with higher values indicating more efficient operation. Modern equipment is also transitioning to lower-GWP refrigerants, which is worth confirming when comparing models.
The Installation Process, Step by Step
Professional installation follows a logical sequence. Understanding these stages helps you evaluate quotes, schedule the work, and verify that nothing has been skipped.
- Assessment and load calculation. The contractor evaluates your home's layout, insulation, windows, and existing HVAC infrastructure, then calculates the required capacity.
- System selection and proposal. Based on the load calculation, the contractor recommends equipment options across tiers and outlines the installation scope, including any ductwork or electrical modifications.
- Permits and scheduling. Many jurisdictions require permits for HVAC replacement or new installations. The contractor typically handles permitting and arranges inspection.
- Removal of old equipment (if applicable). Existing units and refrigerant are removed and disposed of according to environmental regulations.
- Site preparation. This includes mounting pads or brackets, cutting openings for line sets, and preparing electrical connections.
- Equipment placement and connections. Indoor and outdoor units are positioned, refrigerant lines are run and brazed, condensate drainage is routed, and electrical wiring is completed.
- Vacuum and charge. The refrigerant circuit is evacuated to remove moisture and non-condensables, then charged to the manufacturer's specification.
- Commissioning and testing. The system is started, airflow is balanced, refrigerant pressures are verified, and controls are configured. The installer should walk you through operation and maintenance basics.
For projects that involve adding cooling to an existing forced-air system, the scope may overlap with heating equipment decisions. Reviewing the considerations around adding air conditioning to ducted heating can clarify how the two systems share infrastructure.
Comparing Installation Scenarios
Not every project is the same. The table below outlines how installation scope varies across common scenarios.
| Scenario | Typical Scope | What to Verify |
|---|---|---|
| Replacing an existing central system | Reuse existing ductwork and electrical where compliant; new line set and equipment | Duct condition, refrigerant line compatibility, electrical capacity |
| New central AC with existing ducts | Add outdoor condenser, indoor coil, line set, and controls | Duct sizing and sealing, thermostat wiring, condensate route |
| Ductless mini-split installation | Mount indoor head(s), run line set through wall, set outdoor unit | Wall penetration sealing, drainage slope, electrical circuit |
| Whole-home new construction | Full system design, ductwork, electrical, and commissioning | Load calculation, duct design, permit and inspection schedule |
How to Evaluate Installation Proposals
When comparing proposals, look beyond the equipment list. A complete proposal should include the load calculation summary, equipment model numbers, installation scope, permit responsibility, warranty terms, and a clear commissioning checklist.
Ask about the contractor's licensing and insurance, and confirm whether the work will be performed by employees or subcontractors. For larger projects, it is reasonable to request references from similar installations completed in the past year.
Balanced Approach
Mid-range equipment paired with careful installation typically delivers the best long-term satisfaction. The emphasis is on correct sizing, sealed ducts, and proper commissioning rather than on premium features.
Comfort and Efficiency
Premium and flagship tiers offer variable-speed operation, quieter outdoor units, and advanced controls. These benefits are most noticeable in homes with strict comfort requirements or long cooling seasons.
Common Installation Oversights
Even experienced contractors can cut corners under time pressure. Watch for these common issues during and after installation:
- Skipped load calculation: Sizing based on guesswork instead of room-by-room assessment.
- Inadequate vacuum: Failing to evacuate the refrigerant circuit properly, which shortens compressor life.
- Poor drainage: Condensate lines without proper slope or traps, leading to water damage.
- Unsealed penetrations: Gaps around line sets and ductwork that compromise efficiency.
- No commissioning report: Leaving without verifying airflow, refrigerant charge, and control settings.
If your project involves a replacement of an older system, understanding what drives air conditioning system replacement decisions can help you plan the transition and avoid surprises mid-project.
Frequently Asked Questions
How long does a typical AC installation take?
A straightforward replacement of a central system is often completed in one day. New installations, ductless multi-zone systems, and projects requiring electrical upgrades or ductwork modifications can take two to three days or more, depending on scope and inspection scheduling.
Do I need a permit for AC installation?
Permit requirements vary by jurisdiction. Many areas require permits for new installations and replacements, primarily to verify electrical and refrigerant handling compliance. Your contractor should confirm local requirements and typically handles the permitting process.
Can I install an AC unit myself?
Window and portable units are designed for consumer installation. Central and ductless systems involve refrigerant handling, electrical connections, and code compliance, and generally require licensed professionals. Improper installation can void warranties and create safety hazards.
What should I check after installation is complete?
Confirm that the system maintains setpoint, airflow is balanced across rooms, condensate drains properly, and outdoor unit is level and clear of obstructions. Ask for the commissioning report, warranty registration confirmation, and a walkthrough of filter maintenance and thermostat programming.
How does installation affect system lifespan?
Installation quality has a direct impact on longevity. Correct sizing, proper vacuum and charge, sealed ducts, and adequate airflow reduce stress on the compressor and other components. Systems installed to manufacturer specifications consistently outlast poorly installed ones.
Preparing for Your Project
A successful installation starts before the crew arrives. Clear access to indoor and outdoor work areas, remove valuables from work zones, and confirm parking and utility access. If ductwork will be modified, expect some dust and noise — plan accordingly, especially if you work from home.
Keep a folder with the proposal, equipment model numbers, permit documentation, and commissioning report. This record is valuable for warranty claims and future service visits. If you are comparing this project against other home upgrades, reviewing central air conditioning system installation considerations can help you frame the broader investment.