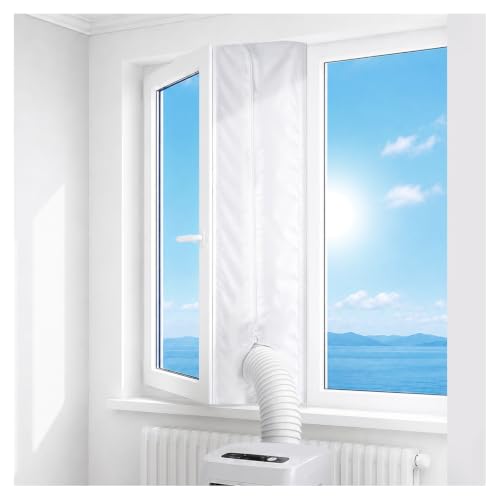
Casement Window Air Conditioner Installation Kit: Complete Buyer's Guide
Everything you need to know before choosing a casement AC installation kit — components, compatibility, sizing, installation steps, and how to pick the right tier for your window.
Casement windows are a popular architectural feature in many North American homes, especially in older houses, condominiums, and apartments where they offer excellent ventilation and a clean outward-opening profile. However, that same outward-swinging hinge design makes them incompatible with standard double-hung window air conditioners. A casement window air conditioner installation kit solves this problem by providing a dedicated mounting system that supports the unit, seals the opening, and keeps the window secure.
If you already know that a casement window air conditioner is the right cooling solution for your space, the next critical decision is the installation kit. This guide walks you through every component, compatibility check, and installation consideration so you can buy with confidence.
What Is a Casement Window AC Installation Kit?
A casement window air conditioner installation kit is a bundled set of hardware designed specifically for mounting a casement-style AC unit into a window that opens outward on a vertical hinge. Unlike a standard window AC that rests on the lower sash of a double-hung window, a casement unit must be supported from below and anchored to the window frame itself.
Most kits include the following core components:
- Support bracket or shelf: An L-shaped or platform-style bracket that carries the weight of the unit and transfers it to the interior wall or window sill.
- Side filler panels: Insulating panels that close the gap between the AC unit and the window frame, preventing air leaks and insect entry.
- Weather sealing strips: Foam or rubber gaskets that create a tight seal against drafts and moisture.
- Mounting hardware: Screws, bolts, and anchors rated for the weight of the unit and the material of the window frame.
- Security brackets or locking plates: Optional components that prevent the window from being forced open from the outside.
Some premium kits also include a drip tray, adjustable legs, or a reinforced crossbar for larger or heavier units. The exact contents vary by brand and tier, so always review the included parts list before ordering.
Why You Cannot Use a Standard Window AC Kit
Standard window AC kits assume a vertical sliding window. The unit sits on the lower sash, and the upper sash closes down behind a top bracket. Casement windows do not have a lower sash to rest on — they swing outward, leaving an open frame with no horizontal support surface.
Using a standard kit on a casement window creates three serious risks:
- Structural failure: The unit has no proper load-bearing surface and can fall, especially in upper-floor installations.
- Air and water infiltration: Gaps around the unit allow conditioned air to escape and rain to enter, undermining efficiency and causing water damage.
- Security compromise: Without a locking mechanism, the window can be opened from outside, creating a security vulnerability.
A dedicated casement kit addresses all three issues with a purpose-built bracket, precise filler panels, and a locking mechanism. For a broader look at how casement units differ from other styles, see the casement window air conditioner guide.
Key Components and What to Look For
1. Support Bracket
The bracket is the most important part of the kit. It must be rated for the operating weight of your unit plus a safety margin. Look for heavy-duty steel construction with a rust-proof finish, especially if the window is exposed to rain or salt air. Entry-level brackets are typically stamped steel, while mid-range and premium kits use reinforced or powder-coated steel with adjustable depth.
2. Filler Panels
Filler panels close the gap between the AC unit and the window frame. They should be rigid enough to resist wind pressure and insulated to prevent thermal bridging. Premium kits use double-wall panels or insulated foam cores. Measure the width of your window opening carefully — most kits specify a minimum and maximum window width range.
3. Weather Sealing
Foam gaskets and rubber seals are inexpensive components that make a large difference in performance. A well-sealed installation prevents drafts, reduces noise, and keeps insects out. Check that the kit includes sealing strips for both the top and bottom of the unit as well as the side gaps.
4. Security Hardware
Casement windows are particularly vulnerable to forced entry when partially open. A good kit includes a locking plate or security bracket that secures the window frame to the AC unit or the wall. This is especially important for ground-floor installations.
5. Mounting Hardware
Screws and anchors must match the material of your window frame — wood, vinyl, aluminum, or masonry. Kits that include a variety of anchor types are more versatile. If your window frame is masonry, you may need to source specialized anchors separately.
Comparing Kit Tiers: Entry-Level to Professional-Grade
Casement installation kits are available across a range of quality tiers. The table below summarizes what you can expect at each level so you can match the kit to your installation environment.
| Tier | Best For | Typical Construction | Sealing Quality |
|---|---|---|---|
| Entry-level | Light units in sheltered ground-floor windows | Stamped steel bracket, basic foam seals | Basic — suitable for mild climates |
| Mid-range | Typical residential installations, most climates | Reinforced steel bracket, insulated filler panels | Good — includes weather stripping and side seals |
| Premium | Exposed windows, upper floors, heavier units | Powder-coated heavy-duty steel, adjustable depth | Excellent — full perimeter sealing and drip management |
| Professional-grade | Commercial use, high-wind areas, long-term installations | Commercial-grade steel with corrosion-resistant coating | Superior — engineered sealing system and security lock |
As a general rule, mid-range kits offer the best balance of durability and sealing for most homes. Entry-level kits are fine for light units in protected locations, while premium and professional-grade kits are worthwhile investments for exposed windows or heavier units where long-term reliability matters.
Compatibility: Matching the Kit to Your Unit and Window
Before ordering any kit, verify three compatibility points:
Unit Size and Weight
Check the maximum weight rating of the bracket against the operating weight of your AC unit. The operating weight includes the unit itself plus any condensation that accumulates during use. A bracket rated well above the unit weight provides a safety margin.
Window Width and Wall Thickness
Casement kits are sized to specific window opening ranges. Measure the width of the opening between the window frame and the hinge side, and measure the wall thickness where the bracket will be anchored. Kits with adjustable depth are more forgiving, but you still need to confirm the range covers your wall.
Unit Model Compatibility
Filler panels and side seals are often model-specific. A bracket may be universal, but the panels that close the gap around the unit are usually designed for a particular unit series. Always cross-reference the kit's compatibility list with your unit's model number. If you are still choosing a unit, the 12,000 BTU casement window air conditioner page covers a popular size class, and the casement window air conditioner with heat page covers units that include a heating function.
Step-by-Step Installation Overview
Installation difficulty varies by kit tier and window height, but the general process follows the same sequence. The steps below assume a mid-range kit and a ground-floor window. Always follow the manufacturer's instructions for your specific kit.
- Prepare the window opening. Clean the window frame and remove any old sealant or debris. Check that the window opens fully and that the hinge operates smoothly.
- Assemble the support bracket. Attach the bracket to the interior wall or sill according to the kit instructions. Use a level to confirm the bracket is horizontal.
- Set the AC unit on the bracket. With a helper, lift the unit onto the bracket and slide it into position. Confirm that it sits level and that the rear of the unit extends slightly beyond the window frame for drainage.
- Install the filler panels. Slide the side panels into place and trim them to fit if necessary. The panels should close the gap completely without bowing.
- Apply weather sealing. Install foam or rubber seals around the top, bottom, and sides of the unit. Pay special attention to the corners, where leaks are most common.
- Secure the window and unit. Attach the locking plate or security bracket to prevent the window from being opened from outside. Confirm that the unit cannot be pushed inward or pulled outward.
- Test and inspect. Run the unit for several minutes and check for air leaks, rattling, or water intrusion. Adjust the seals if needed.
For installations above the ground floor, or for units in the premium and professional-grade tiers, consider hiring a professional installer. The weight and leverage involved in upper-floor installations make a two-person or professional installation the safer choice.
Maintaining Your Installation Kit
A casement installation kit is a long-term investment, and a few simple maintenance habits will keep it performing well season after season:
- Inspect the bracket and anchoring hardware at the start of each cooling season for rust, looseness, or corrosion.
- Replace foam seals every one to two years, or sooner if you notice drafts or water intrusion.
- Clean the filler panels with a damp cloth to remove dust and pollen buildup.
- Check the security lock periodically to confirm it engages properly.
- Remove the unit and kit before winter in cold climates to prevent ice damage to the window frame.
If you notice the unit shifting, rattling, or leaking, stop using it and inspect the kit before resuming operation. A loose bracket is a safety hazard, not just a performance issue.
Related Guides for Casement Window Cooling
If you are still in the research phase, these related pages will help you complete the picture:
- Casement window air conditioner overview — how these units differ from standard window ACs.
- 12,000 BTU casement window air conditioner — a popular capacity class for medium rooms.
- Casement window air conditioner with heat — units that provide year-round comfort.
- Casement window insert guide — how inserts work with installation kits.
- Casement window AC buying guide — capacity, efficiency, and feature considerations.
Frequently Asked Questions
Do I really need a special kit for a casement window AC?
Yes. Standard window AC units are designed for double-hung windows that open vertically. Casement windows open outward on a hinge, so the unit must be supported differently and sealed against the side frame. A dedicated kit provides the bracket, filler panels, and hardware required for a safe, weather-tight installation.
Can I install a casement window AC kit myself?
Many mid-range and premium kits are designed for DIY installation with basic tools such as a drill, level, and screwdriver. However, units above a certain weight or installations on upper floors may require two people or a professional to ensure the bracket is anchored securely.
Will an installation kit fit any casement window AC?
No. Kits are matched to specific window widths, wall thicknesses, and unit sizes. Always check the manufacturer's compatibility list and measure your window opening before ordering. A universal bracket may work across several models, but filler panels and side seals are usually model-specific.
How do I know which kit tier is right for my home?
Entry-level kits suit light units in sheltered locations. Mid-range kits offer sturdier brackets and better sealing for typical residential use. Premium and professional-grade kits provide heavy-duty anchoring, powder-coated finishes, and superior weather sealing for exposed or upper-floor installations.
What should I do if my window opening is an unusual size?
Choose a kit with adjustable depth and trim-to-fit filler panels, then measure carefully and confirm the kit's stated range covers your opening. If the opening is significantly outside standard ranges, consult the kit manufacturer or a professional installer before ordering.