Central Air Conditioning Installation: Complete Guide
Understand the full installation process, from sizing and system components to efficiency ratings and contractor selection, so you can make a confident, informed decision for your home.
Why this guide matters: A central air conditioning system is one of the largest mechanical investments in a home. Getting the installation right the first time affects comfort, energy performance, indoor air quality, and the lifespan of the equipment. This guide walks you through every stage of the process so you know exactly what to expect and what questions to ask.
What a Central Air Conditioning System Includes
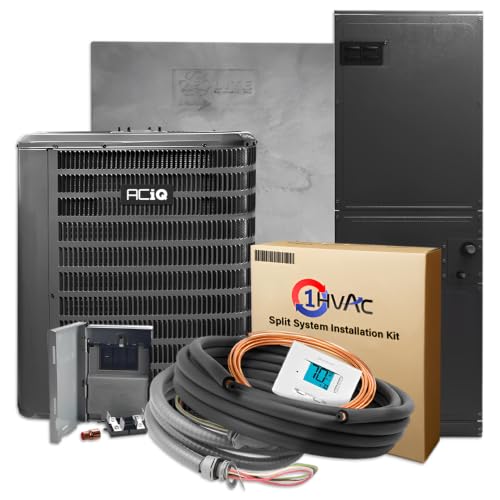
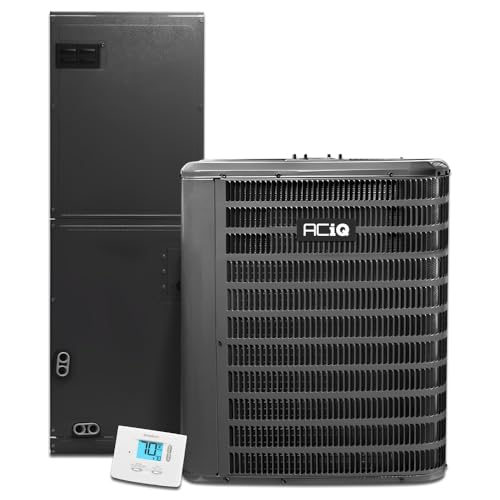
A complete central AC system is made up of several integrated components that work together to cool and dehumidify your home. Understanding each part helps you evaluate quotes and communicate clearly with contractors.
Outdoor Condenser Unit
The compressor and condenser coil that release heat absorbed from your home into the outdoor air. This is the visible unit placed outside.
Indoor Evaporator Coil
Mounted on the furnace or air handler, this coil absorbs heat and moisture from indoor air as refrigerant evaporates inside it.
Air Handler or Furnace
The blower that circulates conditioned air through the ductwork. In many homes, the existing furnace blower is reused.
Ductwork
The network of supply and return ducts that distributes cool air throughout the rooms and returns warm air to the system.
Refrigerant Lines
Insulated copper lines that carry refrigerant between the indoor coil and outdoor condenser.
Thermostat & Controls
The interface that lets you set temperature schedules and, in modern systems, control the system remotely.
Condensate Drain
Removes moisture collected by the evaporator coil. Proper drainage is critical to prevent water damage and mold.
Electrical Supply
Dedicated circuits and disconnect boxes that safely power the condenser and air handler.
How the Installation Process Works
Central air installation follows a predictable sequence. Knowing the steps helps you plan for access, downtime, and inspections.
- Home assessment and load calculation. The contractor evaluates square footage, insulation, windows, ceiling height, and local climate, then performs a Manual J load calculation to determine the correct system size.
- System selection and proposal. Based on the load calculation, the contractor recommends equipment tiers, efficiency levels, and features, then provides a detailed written proposal.
- Permits and scheduling. Most jurisdictions require an HVAC permit. The contractor typically handles the application, and inspection occurs after installation.
- Site preparation. The installation team sets up equipment, protects floors, and confirms the placement of the outdoor unit and indoor coil.
- Ductwork installation or modification. If ductwork exists, it is inspected and sealed. For new installations, ducts are designed and fabricated to fit the home's layout.
- Equipment installation. The condenser is set on a pad, the evaporator coil is mounted, and refrigerant lines and electrical connections are run.
- Evacuation and charging. The system is vacuumed to remove moisture and non-condensable gases, then charged with the correct refrigerant amount.
- Testing and commissioning. The contractor verifies airflow, temperature differential, refrigerant pressures, and thermostat operation.
- Final inspection and walkthrough. A municipal inspector confirms code compliance, and the contractor explains operation and maintenance to the homeowner.
Timeline note: A straightforward replacement using existing ductwork often takes one to three days. New installations that require duct design and fabrication can take three to five days or longer, depending on the home's complexity and access.
Sizing: The Most Important Decision
An oversized system cools too quickly, cycling on and off frequently. That short cycling leaves indoor humidity high, increases wear on components, and reduces energy efficiency. An undersized system runs continuously and struggles to maintain comfort on hot days.
Proper sizing relies on a professional load calculation rather than a simple rule of thumb. As a general reference, homes around 1,200 to 1,500 square feet commonly use a 2 to 2.5 ton system, while 2,000 to 2,500 square feet often require 3 to 4 tons. These figures are starting points only; factors like insulation, window orientation, and climate zone can shift the result significantly.
For a deeper look at matching system capacity to home size, see this guide on system sizing for a 1,500 square foot home and the reference on equipment for a 2,500 square foot home.
Efficiency Ratings and Equipment Tiers
Central air conditioners are classified by SEER2 (Seasonal Energy Efficiency Ratio) and EER2 ratings. Higher ratings indicate greater efficiency, which generally means lower electricity consumption over the system's life. Modern minimum standards require SEER2 ratings around 14.3 in most U.S. regions.
| Tier | Typical SEER2 Range | Best For |
|---|---|---|
| Essential tier | Around 14.3 to 15 | Homeowners focused on meeting code requirements with reliable, straightforward performance. |
| Balanced mid-range tier | 15 to 16 | Households seeking a solid balance of efficiency, features, and long-term energy performance. |
| Premium tier | 16 to 18 | Homeowners in hot climates or with high cooling demand who want stronger efficiency and quieter operation. |
| High-end tier | 18 to 20+ | Those prioritizing maximum efficiency, variable-speed comfort, and advanced smart controls. |
Higher-tier systems often include variable-speed compressors that modulate output more precisely, resulting in steadier temperatures, better humidity control, and quieter operation. For a broader view of efficient equipment options, explore the guide on high efficiency air conditioner systems.
New Installation vs. Replacement
The scope of work differs significantly depending on whether your home already has central air.
Replacement with Existing Ductwork
Replacing an existing system is generally the most straightforward scenario. The contractor removes the old condenser and coil, inspects and seals the ductwork, installs new equipment, and reconnects refrigerant and electrical lines. This approach benefits from established infrastructure and usually requires less labor. See the guide on installing AC with existing ductwork for a detailed breakdown.
Adding Central Air to a Home Without Ductwork
Homes without existing ducts require a full design and installation of a duct system, which is the most labor-intensive part of the project. Duct routing depends on attic, basement, or crawlspace access, and may require soffits or closets to conceal runs. For older homes with complex layouts, the project can take longer and involve more invasive work. Explore the reference on installing central AC in an old house and the guide on air conditioning installation in older homes for context.
When full ductwork is impractical, ductless options may be worth considering. The guides on installing an HVAC system without ductwork and ductless mini-split installation cover those alternatives.
Key Factors That Influence Project Scope
Every home is different. The following factors affect how complex and lengthy a central AC installation will be.
- Home size and layout. Larger and multi-story homes require more duct runs and careful zoning.
- Duct accessibility. Attic, basement, and crawlspace access simplifies routing; homes on slabs may need creative solutions.
- Insulation and air sealing. Poor insulation increases the required system capacity and reduces efficiency.
- Electrical panel capacity. Older panels may need upgrades to support the new equipment's dedicated circuits.
- Local climate. Hotter climates place greater demands on the system and may favor higher-efficiency tiers.
- Permit requirements. Local codes vary; some jurisdictions have stricter inspection timelines and documentation requirements.
Choosing a Contractor
The quality of the installation has as much influence on performance as the equipment itself. A well-installed mid-range system often outperforms a poorly installed premium system. Consider the following when evaluating contractors:
- Verify state licensing and insurance coverage.
- Ask whether the contractor performs a Manual J load calculation and shares the results.
- Request a written, itemized proposal that separates equipment, labor, ductwork, and permits.
- Confirm the manufacturer warranty terms and whether labor warranty is included.
- Read recent reviews and ask for references from similar homes.
- Ensure the final price includes permit acquisition and post-installation inspection.
For related planning resources, the overview of central air conditioning installation in a house and the general guide on installing an air conditioning system provide useful framing for comparing proposals.
Pre-Installation Checklist
- Confirm system size using a professional load calculation.
- Verify electrical panel capacity and available circuits.
- Decide on equipment tier and efficiency target.
- Review ductwork condition and plan for sealing or replacement.
- Confirm permit responsibility with the contractor.
- Schedule installation during a period when cooling demand is moderate.
- Clear access to the attic, basement, and outdoor unit location.
After Installation: What to Expect
Once the system is running, the contractor should walk you through thermostat operation, filter replacement intervals, and the maintenance schedule. Register the equipment warranty promptly, as many manufacturers require registration within a specific window after installation.
Expect a short adjustment period as you fine-tune temperature settings. Modern programmable and smart thermostats can help balance comfort and efficiency. Annual professional maintenance preserves performance and is often required to keep the warranty valid.
Frequently Asked Questions
How long does central air conditioning installation take?
A typical installation takes one to three days for a straightforward replacement using existing ductwork. New installations that require ductwork can take three to five days or longer depending on the complexity of the home layout.
What size central air conditioner do I need?
Sizing depends on square footage, ceiling height, insulation quality, window area, and climate zone. A professional load calculation following Manual J guidelines is the most accurate method. As a general reference, homes around 1,200 to 1,500 square feet typically use a 2 to 2.5 ton system, while 2,000 to 2,500 square feet often require 3 to 4 tons.
What SEER rating should I choose for a new central AC?
Modern minimum efficiency standards require SEER2 ratings of around 14.3 in most regions. Mid-range systems typically offer SEER2 ratings in the 15 to 16 range, while premium and high-end tier systems can reach 18 to 20 or higher. Higher efficiency units generally provide better long-term energy performance.
Can central air be installed in an older home without ductwork?
Yes, but it requires careful planning. Options include installing ductwork in the attic, basement, or crawlspace, using a ducted mini-split system, or opting for a ductless multi-zone system. A professional assessment will determine the most practical approach for your home's layout.
What is included in a central AC installation?
A complete installation typically includes the outdoor condenser unit, indoor evaporator coil or air handler, refrigerant lines, electrical connections, thermostat, condensate drain, and ductwork connection. New installations also require duct design and fabrication, plus permit acquisition and final inspection.
How often should a new central AC system be serviced?
Annual professional maintenance is recommended to keep the system operating efficiently and to preserve the manufacturer warranty. Routine service includes coil cleaning, refrigerant level checks, electrical component inspection, and filter replacement.
Summary: Planning for a Successful Installation
Central air conditioning installation is a multi-stage project that rewards careful planning. The most important decisions are proper sizing through a professional load calculation, selecting an equipment tier that matches your climate and usage, and choosing a qualified contractor who handles permits and inspections correctly. Understanding the components, the installation sequence, and the factors that influence scope helps you compare proposals on equal terms and make a confident decision.
Once installed, a central system delivers whole-home comfort, consistent temperatures, and improved humidity control. Combined with annual maintenance and an appropriate thermostat strategy, it represents a durable, long-term investment in your home's comfort.