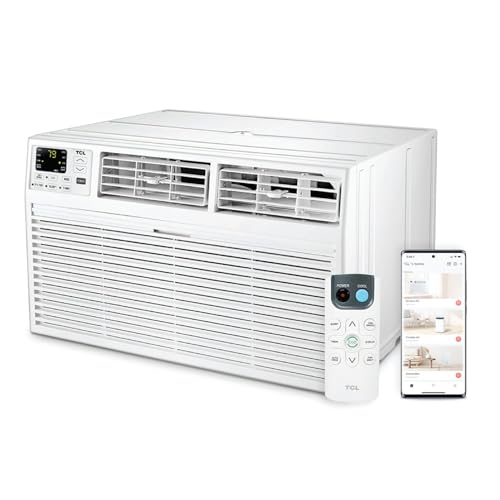
Through Wall Air Conditioner Installation Cost: What to Expect
Understand the complete scope of a through-the-wall AC installation project — from site preparation and electrical work to professional labor — so you can plan your installation with confidence.
Explore Cost FactorsPlanning a Through Wall AC Installation? A through-the-wall air conditioner is a permanent cooling solution that requires structural modification, dedicated electrical work, and skilled installation. Unlike a window unit, it blends into your wall and frees up window space, but the installation complexity is higher. This guide breaks down every component of the project so you understand exactly what drives the overall expense and how to make a smart, well-informed decision.
What Is a Through-the-Wall Air Conditioner?
A through-the-wall air conditioner — sometimes called a wall unit AC or through wall AC — is a self-contained cooling system installed permanently into an exterior wall. Unlike a window unit that sits in a window frame, a through-wall AC is built into the wall structure itself, with the condenser side facing outdoors and the evaporator side facing the room. This creates a cleaner, more integrated look and does not block your window view.
Because the unit is permanently mounted, installation involves more than simply sliding a box into a frame. Installers must cut an opening in the wall, frame it properly, provide structural support, run a dedicated electrical circuit, and ensure the unit is sealed against air and moisture intrusion. Each of these steps contributes to the overall installation expense and explains why a through-the-wall project differs from a simpler window AC setup.
For a broader comparison of installation options, you may also want to review guides on window air conditioner installation and wall mounted air conditioner installation to see how different approaches compare in scope and complexity.
Key Factors That Influence Your Installation Project
Every through-wall installation is unique, and the total investment depends on several interrelated factors. Understanding these variables helps you anticipate the scope of your project and communicate more effectively with contractors when requesting quotes.
Wall Type & Construction
Brick, concrete block, wood frame, and siding walls each require different cutting techniques and framing approaches. Brick and masonry walls are more labor-intensive and may require specialized tools and additional structural reinforcement.
Wall Thickness
Standard through-wall units are designed for walls up to a certain thickness. Thicker walls — common in older homes — may require a sleeve extension or special mounting configuration, which adds to labor and material requirements.
Electrical Work
Most through-wall ACs require a dedicated 230V circuit. If your home does not already have one near the installation site, an electrician will need to run new wiring, install a breaker, and add an outlet — a significant portion of the overall project scope.
Unit Size & BTU Rating
Larger units with higher BTU ratings are heavier and may require additional bracing or a larger wall opening. The physical size of the unit directly affects how much structural work is needed.
Location & Accessibility
Installing on a second floor, in a finished basement, or in a location with limited exterior access increases labor time. Scaffolding, ladders, or special equipment may be required for safe installation.
Permits & Inspections
Many jurisdictions require a building permit for cutting into an exterior wall and for new electrical circuits. Permit requirements and inspection processes add administrative steps and oversight to the project.
Sleeve & Trim Work
A proper installation includes a wall sleeve, exterior sealant, and interior trim to finish the opening. Some units come with a sleeve; others require a separate purchase. Finishing work affects both appearance and weather protection.
Removal of Old Unit
If you are replacing an existing through-wall unit, the old unit must be removed and the opening may need modification. Disposal and any necessary adjustments add to the scope of work.
Typical Cost Breakdown by Project Component
The table below outlines the major components of a through-wall AC installation project. Tier descriptors are used instead of specific figures because every project is unique and varies by region, contractor, and site conditions. Use this as a framework to understand where your investment goes.
| Project Component | Tier Range | What It Covers |
|---|---|---|
| Wall Opening & Framing | Essential tier to mid-tier | Cutting the wall opening, framing, adding structural support, and preparing the sleeve area. |
| Electrical Circuit | Mid-tier to high-end tier | Running a dedicated 230V circuit, installing breaker and outlet, and connecting the unit safely. |
| Unit Installation & Sealing | Essential tier to mid-tier | Setting the AC in the sleeve, leveling, insulating gaps, and applying weather sealant. |
| Interior Trim & Finish | Essential tier | Installing interior trim, painting or finishing edges, and cleaning up the work area. |
| Permits & Inspection | Mid-tier | Building permit fees, electrical permit, and scheduling inspections as required by local codes. |
| Old Unit Removal | Essential tier | Removing and disposing of an existing unit, capping old connections if necessary. |
When evaluating quotes, ask your contractor to itemize these components so you can compare proposals fairly. A well-specified quote will clearly separate labor, materials, permit fees, and any optional finishing work. This transparency helps you identify where you might adjust scope — for example, choosing a simpler trim finish or handling permit applications yourself — without compromising the core installation quality.
Professional Installation vs. DIY: What You Should Know
Some homeowners wonder whether a through-the-wall AC can be a DIY project. While it is technically possible for someone with advanced carpentry and electrical skills, the risks are significant. Cutting into an exterior wall can compromise structural integrity if framing is not handled correctly. Improper electrical work creates fire and shock hazards. Poor sealing leads to drafts, moisture intrusion, and pest problems.
Professional installation ensures that:
- The wall opening is properly sized and framed with adequate structural support.
- The electrical circuit is dedicated, correctly rated, and code-compliant.
- The unit is sealed against air leaks and water infiltration.
- Local permits and inspections are handled correctly.
- The installation is covered by a workmanship warranty.
For most homeowners, hiring a qualified HVAC contractor or a licensed handyman with electrical experience is the safer and more reliable choice. The investment in professional labor protects both your home's structure and your family's safety. For more context on related installation projects, see our guide on through the wall air conditioner installation and mini split air conditioner installation.
How to Prepare for Your Installation
Proper preparation helps the project run smoothly and can reduce unexpected delays. Before your installer arrives, consider the following:
- Choose the right location: The wall should be exterior, accessible from both inside and outside, and positioned to allow proper airflow and drainage. Avoid areas where the unit would be blocked by furniture or landscaping.
- Verify electrical capacity: Have an electrician assess your panel to confirm it can support a new dedicated circuit. If your panel is at capacity, a panel upgrade may be needed.
- Check local regulations: Contact your local building department to understand permit requirements and any restrictions on exterior equipment placement, especially if you live in a historic district or HOA community.
- Select the right unit size: Match the BTU rating to your room size and cooling needs. An undersized unit won't cool effectively; an oversized unit cycles inefficiently. Our guide on how to size an air conditioner can help.
- Clear the work area: Remove furniture, wall decorations, and items near the installation site to give installers safe access.
If you are comparing this project with other cooling options, you may also want to review window AC installation and wall unit air conditioner installation to understand how scope and requirements differ.
Keeping Your Investment Efficient Over Time
After installation, regular maintenance keeps your through-wall AC running efficiently and extends its lifespan. Key tasks include cleaning or replacing the air filter monthly during peak season, keeping the exterior condenser coil free of debris, and scheduling professional service annually to check refrigerant levels, electrical connections, and overall system performance. Proper maintenance protects your installation investment and helps avoid premature wear.
For related efficiency topics, explore our guides on air conditioning unit service and ductwork cleaning if your home has a ducted system in addition to the wall unit.
Frequently Asked Questions
A typical through-wall AC installation takes one to two days for a straightforward project. If new electrical wiring must be run from the panel, or if the wall is masonry, the project may extend to two or three days. Complex installations — such as second-floor units or walls requiring significant structural reinforcement — can take longer. Your contractor should provide a timeline estimate with the quote.
In most jurisdictions, yes. Cutting an opening in an exterior wall and adding a dedicated electrical circuit typically require a building permit and an electrical permit. Requirements vary by location, so check with your local building department before beginning the project. A qualified contractor will usually handle permit applications as part of the service.
Most exterior walls can accommodate a through-wall unit, but some limitations apply. Load-bearing walls require careful framing to maintain structural integrity. Walls with plumbing, wiring, or ductwork inside may need rerouting. Some HOAs and historic districts restrict exterior equipment placement. A professional installer will assess your specific wall and recommend the best approach.
Unit size is determined by the room's square footage, ceiling height, insulation quality, window area, and sun exposure. As a general guideline, rooms up to 150 square feet typically need 5,000–6,000 BTU, while rooms of 250–400 square feet may need 8,000–12,000 BTU. Use a BTU calculator or consult an HVAC professional for an accurate recommendation tailored to your home.
A window AC sits in a window frame and can be removed seasonally, while a through-wall AC is permanently installed into an exterior wall. Through-wall units free up window space, offer a cleaner look, and are generally more secure, but installation is more involved and requires structural and electrical work. Window units are simpler to install but block the window and are less permanent.
Yes, but brick and masonry installations are more labor-intensive. Cutting through brick requires specialized tools such as a masonry saw or core drill, and the opening must be properly framed and sealed to prevent moisture intrusion. Expect the project to take longer and involve more labor compared to a wood-frame wall installation.
Ready to Choose the Right Through-Wall AC?
Now that you understand the installation process, explore our curated selection of through-wall air conditioners to find the right fit for your space.
View Recommended Units