Window Air Conditioner Installation: What to Expect & Plan For
Before you buy a window unit, understand the installation scope: window compatibility, electrical checks, mounting safety, sealing, and the decisions that determine whether the job is a simple DIY project or one that calls for a licensed professional.
Jump to Installation ChecklistAC Units Guide Philosophy: Well-informed buyers make better decisions. This page explains the installation process in plain language so you can plan confidently, compare quotes fairly, and avoid surprise work after the unit arrives.
Why Installation Scope Matters More Than the Unit Itself
A window air conditioner is one of the most direct ways to cool a single room, but the unit is only half of the equation. The other half is the installation: whether your window accepts the unit safely, whether the electrical circuit can support it, whether the chassis is properly supported, and whether the perimeter is sealed against air and water intrusion. Two households can buy the same model and end up with very different installation experiences because their windows, wiring, and building structure differ.
This guide is written for readers who are researching before they buy. Instead of quoting figures that change by region and season, it explains the components of a window AC installation and what drives the scope of work up or down. That framing lets you ask better questions, request accurate quotes, and decide whether to install the unit yourself or bring in a professional.
If you are still deciding between unit types, the broader window unit overview explains how window units compare with portable and ductless options. If you have already chosen a window unit, continue below.
What a Window AC Installation Typically Includes
A complete installation is more than sliding the unit into the frame. A thorough job covers the following stages, whether performed by a homeowner or a technician:
- Site survey. Confirming the window type, sill condition, available width and height, and proximity to an outlet.
- Electrical verification. Matching the unit nameplate to the outlet, circuit, and breaker.
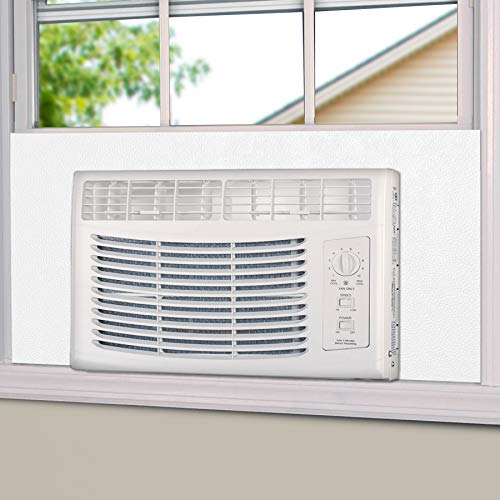
- Support and mounting. Installing the manufacturer bracket or support, setting the unit with a slight outward tilt for drainage, and securing it against tipping.
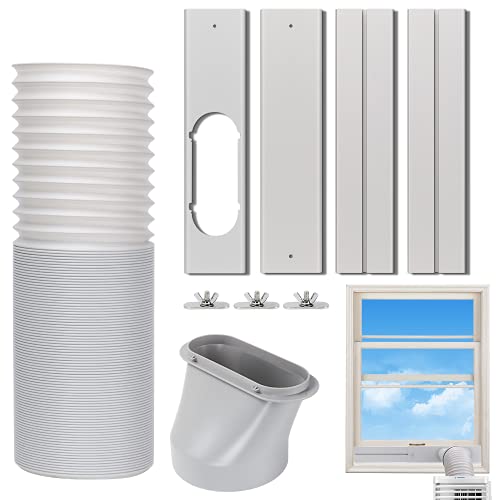
- Window and gap sealing. Fitting the accordion panels, insulating gaps, and sealing the perimeter against drafts, insects, and rain.
- Testing and handover. Verifying cooling, drainage, noise, and that the unit is stable and correctly oriented.
Each of these stages can expand depending on the home. A standard double-hung window with a dedicated outlet is the simplest case; a casement window or an older home with two-prong outlets is at the opposite end.
Window Compatibility: The First Decision Point
Window type is the single biggest factor in installation complexity. The table below summarizes how different window styles affect the process.
| Window Type | Compatibility | Installation Notes | Complexity Tier |
|---|---|---|---|
| Double-hung (vertical slide) | Standard fit for most window units | Unit sits on the sill; sash closes behind the top rail; use included support bracket | Essential tier |
| Single-hung | Generally compatible | Same as double-hung but only the lower sash moves; confirm frame depth | Essential tier |
| Sliding (horizontal) | Limited compatibility | Requires a specialized bracket or adapter; some units are not rated for this orientation | Balanced tier |
| Casement (crank-out) | Generally incompatible with standard units | Consider a portable unit, through-the-wall unit, or a casement-specific model | High-end tier |
| Awning | Limited compatibility | Special brackets may be required; verify unit rating | Balanced tier |
If your window is not a standard double-hung or single-hung style, confirm compatibility with the manufacturer before purchase. A unit that does not fit safely should not be forced into the frame.
Electrical Requirements and Safety
Electrical mismatches are the most common cause of unsafe window AC installations. Before installing, check the unit nameplate for three values: voltage, running amps, and the required circuit rating. Then verify that the outlet, wiring, and breaker match.
120V Units
Often use a standard grounded outlet but typically require a dedicated circuit. Sharing a circuit with other appliances can trip breakers or create a fire hazard.
230V Units
Larger capacity units require a dedicated 230V circuit, a matching outlet type, and usually a licensed electrician for new wiring or breaker work.
If the only nearby outlet is ungrounded, shared with other loads, or lacks the correct receptacle type, electrical work becomes part of the project. That work is best handled by a qualified electrician rather than adapted with extension cords or plug converters.
Mounting, Support, and Sealing
A window AC is heavy and vibrates while running. Proper support protects the unit, the window, and anyone standing below. Most modern units ship with a bracket or support kit, and many manufacturers recommend using it rather than resting the unit solely on the sill.
Correct mounting follows a few consistent principles:
- Slight outward tilt. The unit should tilt a few degrees toward the outdoors so condensate drains out rather than into the room.
- Firm, level support. The bracket or sill support should carry the unit's weight without flexing.
- Secure against tipping. Use the manufacturer's locking hardware or a sash lock to prevent the window from opening and the unit from shifting.
- Full perimeter sealing. Accordion panels, foam insulation, and weather sealing reduce cooling loss and keep insects and rain out.
Sealing is often the most overlooked step. Gaps around the unit let hot air in, which forces the compressor to run longer and undermines the cooling you paid for. A careful seal is what makes the difference between a unit that cools well and one that struggles.
Pre-Installation Checklist
Confirm these before the unit arrives
- Window type is compatible with the unit (preferably double-hung or single-hung).
- Window opening width and height fall within the unit's specified range.
- Sill and frame are structurally sound, with no rot or looseness.
- A grounded outlet of the correct voltage is within reach of the unit's cord.
- The circuit is dedicated or has sufficient capacity for the unit's running amps.
- The manufacturer's bracket or support kit is on hand.
- Accordion panels and insulation are included and undamaged.
- Local permit requirements have been checked, if applicable.
- A second person is available to help lift and position the unit.
Installation Tiers: From Simple Swap to Full Retrofit
Installation scope falls into broad tiers. The descriptors below describe relative market position of the installation scenario, not a figure. Use them to frame quotes and expectations consistently.
| Tier | Typical Scenario | Best For | What Drives Scope |
|---|---|---|---|
| Essential tier | Replacement in a standard double-hung window with an existing dedicated outlet | Renters and homeowners replacing a like-for-like unit | Lift-out and reinstall, bracket reuse, basic sealing |
| Balanced tier | New installation in a compatible window that needs a bracket, new sealing, and outlet verification | First-time window AC buyers | Bracket installation, sealing, electrical check |
| High-end tier | Installation in a non-standard window or a home requiring new electrical work | Older homes, sliding or awning windows, 230V units | Electrical circuit work, window adapters, structural adjustments |
| Commercial-grade | Multiple units or a managed property with documented safety and compliance needs | Landlords, property managers, small businesses | Permits, inspections, repeatable procedures |
DIY vs Professional Installation
Many single-room window units in standard windows can be installed by a careful homeowner. The manufacturer's manual is the authoritative guide, and following it closely is what separates a safe installation from a risky one. DIY is generally reasonable when the window is a standard double-hung type, the unit is within a manageable weight, the outlet is verified, and the bracket kit is used correctly.
Professional installation is the better choice when any of the following apply:
- The unit is heavy or mounted high above ground level.
- The window is sliding, casement, awning, or otherwise non-standard.
- The electrical circuit is uncertain, ungrounded, or shared.
- New wiring, a new outlet, or a breaker change is required.
- Local codes require permits or licensed work.
- The frame or sill shows signs of damage that could affect support.
When hiring, ask for a written scope that lists the bracket, sealing materials, electrical verification, and cleanup. A clear scope is the best protection against surprise work. For related reading on how ductless alternatives compare, see the ductless mini-split overview and the ductless system cost guide.
Long-Term Considerations After Installation
Installation is the beginning of ownership, not the end. A properly installed unit is easier to maintain and lasts longer. Filter cleaning, seasonal removal, and checking the seal each season keep the unit efficient. If you choose an inverter-driven window unit, the energy-efficient window AC guide explains how efficiency features interact with installation quality. For smart-control models, the Wi-Fi window AC overview covers connectivity expectations.
If the window situation ultimately proves unsuitable, many homeowners pivot to a ductless system. The single-room ductless guide and the DIY mini-split overview are useful next reads.
Frequently Asked Questions
Do I need a professional to install a window air conditioner?
Many single-room window units in standard double-hung windows can be installed by a capable DIYer using the manufacturer bracket and included hardware. Professional installation is recommended when the unit is heavy, the window type is unusual, the electrical circuit is uncertain, or local codes require permitted work.
What electrical requirements should I check before installation?
Check the unit nameplate for voltage, running amps, and the required circuit rating. Confirm the outlet is a dedicated grounded circuit of the correct voltage and that the breaker and wiring match the unit's requirements. For 230V units, a dedicated circuit and often a licensed electrician are necessary.
Can a window AC be installed in a sliding or casement window?
Standard window units are designed for double-hung or single-hung windows. Sliding and casement windows generally require specialized brackets, adapters, or a different AC type such as a portable or through-the-wall unit.
How long does a typical window AC installation take?
A straightforward replacement in a standard double-hung window often takes one to two hours. More complex jobs involving brackets, window modifications, electrical work, or sealing typically take longer.
Why does sealing matter so much?
Gaps around the unit let hot outdoor air in and cool indoor air out, which forces the compressor to work harder. Full perimeter sealing improves cooling performance, reduces noise, and keeps insects and rain out.
Next step: If your window is compatible and the outlet is verified, you are ready to compare units. If either check fails, explore ductless alternatives before purchasing, because installation feasibility should drive the product decision rather than the reverse.