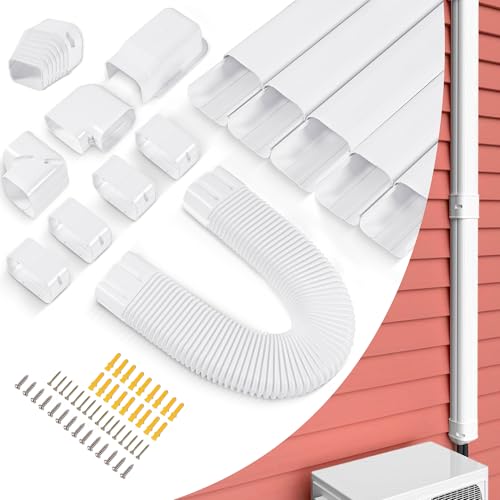
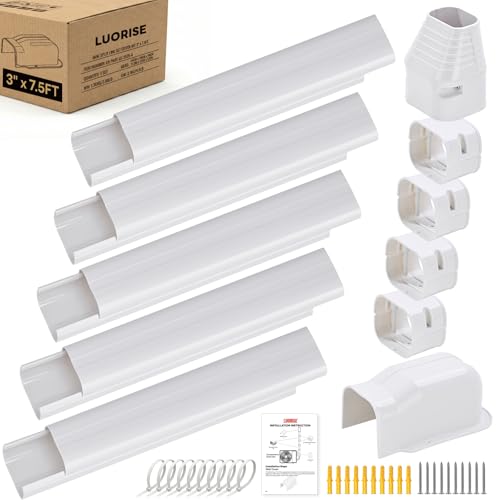
Line Hide for Mini Split: Complete Guide to a Clean Installation
A line hide transforms the exposed refrigerant lines, wiring, and drain hose of your ductless mini split into a clean, professional-looking installation. Learn how to choose the right kit, measure your run, and install it correctly.
Jump to Buying GuideWhether you are planning a new mini split installation or updating an existing one, selecting the right line hide kit is an important finishing step. This guide covers the types of covers available, how to measure your line set, installation steps, and what to look for when comparing options.
What Is a Line Hide for a Mini Split?
A line hide is a rigid or semi-rigid channel — typically made of PVC or aluminum — that runs along the exterior wall between the outdoor condenser and the indoor air handler. Inside the channel sit three critical components:
- Refrigerant lines — the insulated copper suction and liquid lines that carry refrigerant between units.
- Electrical wiring — the power and communication cable connecting the indoor and outdoor units.
- Condensate drain hose — the tube that carries condensed water away from the indoor coil.
Beyond aesthetics, a line hide protects the insulation on the refrigerant lines from UV degradation, prevents the drain hose from sagging or kinking, and shields wiring from moisture and rodents. For homeowners who care about curb appeal, it is one of the most visible finishing touches of a mini split AC system.
Types of Line Hide Kits
Line hide products fall into a few broad categories. Each serves a different installation scenario and aesthetic preference.
Standard PVC Line Hide
The most common option. Rigid PVC channels with snap-on or slide-in covers, usually available in white, ivory, or beige. Suitable for straight runs along siding or stucco. Durable and weather-resistant for most climates.
Slim Profile Line Hide
Narrower channels designed for tight spaces or modern exteriors where a lower profile is preferred. Often used when the line set is small (e.g., 9,000–12,000 BTU systems) and the wall surface has limited clearance.
Aluminum Line Hide
Powder-coated aluminum channels that resist rust and handle harsh weather. Typically chosen for coastal areas or commercial-grade installations. Heavier and more rigid than PVC, with a premium finish.
Corner & Bend Kits
Modular systems with pre-formed 90-degree elbows, 45-degree bends, and telescoping sections. These allow a continuous, joint-minimized run around corners and soffits — ideal for complex exterior layouts.
Paintable Line Hide
Covers with a finish that accepts exterior paint, letting you match the color of your siding or trim. Popular for historic homes and HOA-governed neighborhoods where color consistency matters.
Wall Penetration Covers
Short covers and escutcheons that conceal the point where the line set passes through the wall. Often bundled with full kits but also sold separately for retrofits.
How to Measure and Size a Line Hide
Correct sizing prevents a loose fit (which lets in moisture and pests) and an overly tight fit (which can compress insulation). Follow these steps before ordering.
Step 1: Measure the total run
Use a tape measure to record every segment of the line set path: the vertical drop from the indoor unit, any horizontal runs along the wall, and the final approach to the condenser. Add 10–15 percent to the total for bends, offsets, and slack. If your run wraps around a corner, note each corner separately.
Step 2: Determine the line set bundle diameter
Wrap a string around the bundled line set (refrigerant lines + drain + wiring) and measure the circumference. Divide by 3.14 to get the approximate diameter. Add at least 0.25 inch (6 mm) of clearance so the bundle slides in without compressing the insulation. Most residential mini splits use bundles between 2.5 and 3.5 inches in diameter.
Step 3: Match the cover profile
Line hide kits are usually sold by internal channel dimensions (e.g., 3-inch, 4-inch). Choose a channel that comfortably fits your measured bundle. If you are unsure, size up rather than down — a slightly larger channel is easier to install and allows better airflow around the insulation.
| System Capacity | Typical Line Set Bundle | Suggested Channel Size | Best For |
|---|---|---|---|
| 9,000 – 12,000 BTU | ~2.5 inches | 3-inch channel | Single-zone bedroom or small office |
| 18,000 – 24,000 BTU | ~3.0 inches | 3.5 to 4-inch channel | Living room or large bedroom |
| 30,000 – 36,000 BTU | ~3.5 inches | 4 to 4.5-inch channel | Open-plan areas, multi-zone branch |
| Multi-zone (2–4 heads) | Varies per branch | 4 to 6-inch channel or separate runs | Whole-home systems |
PVC vs Aluminum: Which Material Should You Choose?
Both materials work well, but they suit different environments and aesthetic goals. Use the comparison below to decide.
| Factor | PVC Line Hide | Aluminum Line Hide |
|---|---|---|
| Weather resistance | Good in most climates; may yellow under intense UV over time | Excellent; powder coating resists UV, salt, and moisture |
| Weight | Lightweight and easy to cut | Heavier; requires more robust fasteners |
| Installation | Can be cut with a fine-tooth saw or snips; snap-fit covers | Requires metal-cutting tools; typically screw-fixed covers |
| Aesthetics | Clean white/ivory finish; paintable options available | Premium painted finish; professional-grade look |
| Best for | Standard residential installations, inland climates | Coastal areas, commercial-grade projects, high-end exteriors |
How to Install a Line Hide: Step-by-Step
Installation is straightforward for a competent DIYer, but the refrigerant connections themselves must be completed by a licensed technician before the cover goes on. The steps below assume the mini split system is already commissioned and the line set is in place.
- Plan the route and dry-fit the pieces Lay out the channel sections, elbows, and end caps along the wall without fastening. Mark where each piece will sit, and confirm that bends align with the actual line set path. Trim sections as needed with a fine-tooth saw or snips.
- Mark fastener locations Hold each channel section in place and mark the screw holes on the wall. Space fasteners every 12–18 inches along straight runs, and always place one within 2 inches of each joint or elbow. Use a level to keep the run straight.
- Mount the base channels Drill pilot holes and secure the base sections with appropriate anchors for your wall type (masonry anchors for brick or stucco, wood screws for siding). Do not overtighten — the channel should sit flush without deforming.
- Feed the line set into the channel Gently guide the bundled refrigerant lines, drain hose, and wiring into the base channel. Avoid sharp bends; the minimum bend radius of the copper lines must be respected. If the bundle is tight, remove a section and re-route rather than forcing it.
- Install elbows and transitions Fit pre-formed elbows at corners and transitions at wall penetrations. Many kits use snap-on covers for elbows; others require screws. Ensure the drain hose maintains a continuous downward slope — no uphill sections that could trap water.
- Attach the cover sections Snap or screw the cover onto the base. Start at one end and work toward the other, pressing firmly at each joint. Confirm that all seams are tight and that no line set is pinched.
- Seal wall penetrations and ends Use exterior-grade sealant around the wall entry point and at the end caps near the condenser and air handler. This prevents moisture, insects, and drafts from entering the channel. Do not seal the drain hose outlet itself.
- Inspect and clean up Walk the run and check for gaps, loose fasteners, or sagging sections. Wipe down the cover with a damp cloth. Verify that the drain line still slopes correctly and that no wiring is exposed at joints.
Common Line Hide Installation Mistakes to Avoid
- Choosing an undersized channel. A tight fit compresses insulation and reduces the energy efficiency of the refrigerant lines. Always size up if uncertain.
- Skipping fasteners near joints. Unsupported joints sag and separate over time, exposing the line set.
- Ignoring the drain slope. A level or uphill drain section traps water and can cause the indoor unit to leak. Check the slope after the cover is installed.
- Sealing the drain outlet. The condensate must drain freely. Seal the wall penetration, not the hose end.
- Using indoor-rated fasteners outdoors. Standard drywall screws corrode quickly. Use exterior-grade or stainless fasteners.
- Forgetting expansion gaps. Long PVC runs expand and contract with temperature. Leave a small gap at slip joints to prevent buckling.
What to Look for When Buying a Line Hide Kit
When comparing options, focus on fit, durability, and completeness rather than a single headline feature. A well-specified kit saves time and looks better for years.
| Feature | Why It Matters | Tier Guidance |
|---|---|---|
| Modular sections | Allows continuous runs around corners with fewer visible seams | Look for mid-range and high-end tier kits with elbows included |
| UV-stabilized material | Prevents yellowing and brittleness in sunny climates | Standard on premium and professional-grade products |
| Complete fastener kit | Saves trips to the hardware store; ensures correct anchors | Common in balanced-tier and above |
| Paintable finish | Blends with siding and trim colors | Available across mid-tier and high-end tier lines |
| Wall penetration cover | Finishes the entry point cleanly and seals drafts | Often bundled in complete kits; sold separately for retrofits |
| Drain hose channel | Keeps the drain separate from wiring and refrigerant lines | Feature-rich for its class in professional-grade kits |
If you are also considering the indoor unit's placement, our guide to mini split air conditioners for small rooms explains how line routing affects installation options. For multi-zone systems, plan separate line hide runs for each indoor head to keep the exterior organized.
Ready to Finish Your Mini Split Installation?
Compare line hide kits by tier, material, and included components. A complete kit with elbows, fasteners, and a wall penetration cover is the simplest path to a clean, durable result.
Explore OptionsFrequently Asked Questions
What is a line hide for a mini split?
A line hide is a protective cover that conceals the refrigerant lines, electrical wiring, and drain hose running from the outdoor condenser to the indoor air handler of a ductless mini split system. It protects the components from weather and gives the installation a finished look.
How do I measure for a mini split line hide?
Measure the total run of the line set from the outdoor unit to the indoor unit, including vertical and horizontal sections. Add 10–15 percent extra for bends and slack. Choose a line hide diameter that comfortably fits the bundled line set plus a small clearance — usually 0.25 inch or more.
Can I install a line hide myself?
Yes, many line hide kits are designed for straightforward installation using basic tools. However, the refrigerant lines themselves must be connected by a licensed HVAC technician. The cover can be installed after the system is commissioned and the line set is in place.
Should I use PVC or aluminum line hide?
PVC is a solid choice for most inland residential installations and is lightweight and easy to cut. Aluminum is a better fit for coastal areas, harsh weather, or commercial-grade projects where a premium finish and maximum durability are priorities.
Does a line hide affect mini split performance?
No. A properly sized line hide encloses the insulated line set without compressing it. As long as the channel has adequate clearance and the drain hose maintains its slope, the system's cooling performance and efficiency are unaffected.
Can I paint a line hide to match my house?
Many line hide kits accept exterior-grade paint. PVC covers generally require a primer formulated for plastics, while powder-coated aluminum usually needs light sanding before painting. Check the manufacturer's guidance before applying any coating.
For more detailed guidance on the broader installation process, see our mini split installation guide. If you are still selecting equipment, the energy-efficient mini split air conditioner overview can help you compare system options before finalizing the line set route.