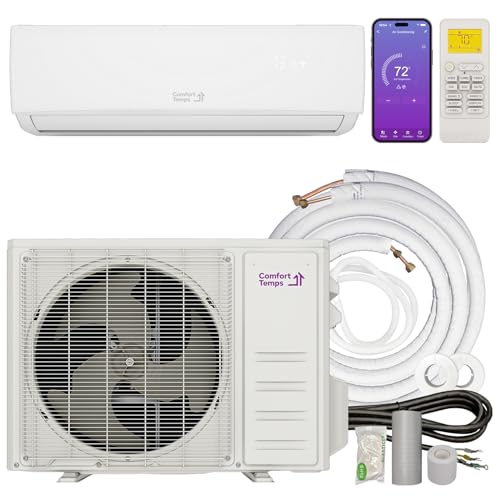
Installing a Mini Split: What to Expect
Installing a mini split is not a single step — it is a sequence of decisions and physical tasks that determine whether the system runs quietly and efficiently for years. This guide walks through the full installation process, from site assessment to final commissioning, so you know exactly what is involved before you commit.
VIEW INSTALLATION STEPSThe honest truth about mini split installation: A ductless system is more forgiving than a full ducted installation, but it still involves refrigerant handling, line-set routing, electrical work, and system vacuuming. Some homeowners can handle parts of the prep work themselves, but the refrigerant and electrical stages require licensed professionals under most local codes and EPA regulations.
What Is a Mini Split and Why Install One?
A mini split — more formally called a ductless mini-split heat pump or ductless air conditioner — consists of an outdoor compressor unit connected by refrigerant lines to one or more indoor air-handling heads. Because conditioned air is delivered directly into the room rather than pushed through ductwork, mini splits avoid duct losses and can be installed in spaces where ducts would be impractical.
This makes them especially attractive in older homes without existing ductwork, in room additions, and in homes where only part of the building needs conditioning. If you are still deciding whether ductless is right for your home, our overview of ductless mini-splits and the broader guide to ductless air conditioning for older homes cover the trade-offs in more depth.
Why homeowners choose mini splits
- No ductwork required, simplifying retrofits
- Zone-by-zone control for different rooms
- Very quiet indoor operation
- Can provide both heating and cooling
What to weigh before installing
- Each indoor head needs its own wall or ceiling space
- Refrigerant line routing requires planning
- Electrical work is usually necessary
- Professional refrigerant handling is essential
The Installation Process Step by Step
The exact sequence varies by configuration — single-zone versus multi-zone, wall-mounted versus ceiling cassette, and so on — but the overall flow follows a consistent pattern. Understanding each stage helps you ask the right questions and understand where a contractor's time is going.
Site Assessment and Load Calculation
The installer measures the space, checks insulation, window exposure, and existing electrical capacity, then performs a load calculation to confirm the correct capacity. Skipping this step is the most common cause of an under- or oversized system.
Indoor and Outdoor Placement
The indoor head is positioned for optimal airflow and drainage, while the outdoor unit is placed with adequate clearance, shade, and noise consideration. Both locations must be practical for the line-set route connecting them.
Mounting Brackets and Wall Penetration
The indoor mounting plate is fixed to the wall, and a hole is drilled for the line set, drain, and electrical cable. The hole is sleeved and sealed to prevent drafts and moisture intrusion.
Electrical Rough-In
A dedicated circuit is run from the panel to the outdoor unit. Depending on the system, the indoor head may also need a power feed. This stage is where licensed electrical work is essential.
Line Set and Drain Routing
Refrigerant lines, communication wire, and the condensate drain are routed between the indoor and outdoor units. Line-set length and routing must respect the manufacturer's limits and avoid kinks or tight bends.
Flaring, Connection, and Torque
Refrigerant line ends are flared and connected to the service valves with proper torque. Incorrect flaring or over-tightening is a frequent cause of leaks, so this step requires care and the right tools.
Vacuuming the System
A vacuum pump removes moisture and air from the refrigerant circuit. Skipping or rushing this step compromises performance and can damage the compressor over time. A proper vacuum takes time and should be verified with a gauge.
Refrigerant Charge and Testing
Depending on the system, refrigerant may be pre-charged for a specific line length or topped up on-site. The system is then started, tested in both modes, and monitored for correct pressures and temperature differentials.
DIY vs Professional Installation
Mini splits are sometimes marketed as DIY-friendly, and there is some truth to that for the less technical steps — mounting the indoor head, drilling and sealing the wall penetration, and routing the drain line are all within reach of a careful homeowner. However, the refrigerant and electrical stages are a different matter. Handling refrigerant requires EPA certification under Section 608 in the United States, and most local codes require electrical work to be performed or inspected by a licensed electrician.
For homeowners weighing the trade-off, the practical division looks like this: prep work and mounting can sometimes be done yourself, but line-set connection, vacuuming, and electrical should involve a licensed professional. Our guide on HVAC contracting explains what to verify about a contractor before signing, and getting HVAC quotes covers what a properly structured proposal should include.
Mini Split Tiers at a Glance
The cards below use tier descriptors to indicate each category's general market positioning. These are relative labels, not figures, and they help you compare like with like across the range of options available.
Single-Zone Starter Mini Split
A basic one-room system with a single indoor head. Ideal for a bedroom, home office, or small addition.
- Simplest installation profile
- Straightforward line-set routing
- Best for one defined space
Multi-Zone Mini Split System
One outdoor unit serving two to four indoor heads, each with its own thermostat. Good for homes conditioning several rooms.
- Independent zone control
- More complex line-set routing
- Requires careful load calculation per zone
Cold-Climate Mini Split Heat Pump
A mini split designed to provide efficient heating well below freezing, often with enhanced compressor technology.
- Year-round heating and cooling
- Cold-weather performance
- Higher electrical load requirements
Ducted Mini Split System
A mini split that connects to short duct runs for spaces where a wall-mounted head would be intrusive. Often used for whole-floor coverage.
- Concealed installation option
- More involved duct routing
- Good for design-conscious spaces
Multi-Zone Heat Pump with Smart Controls
A high-feature system with app-based control, scheduling, and monitoring across zones.
- Remote monitoring and scheduling
- Zone-by-zone automation
- Requires reliable Wi-Fi
Whole-Home Mini Split Array
Five or more indoor heads across multiple levels, typically paired with the highest efficiency outdoor units available.
- Comprehensive home coverage
- Most complex installation profile
- Best with a dedicated commissioning plan
Electrical and Physical Requirements
Before any installation begins, confirm that the home can support the new system. Mini splits draw significant current relative to typical household appliances, and the outdoor unit usually requires its own dedicated circuit and breaker. Panel capacity, breaker availability, and the distance from panel to unit all affect the installation scope.
Our overview of electrical outlet and plug configurations gives useful background on the types of circuits involved, and the article on outlets with USB ports is a related read for homeowners modernizing their home's electrical layout. For a broader view of installation scope across system types, the guide to ductless mini-split installation considerations explains what separates a straightforward project from a complex one.
| Installation Stage | Typical DIY Scope | Professional Scope | Key Consideration |
|---|---|---|---|
| Site assessment and load calculation | Not typical | Recommended | Correct capacity prevents cycling problems |
| Indoor mounting and wall penetration | Possible for careful DIY | Standard service | Level mounting and proper sealing |
| Electrical rough-in | Not typical | Required by most codes | Dedicated circuit and inspection |
| Line-set routing | Possible for careful DIY | Standard service | Respect manufacturer's length limits |
| Flaring and refrigerant connection | Not typical | EPA-certified professional | Leak-free connections require the right tools |
| Vacuuming and charging | Not typical | EPA-certified professional | Moisture in the circuit damages the compressor |
| Startup and testing | Possible for careful DIY | Standard service | Verify both modes before signoff |
Common Installation Mistakes to Avoid
Most mini split failures trace back to installation decisions made in the first day or two, not to the equipment itself. Awareness of the common pitfalls helps you vet a contractor and understand what to check at each stage.
Skipping the load calculation
Oversized units cycle too quickly; undersized ones run continuously. Either outcome shortens equipment life and undermines comfort.
Rushing the vacuum
Moisture left in the refrigerant circuit reacts with oil and forms acids that damage the compressor over time. Vacuuming must be thorough, not fast.
Poor condensate drainage
The indoor head produces condensate. If the drain route is not properly pitched or is blocked, water can back up into the unit or wall. A drain pan float switch adds protection.
Ignoring line-set length limits
Every system has a maximum line-set length and vertical lift. Exceeding them compromises performance and may void the warranty.
Undersized electrical circuit
A circuit that is not sized correctly for the unit's startup draw can trip breakers or overheat wiring. Confirm capacity before installation begins.
Misjudged outdoor placement
Recirculated air, poor clearance, or noise reflections can all undermine performance. Placement is a design decision, not an afterthought.
The First Week After Installation
The days following installation are when small issues tend to surface. A drain line that is slightly off can back up; a flaring joint that did not seat perfectly can leak slowly; and a control setting that is not intuitive can cause confusion. Keeping an eye on these during the first week catches problems while the installer is still readily available to return.
Our guide to the first week after installation covers what to check and when to call for service. Homeowners comparing efficiency options after installation can also review the explainer on what a SEER rating is to understand how the system's performance will shape operating behaviour over time.
Frequently Asked Questions
Can I install a mini split myself?
Partially. Mounting the indoor head, drilling the wall penetration, and routing the drain can sometimes be done by a careful homeowner. The refrigerant connection, vacuuming, and electrical work require EPA certification and, in most jurisdictions, licensed electrical work. Attempting those steps without proper credentials is risky and may violate local codes.
How long does installation take?
A single-zone wall-mounted mini split typically takes one working day for a professional crew. Multi-zone systems and ducted configurations take longer, sometimes two to three days, depending on the number of heads, the complexity of line-set routing, and whether electrical panel work is required.
Do I need a permit?
Most jurisdictions require a mechanical permit for mini-split installation, and electrical permits are usually required as well. Permits protect the homeowner by triggering inspection of the electrical work, refrigerant handling, and condensate routing. Confirm permit responsibility with your contractor in writing before work begins.
Can a mini split connect to existing ductwork?
Standard wall-mounted mini splits do not connect to existing ductwork — they deliver air directly into the room. However, ducted mini-split models exist for homeowners who want concealed indoor units and short duct runs. Whether that configuration fits your home depends on ceiling access and layout.
What happens if the line set is too long?
Exceeding the manufacturer's maximum line-set length reduces capacity, strains the compressor, and may void the warranty. If the outdoor unit cannot be placed within the specified distance, a different configuration — such as a multi-zone system or a ducted unit — may be a better fit.
How soon can I use the system after installation?
Immediately, once commissioning is complete. The system should be tested in both cooling and heating modes before the installer leaves, and any unusual noise, vibration, or drainage issues should be addressed on the spot rather than deferred.
Ready to Choose a Mini Split System?
Review the recommended mini split systems below, then confirm sizing and installation requirements with a qualified contractor before purchase.
VIEW RECOMMENDED SYSTEMS