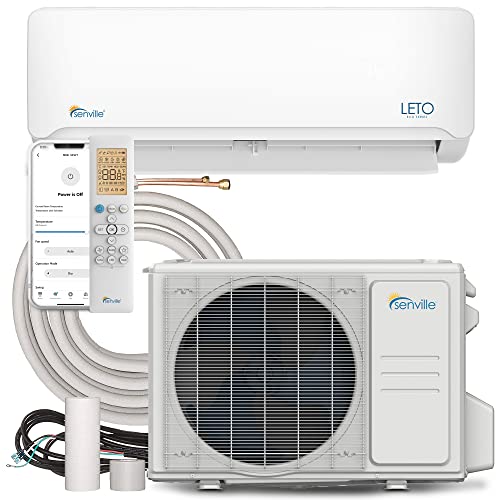
Mini Split Air Conditioner Dripping Water: Causes and Fixes
Water dripping from a ductless mini split is one of the most common service calls in HVAC. This guide explains exactly why it happens, how to diagnose the source, and which fixes you can safely handle yourself before calling a professional.
Why a Mini Split Air Conditioner Drips Water
A mini split cools your room by moving heat from indoors to outdoors. As warm indoor air passes over the cold evaporator coil, moisture in the air condenses onto the coil, just like water beads on a cold glass. That condensation is normal and expected. It collects in a drain pan beneath the coil and flows out through a drain line, usually by gravity, sometimes with a small condensate pump.
Water dripping into your room means the condensate has escaped the intended path. The culprit is almost always one of three things: the drain line is blocked, the coil is frozen, or the drain pan and hose are misaligned. In rare cases, the issue is low refrigerant charge or a failed condensate pump. The good news is that most causes are diagnosable at home with simple observation, and many fixes are straightforward maintenance tasks.
The 7 Most Common Causes of a Dripping Mini Split
Below are the causes we see most often, ranked roughly by frequency. Use this table as a fast reference before reading the detailed diagnosis section.
| Cause | Typical Symptom | Likely Fix |
|---|---|---|
| Clogged condensate drain line | Water drips steadily after long runtime; drain pan overflows | Flush the line with a wet vacuum or distilled vinegar |
| Dirty air filter | Reduced airflow, coil icing, then water when ice melts | Clean or replace the filter |
| Frozen evaporator coil | Ice on the indoor coil; dripping starts when it thaws | Thaw, clean filter, check airflow and refrigerant |
| Disconnected or kinked drain hose | Water pools near the indoor unit or runs down the wall | Reconnect, straighten, or re-clamp the hose |
| Improper drain line slope | Water sits in the line and backs up into the pan | Correct the slope or add a condensate pump |
| Low refrigerant charge | Coil freezes repeatedly, poor cooling, water after thaw | Licensed technician must find and fix the leak |
| Cracked or misaligned drain pan | Water bypasses the pan outlet; visible cracks or gaps | Reseal, realign, or replace the pan |
1. Clogged Condensate Drain Line
This is the single most common cause. Dust, biofilm, insect debris, and algae build up inside the narrow drain line over months of use. Once the line is partially or fully blocked, condensate cannot escape and the drain pan overflows into the room. If your mini split drips after it has been running for a while, especially on humid days, a clog is the prime suspect.
2. Dirty Air Filter
A clogged filter restricts airflow across the evaporator coil. The coil gets colder than it should, frost forms, and when the system cycles off the ice melts faster than the drain can handle. Dripping often follows a period of weak cooling and visible frost. Filter cleaning is the simplest preventive habit and directly supports the reliability of the whole mini split AC system.
3. Frozen Evaporator Coil
Ice on the indoor coil is a symptom, not the root problem. It can come from a dirty filter, blocked return air, a failing blower, or low refrigerant. The water appears when the ice melts. Repeated freezing after a filter cleaning strongly suggests a refrigerant issue that requires professional diagnosis.
4. Disconnected or Kinked Drain Hose
The flexible drain hose can slip off its barb, develop a kink behind the unit, or sag into a trap that holds water. If the indoor unit was recently installed or moved, check the hose connection first. This is especially common after installing a mini split where the line set and drain were routed together and the drain got pinched.
5. Improper Drain Line Slope
Gravity drains need a continuous downward slope from the indoor unit to the exterior. A flat or upward section traps water, and the pan eventually overflows. If the drain run is long or must go upward, a condensate pump is required. Slope problems are a design and installation issue rather than a maintenance one.
6. Low Refrigerant Charge
When refrigerant is low, the evaporator coil pressure drops and the coil temperature falls below freezing. Ice forms, and melting ice produces more water than the drain can handle. This cause is not a DIY fix. It requires leak detection, repair, and recharge by a licensed technician. Ignoring it can damage the compressor.
7. Cracked or Misaligned Drain Pan
The drain pan is plastic or metal and can crack with age, thermal cycling, or impact during service. A pan that has shifted away from the coil lets water drip beside it instead of into it. Inspect the pan for cracks, gaps at the coil edge, and debris that blocks the outlet.
How to Diagnose the Leak Step by Step
Before touching anything, switch the unit off at the thermostat and, if possible, at the breaker. Water and electricity are a dangerous combination. Then work through the following sequence.
- Locate the water source. Wipe the area dry and watch where water reappears. Water at the indoor unit suggests a pan or drain issue. Water running down the wall near the line set suggests a hose problem. Water on the floor beneath a wall-mounted unit often points to an overflowing pan.
- Check the air filter. Remove the filter and hold it up to light. If you cannot see through it, clean it. A dirty filter is the easiest cause to rule out and the easiest to fix.
- Look at the evaporator coil. Remove the front cover if your model allows it safely. Visible frost or ice confirms a freezing problem. Let it thaw fully before further testing.
- Inspect the drain pan. Look for standing water, cracks, debris, and whether the pan outlet is clear. A pan full of water with a dry drain line means the line is blocked.
- Trace the drain line. Follow the hose from the indoor unit to where it exits the house. Check for kinks, disconnections, and sagging sections. Confirm the line slopes downward along its entire run.
- Test the drain flow. With the unit off, pour a cup of water into the pan near the outlet. If it drains slowly or not at all, the line is clogged. If it drains freely, the problem is elsewhere.
- Check the outdoor unit and line set. Water near the outdoor unit may be normal condensate from the suction line or a sign of a drain line routed incorrectly. Confirm the indoor drain terminates in a safe location.
DIY Fixes You Can Do Safely
The following repairs are within reach for a careful homeowner. If any step feels beyond your comfort level, stop and call a professional. A botched repair on a pressurized system can turn a maintenance task into a major repair.
Flush a Clogged Drain Line
Locate the exterior end of the drain line. Attach a wet/dry vacuum to the end and run it for a minute to pull the clog out. Alternatively, pour a mixture of distilled vinegar and warm water into the drain pan outlet and let it sit, then flush with water. Avoid harsh chemical drain cleaners, which can damage the plastic line and the pan.
Clean or Replace the Air Filter
Wash reusable filters with lukewarm water and mild soap, rinse thoroughly, and let them dry completely before reinstalling. Replace disposable filters with the same size and rating. Clean filters every two to four weeks during heavy use.
Thaw a Frozen Coil
Switch the unit to fan-only mode or turn it off entirely and let the ice melt. Place towels under the indoor unit to catch water. Do not chip ice with tools. Once thawed, clean the filter and check for airflow obstructions. If the coil freezes again within a few days, call a technician.
Reconnect or Straighten the Drain Hose
Push the hose firmly back onto its barb and secure it with a hose clamp if one is present. Remove kinks by rerouting the hose with gentle bends. If the hose sags, add a support clip to maintain a continuous downward slope.
Clear the Drain Pan
Remove debris, biofilm, and standing water from the pan. A soft brush and a diluted vinegar solution work well. Check the pan outlet for blockages. If the pan is cracked, a temporary sealant may slow the leak, but plan to replace the pan.
When to Call a Technician
Some causes are not safe or legal to handle without certification. Call a licensed HVAC professional when you observe any of the following:
- The coil freezes repeatedly after cleaning the filter and confirming good airflow.
- You suspect low refrigerant or see oil residue near the line connections.
- You smell a refrigerant odor or hear hissing near the line set.
- The drain pan is cracked and cannot be sealed reliably.
- The indoor unit has water damage to drywall, insulation, or electrical components.
- The condensate pump (if equipped) fails to operate.
- Water continues to drip after you have cleared the drain line and confirmed the slope.
A technician will pressure-test the system, inspect the coil, verify the drain slope, and correct the root cause. Trying to recharge refrigerant without certification is illegal in many jurisdictions and dangerous.
Prevention and Maintenance Routine
Most dripping incidents are preventable with a simple seasonal routine. The habits below take less than an hour per season and dramatically reduce the chance of an indoor leak.
- Clean the filter every two to four weeks during cooling season. This single habit prevents most icing and airflow problems.
- Flush the drain line every three to six months with distilled vinegar or a wet vacuum. Do it before the cooling season begins.
- Inspect the drain pan and hose at the start of each season. Look for cracks, kinks, and debris.
- Keep the outdoor unit clear of leaves, pollen, and debris so airflow and drainage remain unrestricted.
- Schedule professional maintenance annually. A technician will check refrigerant pressures, coil condition, and drain performance. Our overview of maintenance for HVAC systems explains what a proper service visit includes.
If you are still planning your installation, choosing a unit with a well-designed drain path and a reliable condensate pump matters. Our guide to energy-efficient mini split air conditioners covers efficiency features that often correlate with better overall build quality and drainage design.
Unit Tiers and Drain Reliability
Not all mini splits are built to the same standard. While every unit can develop a clog, build quality affects how robust the drain pan, hose fittings, and condensate management are over time. The tiers below describe relative market positioning, not a specific product recommendation.
Entry-Level Tier
Basic drain pans and simple gravity hoses. Adequate for light use, but fittings and pan materials are less robust. Requires consistent filter and drain maintenance to avoid leaks.
Mid-Range Tier
Improved pan design and better hose connections. Often includes a built-in drain pump option. A solid choice for most homes when paired with a regular maintenance routine.
High-End Tier
Reinforced drain pans, corrosion-resistant coatings, and more precise condensate management. Better tolerance for humid climates and longer service intervals between flushes.
Premium Tier
Flagship engineering with advanced moisture control, smart diagnostics, and premium materials. Designed for demanding installations where reliability and low maintenance are priorities.
Regardless of tier, the drain line remains the most failure-prone component. A well-installed mid-range unit with a maintained drain outperforms a neglected premium unit every time.
Frequently Asked Questions
Why is my mini split air conditioner dripping water inside the house?
The most common cause is a clogged condensate drain line. Other causes include a frozen evaporator coil, a disconnected or improperly sloped drain hose, a dirty air filter, low refrigerant charge, or a cracked drain pan. Identifying the exact cause first prevents unnecessary repairs.
Can I fix a dripping mini split myself?
Several fixes are safe for a confident DIYer: cleaning the air filter, flushing a clogged drain line with a wet vacuum or distilled vinegar, straightening a kinked drain hose, and clearing debris from the outdoor unit. Refrigerant issues, frozen coils that recur, and cracked drain pans should be handled by a licensed HVAC technician.
How often should I clean the mini split drain line?
A preventive flush every three to six months is a solid routine, ideally before the cooling season starts. In humid climates or homes with pets, monthly checks of the drain pan and line are sensible. Regular filter cleaning also reduces the amount of debris that reaches the drain.
Does a mini split dripping water always mean a serious problem?
No. A small amount of condensation is normal, and water escaping the unit is usually a maintenance issue such as a clogged line or dirty filter. The situation becomes more serious when water has been dripping for days, when the coil is frozen repeatedly, or when the leak is accompanied by a refrigerant smell or ice buildup.
Why does my mini split drip water only when the weather is very humid?
High humidity increases the volume of condensate the evaporator coil produces. If the drain line is partially restricted, it can handle moderate loads but overflows under heavy condensation. This pattern usually points to a partially clogged drain that needs flushing rather than a mechanical failure.