Mounting a Window AC Unit in the Wall: A Complete Guide
Wall-mounted window air conditioners free up windows, improve security, and deliver a cleaner look. This guide explains wall requirements, the correct sleeve method, tools, step-by-step installation, and the mistakes to avoid.
Jump to Installation StepsIf you already own a window air conditioner and want permanent, window-free cooling, mounting it through an exterior wall is a practical option. This approach is commonly called a through-the-wall installation. It keeps the unit out of your window, lets you lock the window, and often reduces noise and vibration inside the room. The work is manageable for a confident do-it-yourselfer, but it requires careful measuring, proper wall framing, and correct sealing to stay safe, stable, and watertight.
Is Wall Mounting a Window AC Unit Right for You?
Before cutting into a wall, it helps to compare a through-the-wall installation with a standard window installation and a ductless system. Each option fits different situations.
| Aspect | Window Mount | Through-the-Wall Mount | Ductless Mini-Split |
|---|---|---|---|
| Windows stay usable | No | Yes | Yes |
| Security | Weakens window lock | Strong, wall stays locked | Strong |
| Installation effort | Low | Moderate to high (wall cutting) | High (professional) |
| Noise inside | Moderate to high | Reduced by wall mass | Very low |
| Best for | Renters, temporary cooling | Permanent room cooling, no window space | Whole-home or multi-room comfort |
| Reversible | Yes | Partially, with patching | Yes |
Wall mounting shines when a room has limited window space, needs year-round cooling, or when you want to keep windows clear for light and ventilation. If you also want heating in the same opening, explore in-wall air conditioning and heating units before cutting, since the sleeve and unit dimensions differ from pure cooling models.
Wall Requirements and Site Selection
The wall itself determines whether the project is safe. A through-the-wall air conditioner is heavy and vibrates, so the opening must be framed and supported correctly.
Choose the Right Exterior Wall
- Wood-frame walls are the most common choice. They are straightforward to open, frame, and finish.
- Masonry or brick walls are possible but require a core drill or masonry saw, a lintel check, and often a professional mason. Consider professional help.
- Avoid load-bearing headers and structural columns. Never cut through a header or a corner post without an engineer's input.
- Check for utilities first. Scan for wiring, plumbing, and gas lines inside the wall before marking the opening.
- Building codes and permits. Exterior wall openings usually need a permit. Learn the requirements in how to get an AC permit and confirm with your local building department.
Clearance and Placement
- Keep the outdoor side clear of obstructions so the condenser can exhaust hot air.
- Maintain a slight downward tilt toward the outside (about 1/4 inch per foot) so condensate drains out instead of into the room.
- Place the unit high enough to avoid snow and splash, but low enough that you can service the filter.
- Keep at least a few feet from property lines and combustible materials, following the manufacturer's clearances.
Tools and Materials You Will Need
Gather everything before you start. Most items are standard homeowner tools; the wall sleeve is the key special part.
- Wall sleeve sized for your AC model (or a manufacturer-approved through-the-wall sleeve)
- Stud finder, level, tape measure, and pencil
- Drywall saw or reciprocating saw for wood-frame walls; masonry tools for brick
- Drill and bits, framing lumber (2x4 or 2x6), and wood screws
- Exterior-grade sealant, expanding foam, and flashing
- Insulation for the sleeve gap and a drip rail or sill pan
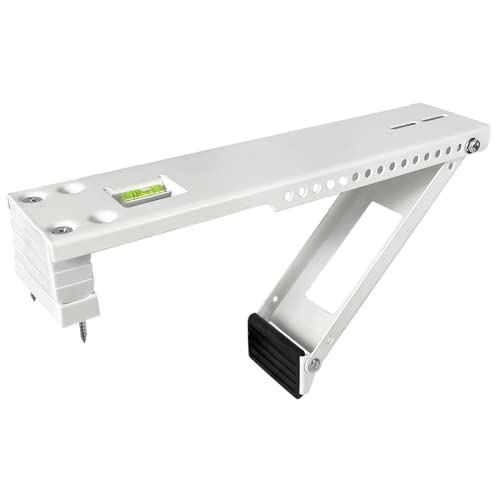
- Support brackets rated for the unit's weight
- Safety glasses, gloves, and a dust mask
Step-by-Step: Mounting a Window AC Unit in the Wall
The steps below assume a wood-frame exterior wall and a manufacturer-approved wall sleeve. Masonry walls require a different opening method but the same sealing and support principles.
- Measure the unit and sleeve. Measure the AC cabinet width, height, and depth, then add clearance for the sleeve per the manual. The opening is built to the sleeve's outside dimensions, not the unit's. Write these numbers down and double-check them before cutting.
- Mark the opening on the interior wall. Use a stud finder to locate framing. Center the opening between studs where possible. Draw the outline with a level, and confirm the slight downward slope toward the exterior. Verify utilities are clear with a scanner.
- Cut the opening. Score drywall and cut carefully. Remove the interior finish first, then cut the sheathing and exterior finish. Keep the cut square. For masonry, use a core drill or masonry saw and consider professional help.
- Frame the opening. Install a header above the opening and jack studs on the sides, sized to carry the sleeve and unit. Use 2x4 or 2x6 lumber as required by the wall thickness. Fasten framing securely to the existing studs. This frame carries the load; the finish does not.
- Dry-fit the sleeve. Slide the sleeve into the opening. It should be level side to side and slope slightly downward outside. Shimming is acceptable behind the sleeve, but do not shim the unit itself in a way that blocks drainage. Mark the sleeve flange for fastening.
- Install flashing and the sill pan. Before final fastening, add flashing over the exterior sill and up the sides to direct water away. A sill pan under the sleeve prevents water from tracking into the wall cavity. Seal seams with exterior-grade sealant.
- Fasten the sleeve and seal the perimeter. Secure the sleeve to the framing with screws through the flanges. Fill the gap between the sleeve and framing with expanding foam, then trim it flush. Seal the interior and exterior perimeter with a bead of exterior sealant, leaving the weep holes and drain path clear.
- Add exterior support. For larger units, install brackets from the exterior wall to the underside of the sleeve. Follow the bracket rating and the manufacturer's instructions. Support prevents sagging and keeps the slope correct.
- Insulate and finish the interior. Add insulation around the sleeve where the wall cavity is exposed. Trim the interior with a frame or casing to cover rough edges and seal air leaks. Keep the unit's front panel removable for filter access.
- Install the AC unit. With help, slide the unit into the sleeve until it seats. Check that it slopes slightly outside and that the seal between the unit and sleeve is tight. Plug in to a dedicated circuit rated for the unit's amps, and follow the manual's electrical requirements.
- Test and check for leaks. Run the unit and check cooling, drainage, and vibration. Look for water tracking inside after a hose test on the exterior. Re-seal any gaps and confirm the unit is stable.
Common Mistakes to Avoid
- Cutting before measuring the sleeve. The sleeve, not the unit, defines the opening size.
- Forgetting the slope. A level or inward-tilted unit drains condensate into the room and wall.
- Skipping the header and jack studs. Framing carries the load; drywall and siding do not.
- Blocking weep holes. Sealant in the drain path causes water to pool and rust the sleeve.
- Ignoring the electrical circuit. Window units draw significant current; use a dedicated circuit per the manual. If you are unsure about the panel, read 110V vs 240V AC unit basics before deciding.
- No permit. Exterior wall openings usually require one; skipping it can complicate resale and insurance.
Maintenance After a Wall Installation
Once mounted, the unit needs routine care to stay efficient and quiet. Clean or replace the filter monthly during heavy use, following how to clean an AC filter. Inspect the exterior sealant and flashing each season, and clear debris from the outdoor coil. A dirty condenser reduces cooling and strains the compressor, so plan periodic coil cleaning with how to clean AC condenser coils.
If the unit stops cooling, do not assume the installation failed. Work through my air conditioner is not blowing out cold air to separate simple fixes from refrigerant or compressor issues. For a broader checklist of seasonal tasks, the installation guide and maintenance resources are useful references.
Choosing the Right Unit for a Wall Installation
Not every window AC is ideal for permanent wall mounting. Look for models marketed as through-the-wall compatible or sold with a matching sleeve. Consider the unit's tier and features relative to your needs.
- Entry-level tier: basic cooling, mechanical controls, and straightforward installation. Good for a spare room or seasonal use.
- Mid-range tier: electronic controls, remote operation, and better efficiency. A solid fit for a primary bedroom or home office.
- High-end tier: inverter compressors, smart controls, and quieter operation. Best when the unit will run frequently and comfort matters most.
Tier descriptions reflect relative market position and features, not any specific figures.
If you want smart features, a smart window air conditioner can pair well with a permanent wall mount. If noise is a concern, compare quiet models before cutting, and if the room is small, a small air conditioning unit may be all you need.
When to Call a Professional
Hire a licensed contractor or mason when the wall is brick, stone, or another masonry type; when the opening is on a second story or higher; when you are unsure about load-bearing framing; or when local codes require an electrician for a new circuit. A professional installation is a long-term investment in safety and weatherproofing, and many contractors offer a maintenance plan afterward, such as those described in HVAC maintenance plan options.
Frequently Asked Questions
Can I put a regular window AC unit through a wall?
Many window units can be installed through a wall, but only with a properly sized sleeve and framing. Check the manual for through-the-wall approval. Some models are designed specifically for wall sleeves, which makes the installation cleaner and safer.
Do I need a special sleeve?
A wall sleeve is strongly recommended. It supports the unit, provides a consistent opening, and simplifies replacement later. Use a sleeve approved for your AC model or a universal through-the-wall sleeve rated for the unit's dimensions and weight.
How much slope should the unit have?
A slight downward slope toward the outside, roughly 1/4 inch per foot, lets condensate drain out. The sleeve and unit should not tilt inward, or water will enter the room.
Can I install a wall-mounted AC on a brick wall?
Yes, but masonry requires core drilling or masonry sawing, a lintel check, and careful flashing. Because of the structural and water-management risks, professional help is recommended for brick and stone.
Will a wall installation be quieter than a window install?
Often yes. The wall mass and a tight sleeve reduce vibration and noise transfer compared with a window frame. Sealing gaps and using a correctly sized sleeve further improve quietness.
What if the unit does not cool after installation?
First check the filter, airflow, thermostat settings, and whether the outdoor coil is blocked. If those are fine, the issue may be refrigerant or a compressor problem, which needs a technician. Start with the troubleshooting steps in the cold-air guide before calling for service.
Final Checklist Before You Cut
- Sleeve and unit dimensions confirmed against the manual
- Wall scanned for utilities and framing located
- Permit requirements checked with the local building department
- Header and jack stud plan drawn
- Flashing, sill pan, sealant, and insulation on hand
- Electrical circuit and plug type confirmed
- Helper available for lifting the unit
- Exterior clearances and drainage path verified
Done correctly, mounting a window AC unit in the wall is a durable upgrade that keeps your windows free and your room comfortable. Take the measurements seriously, frame and flash the opening properly, and the installation will serve you for years.