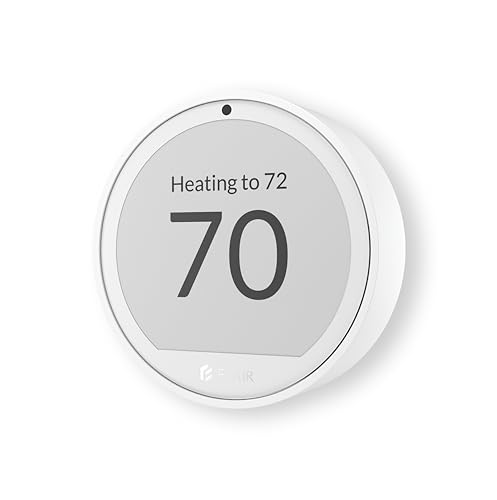
Why the Thermostat Matters for a Split System
A split system — whether a ductless mini-split, a multi-zone system, or a ducted split heat pump — separates the indoor air handler from the outdoor condenser. The thermostat is the command center: it reads room temperature, decides when to call for cooling or heating, and tells the compressor and fan how hard to work. For inverter-driven systems, the thermostat's control logic directly affects how smoothly the compressor modulates, which in turn shapes comfort stability and long-term efficiency.
Many homeowners assume any wall thermostat will work. In practice, ductless split systems are a different animal. A large share of mini-split indoor heads ship with a handheld infrared remote and no low-voltage thermostat terminals at all. Others include a 24V terminal block (R, C, Y, G, W) or a manufacturer-specific connector that only accepts the brand's own wired controller. Understanding that distinction is the single most important step in the buying process.
If you are still mapping out your overall cooling strategy, the broader HVAC thermostat selection guide covers how central systems, heat pumps, and split units differ in their control requirements.
Split System Thermostat Types at a Glance
The market offers several distinct product families. Each serves a different installation scenario and a different position in the market.
| Tier | Type | Best For | Key Traits |
|---|---|---|---|
| Entry-Level | Non-programmable wall thermostat | Basic single-zone cooling, rental units | Simple dial or digital setpoint, battery powered, no scheduling |
| Mid-Range | Programmable 5-2 or 7-day thermostat | Households with predictable weekday schedules | Time-based schedules, backlit display, multi-stage support |
| Mid-Range | Wireless / remote sensor thermostat | Rooms where wiring is difficult or no C-wire exists | RF bridge to indoor unit, battery or line-powered, room-average sensing |
| Premium | Smart thermostat with app & geofencing | Tech-forward homes, remote monitoring, energy insights | Wi-Fi, learning algorithms, occupancy detection, voice assistant support |
| Premium | Manufacturer wired controller | Brand-specific mini-split and VRF systems | Full access to operating modes, error codes, and zone settings |
Compatibility: The Make-or-Break Factor
Before comparing features, confirm that the thermostat will actually communicate with your indoor unit. Split systems fall into three control architectures:
- Standard 24V low-voltage terminals. The indoor board exposes R, C, Y, G, W (and sometimes O/B for reversing valve). Universal thermostats from major brands can typically be wired here.
- Proprietary serial communication. The indoor head uses a brand-specific two-wire bus. Only the manufacturer's wired controller or a certified gateway will work.
- Remote-only control. The unit has an infrared receiver and no thermostat terminals. In this case a third-party thermostat is only possible with an add-on interface module or a dedicated wireless bridge kit.
The practical takeaway: locate the wiring diagram on the indoor unit's service panel, or check the installation manual's "accessories" section. If the terminal block shows R and C, you have a strong candidate for a universal thermostat. If it shows only two communication wires, plan on a manufacturer controller.
For systems that already have a low-voltage terminal but no C-wire, the C-wire installation and adapter guide explains the safe workarounds without running new cable.
Key Features to Evaluate
1. Multi-Stage and Heat Pump Support
Split heat pumps need a thermostat that can energize the reversing valve (O or B terminal) and, on variable-capacity models, interpret multi-stage or modulating calls. A basic single-stage thermostat will run the system, but it will not exploit the inverter's part-load efficiency. Look for models rated for at least two heat / two cool stages and explicit heat-pump compatibility.
2. Scheduling and Occupancy Logic
Programmable models let you set setback periods for work hours and sleep. Smart models add geofencing, so the system relaxes when everyone leaves and recovers before the first person returns. For a ductless head serving a single room, occupancy sensing is often more useful than a rigid 7-day schedule.
3. Remote Sensor Capability
Split system indoor heads often sit high on a wall, where the return-air sensor reads warmer air than the occupied zone. A thermostat that supports a remote floor-level sensor, or a wireless remote-control thermostat that averages readings, delivers more accurate comfort. This is particularly valuable in rooms with high ceilings or direct sun exposure.
4. Power Source and Wiring
Battery-powered thermostats avoid the C-wire problem entirely but require periodic battery changes. Line-powered smart thermostats need a constant 24V source. Wireless bridge kits sidestep both by transmitting setpoint changes over RF to a receiver wired at the indoor unit.
5. App, Voice, and Data
Premium smart thermostats add Wi-Fi control, voice assistant integration, runtime reports, and filter reminders. If your split system is inverter-driven, runtime and energy trend data can help you verify that the system is modulating rather than short-cycling.
Wiring Basics for Split System Thermostats
A typical 24V split-system control circuit uses these conductors:
- R — 24V hot from the indoor transformer
- C — common, required by most smart thermostats
- Y — compressor / cooling call
- G — indoor fan
- W — heat call (electric strip or furnace)
- O / B — reversing valve for heat pump operation
If your indoor unit exposes only R, Y, G and W with no C, a smart thermostat will either need an adapter or a battery-only model. Never jumper R to C to "create" a common — that shorts the transformer. When in doubt, photograph the terminal block and compare it against the thermostat's compatibility chart before ordering.
Homeowners troubleshooting a dead display should first confirm control power; the blank thermostat diagnostic guide walks through fuse, breaker, and low-voltage checks step by step.
Installation and Commissioning Tips
- Kill power at the indoor unit disconnect before touching any conductor.
- Label every wire with its terminal letter before removing the old thermostat.
- Match the thermostat's equipment type in its setup menu (heat pump vs. conventional, number of stages, reversing valve O vs. B).
- Run a short test cycle in both cooling and heating to verify the reversing valve and fan respond correctly.
- Check short-cycle behavior over the first day — an inverter system should ramp gradually, not bang on and off every few minutes.
If the system cools but never satisfies the setpoint, or the thermostat display is active while the indoor fan stays off, the problem may be in the control circuit rather than the thermostat itself. The thermostat on but not cooling troubleshooting guide isolates the most common failure points.
Matching the Thermostat to Your Split System
Ductless Mini-Split (Single Zone)
Most single-zone mini-splits either use the handheld remote or accept a manufacturer wired controller. If the indoor unit has a 24V terminal block, a mid-range programmable or wireless remote thermostat is a practical upgrade. Otherwise, stay with the brand controller — third-party units will not speak the proprietary protocol.
Multi-Zone Mini-Split
Multi-zone systems need per-zone control, and the outdoor unit shares capacity across heads. A central smart thermostat cannot manage zones on its own; you need the manufacturer's zone controller or a compatible gateway. A whole-home perspective helps here — the home heating and cooling thermostat overview explains how zoning logic differs from single-setpoint control.
Ducted Split Heat Pump
A ducted split heat pump behaves much like a central system and usually accepts a standard 24V thermostat. Prioritize heat-pump-rated models with auxiliary heat staging and defrost-aware logic. The heat pump and AC thermostat guide covers defrost and emergency-heat behavior in detail.
Split System with Electric Heat
If the indoor unit includes electric resistance heat, the thermostat must support at least one auxiliary heat stage and ideally a separate emergency-heat mode. Verify the W2 / auxiliary terminal count before purchase.
Common Mistakes to Avoid
- Buying before checking the terminal block. Compatibility is not universal across split systems.
- Ignoring the C-wire. Smart thermostats without a common wire either fail or need an adapter.
- Using a single-stage thermostat on a variable-capacity system. You lose the part-load efficiency the inverter was designed to deliver.
- Mounting the thermostat in direct sun or near a supply register. False readings cause short cycling and comfort complaints.
- Skipping the equipment-type setup. A thermostat configured as conventional when the system is a heat pump will not energize the reversing valve correctly.
Frequently Asked Questions
It depends on the split system. Many ductless mini-splits use proprietary handheld remotes and do not accept standard thermostats. Some models include a low-voltage terminal block that supports third-party thermostats. Always check the manufacturer's compatibility list before purchasing.
Yes, a thermostat for a mini-split heat pump must support both heating and cooling stages and match the system's low-voltage control protocol. Some manufacturers offer dedicated wired controllers, while others work with universal smart thermostats that have multi-stage heat pump support.
A C-wire (common wire) provides continuous 24V power to a smart thermostat. Many split systems do not include a C-wire at the indoor unit, so you may need an adapter kit or a thermostat that runs on batteries. Check the wiring diagram before installing.
Yes. Smart thermostats learn your schedule, support geofencing, and can reduce runtime during peak hours. When paired with a compatible inverter split system, they help maintain stable temperatures and reduce energy waste.
Mount it on an interior wall roughly 4 to 5 feet above the floor, away from direct sunlight, supply registers, doors, and appliances that generate heat. In rooms with high ceilings, a remote sensor at occupied level gives more accurate control than the wall-mounted unit alone.
Bottom Line
The right thermostat for a split system starts with compatibility and ends with features that match how you actually use the room. Confirm the terminal architecture on the indoor unit, decide whether you need C-wire support or a wireless bridge, and then choose the tier that fits: an entry-level non-programmable unit for a simple rental, a mid-range programmable or wireless remote model for a typical bedroom or office, or a premium smart thermostat for homes that want app control, occupancy logic, and energy reporting. Get those three decisions right and the thermostat becomes an invisible upgrade that quietly improves comfort every day.