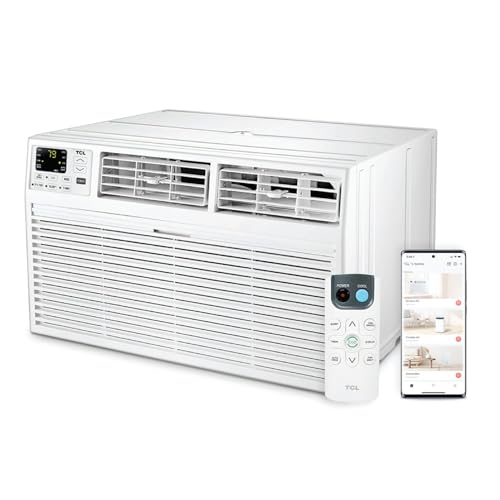
Wall Mounted Air Conditioning Unit Installation
This guide explains how a wall mounted air conditioning unit is installed from start to finish: site planning, bracket mounting, line set routing, condensate drainage, electrical setup, and commissioning. Use it to prepare your home and verify the work at handover.
EXPLORE THE PHASESWho this guide is for: homeowners, landlords, and facility managers preparing for a professional installation. It explains what the installer will do, what you must prepare in advance, and how to check the finished work. Refrigerant and electrical work should always be performed by licensed professionals.
What Wall Mounted AC Installation Involves
A wall mounted air conditioning unit is a split system: an indoor air handler hangs high on a wall and connects to an outdoor condenser through an insulated refrigerant line set, a communication cable, and a condensate drain. Installation is not a single task but a sequence of dependent stages.
Skipping any stage creates problems later: an unlevel indoor unit leaks water, an un-evacuated line set shortens compressor life, and an undersized circuit trips breakers. The sections below break the project into planning, mechanical, electrical, and commissioning phases so you can follow the process and ask the right questions.
If you are still selecting equipment, start with the wall mount heat and air conditioning unit buyer's guide and the wall mounted air conditioner and heater combo overview.
The Four Installation Phases
Every professional installation follows the same broad sequence. Understanding each phase helps you schedule the work, prepare the space, and know what to inspect when the installer finishes.
Pre-Installation Planning
Site survey, electrical check, equipment placement, and permit review. This phase prevents most callbacks.
Mechanical Installation
Wall bracket, indoor unit, wall penetration, line set, and condensate drain routing.
Electrical & Outdoor Unit
Dedicated circuit, disconnect, outdoor pad or bracket, and interconnecting cable.
Commissioning
Vacuum, leak test, refrigerant release, operation checks, and handover.
Phase 1: Pre-Installation Planning
Planning is where installations succeed or fail. The goal is to confirm that the equipment fits the space, that the electrical system can support it, and that the line set route is short and clean.
Confirm the Room Load and Equipment
Verify that the selected unit matches the room load. An oversized unit short-cycles and removes less humidity; an undersized unit runs continuously. Review how to size an air conditioner and what happens if AC is too big or small before finalizing the model.
Check the Electrical Panel
Most wall mounted mini-splits need a dedicated 208/240-volt circuit. Confirm that the panel has spare capacity and that the breaker size matches the unit's rated current. Our amps and breaker size guide explains the calculation, and a qualified electrician should make the final determination.
Select the Indoor Unit Location
- Mount high on the wall with clear airflow above furniture and electronics.
- Avoid placing the unit directly above heat sources or seating areas.
- Prefer an exterior wall so the line set and drain can exit directly to the outside.
- Keep the unit level; the condensate drain depends on a consistent slope.
For a deeper review of placement criteria, see AC indoor and outdoor placement.
Select the Outdoor Unit Location
- Level ground or a wall bracket with adequate clearance for airflow and service access.
- Shaded or sheltered where possible, but never enclosed in a small closed space.
- Accessible for future maintenance and refrigerant service.
- Close enough to the indoor unit to keep the line set within the manufacturer's maximum length.
Check Permits and Contractor Qualifications
Many jurisdictions require a mechanical permit for split system installation. Confirm the contractor's license and insurance before work begins. Our guides on how to get an AC permit and how to choose an HVAC contractor explain what to verify.
Phase 2: Mechanical Installation
Once planning is complete, the mechanical work begins. This phase covers the wall bracket, the indoor unit, the wall penetration, the line set, and the condensate drain.
- Mount the wall bracket. Locate wall studs and anchor the mounting plate with the manufacturer's fasteners. The bracket must be level and rated for the unit's weight. A reinforced plate prevents vibration noise and long-term sagging.
- Drill the wall penetration. Cut a hole sized for the line set and drain sleeve, typically with a slight downward slope toward the exterior. Seal the sleeve after the lines are installed to prevent drafts and moisture entry.
- Hang the indoor unit. Lift the unit onto the bracket and confirm it sits level. A tilted unit will not drain correctly and may leak. For step-by-step detail, see wall mounted air conditioning unit installation.
- Run the line set. Insulated copper lines for liquid and suction connect the indoor and outdoor units. Keep bends gentle, avoid kinks, and secure the lines every few feet. The maximum line length and elevation change are defined by the manufacturer. Our guide on refrigerant line set length explains the limits.
- Route the condensate drain. The drain must slope continuously downward. Use a condensate pump if a gravity drain is impossible. Insulate the drain line in humid spaces. Poor drainage causes the common problem of water coming out of AC vents.
- Seal the penetration. Use appropriate sealant or a wall sleeve cap to close the gap around the line set. This prevents air leakage, insect entry, and water intrusion.
Phase 3: Electrical and Outdoor Unit
Electrical work must be completed by a licensed electrician. This phase covers the dedicated circuit, the outdoor disconnect, the outdoor unit placement, and the interconnecting control cable.
- Install the dedicated circuit. The unit requires a dedicated breaker sized to the manufacturer's specification. The circuit typically terminates at a weatherproof disconnect near the outdoor unit.
- Set the outdoor unit. Place the condenser on a level pad or a wall bracket. Confirm clearances on all sides for airflow and service. A sturdy pad prevents vibration and keeps the unit level. If space is tight, see wall mount bracket for mini split systems.
- Make the electrical connections. The interconnecting control cable runs alongside the line set from the indoor unit to the outdoor unit. Connections must be tight, dry, and protected from weather.
- Bond and ground. Confirm grounding per local code. Improper grounding is both a safety hazard and a common cause of intermittent control faults.
Phase 4: Commissioning and Testing
Commissioning is the final and most important phase. It confirms that the system is leak-free, properly evacuated, and operating within specifications. Skipping or rushing this phase is the most common cause of premature compressor failure.
- Pressure test. The technician pressurizes the line set with dry nitrogen and monitors for pressure loss. Any leak must be located and repaired before proceeding.
- Evacuate the system. A vacuum pump removes moisture and non-condensable gases. The vacuum must hold at the target micron level for the required time. Our guide on how to vacuum an AC system explains the process.
- Release refrigerant. The technician opens the service valves to release the factory charge. Additional refrigerant is added only if the line set exceeds the manufacturer's base length.
- Verify operation. Measure supply and return air temperatures in cooling mode. Confirm that the unit reaches the setpoint and that the drain carries condensate away properly.
- Check drainage. Run the unit long enough to produce condensate. Confirm that water exits the drain line outdoors or into the pump reservoir without backing up.
- Test controls and safety features. Verify the remote control, louver swing, fan speeds, timer, and any smart features. Confirm that the unit responds to setpoint changes. Our how to test new AC guide lists the checks to perform.
Handover Checklist
Before the installer leaves, confirm the following items. A thorough handover prevents surprises in the first weeks of operation.
| Checkpoint | What to Confirm |
|---|---|
| Documentation | Manufacturer manual, warranty registration, and permit sign-off are provided. |
| Line set | Insulation is intact, bends are gentle, and the penetration is sealed. |
| Drainage | Condensate flows freely to the exterior or pump without backing up. |
| Electrical | Dedicated breaker labeled, disconnect installed, and grounding confirmed. |
| Operation | Cooling reaches setpoint; remote and louver functions work. |
| Noise | Indoor and outdoor units operate without abnormal vibration or rattling. |
| Filter | Filter is installed correctly and the owner understands the cleaning interval. |
Ask the installer to explain filter cleaning, seasonal mode changes, and what symptoms warrant a service call. Our guide on questions to ask installer lists additional items to clarify. For the first week of operation, see first week after AC installation.
Common Installation Mistakes to Avoid
Most installation problems trace back to a small number of avoidable errors. Knowing them helps you evaluate the work and ask the right questions.
- Improper wall bracket anchoring. Anchoring into drywall alone causes vibration, sagging, and eventual failure. Fasteners must reach studs or appropriate anchors.
- Tilted indoor unit. An unlevel unit prevents condensate from draining and leads to water leaks from the indoor head.
- Poor drain slope. Uphill or flat drain runs trap water. Every section must slope toward the exit.
- Unsealed wall penetration. Gaps allow drafts, moisture, and insects into the wall cavity. Seal the sleeve after the line set is in place.
- Insufficient vacuum. Moisture left in the line set reacts with refrigerant oil and forms acids that damage the compressor.
- Undersized circuit. A breaker that trips repeatedly is a warning sign. The circuit must match the unit's rated current.
- Outdoor unit clearances ignored. A condenser boxed in by walls or shrubs cannot reject heat and loses capacity.
- Skipping the leak test. A small leak at a flare fitting will eventually cause a loss of charge and a no-cooling complaint.
For a broader list, see common installation mistakes. If you notice symptoms after installation, the troubleshooting air conditioning guide covers the first checks.
First Maintenance After Installation
The installation sets the baseline for the system's life. The first maintenance visit is typically scheduled within the first year. Between visits, the owner handles filter care and visual checks.
- Filters: Clean or replace every four to six weeks during heavy use. See when to replace AC filter.
- Indoor coil: Have the coil cleaned professionally once per year. Our wall mounted air conditioner cleaning service guide explains what is included.
- Outdoor coil: Keep the condenser clear of debris and rinse gently. See clean condenser coils.
- Drain line: Flush the drain seasonally to prevent clogs. A blocked drain causes water leaks and shutdowns.
- Professional service: Schedule annual maintenance to check refrigerant charge, electrical connections, and fan operation. See the split system air conditioning maintenance checklist.
Frequently Asked Questions
How long does the installation take?
A single-zone wall mounted installation usually takes four to eight hours for a professional crew. Longer line sets, difficult wall penetrations, or multi-zone systems can extend the project into a second day.
Can I install the unit myself?
Refrigerant connections, evacuation, and electrical wiring require licensed expertise in most jurisdictions. DIY work also risks voiding the manufacturer warranty. Professional installation is strongly recommended for safety and long-term reliability.
What electrical supply is required?
Most wall mounted mini-splits need a dedicated 208/240-volt circuit with a properly sized breaker and a weatherproof disconnect near the outdoor unit. A smaller group of compact models runs on 110 volts. See wall mounted air conditioner heater combo 110 volt for that variant, and have an electrician confirm panel capacity.
Where should the indoor unit be mounted?
Mount the indoor unit high on an exterior or load-bearing wall with clear airflow above furniture, a level bracket, and a short, properly sloped path to the exterior for the line set and condensate drain.
How is the condensate drain installed?
The drain must slope continuously downward to the exterior or to a condensate pump. Avoid low spots and uphill runs. Insulate the drain line in humid spaces to prevent sweating, and test the drain during commissioning.
What should I check at handover?
Confirm that cooling reaches setpoint, the drain flows freely, the wall penetration is sealed, the circuit is labeled, and the remote and louver functions work. Review the manual, warranty registration, and filter cleaning instructions with the installer.
Planning the Right Equipment First?
Installation quality matters most when the equipment matches the room. Review the recommended wall mounted units below and compare tiers before booking an installer.
VIEW RECOMMENDED MODELS