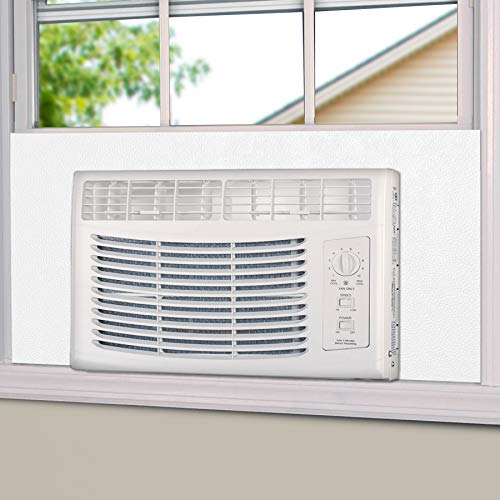
Window Air Conditioner Leaking Water Inside House: Complete Diagnosis & Repair Guide
Puddles beneath your window unit? Discover the real causes of indoor water leaks and learn how to fix them step by step before moisture damages your walls, floors, or furnishings.
Why Does a Window AC Leak Water Inside the House?
A window air conditioner removes both heat and humidity from your room. The evaporator coil condenses moisture from warm indoor air into water, which collects in a drain pan and should exit outdoors through a drain hole or weep hole at the rear of the unit. When any part of that drainage path fails, water finds its way back into your room instead of outside.
Understanding the three separate water sources inside a window unit helps you diagnose faster: condensation from the evaporator coil (indoor side), condensation from the condenser coil (outdoor side), and rainwater that enters through gaps in the installation. Each source has different causes and different fixes.
The Five Most Common Causes
1. Incorrect Backward Slope
The unit must tilt slightly toward the outdoors so gravity carries water out. If it tilts inward or sits perfectly level, condensation pools and spills into the room.
2. Clogged Drain Hole or Drain Pan
Dust, mold, insect nests, and debris block the weep hole or fill the drain pan. Water overflows the pan and drips down the indoor side of the unit.
3. Frozen Evaporator Coil
Restricted airflow or low refrigerant freezes the indoor coil. When the ice melts rapidly, the drain pan cannot handle the volume and water overflows into the room.
4. Poor Installation Seal
Gaps around the window frame, missing weather stripping, or a misaligned installation kit let rainwater and outdoor condensation travel along the unit and drip indoors.
5. Clogged Air Filter
A dirty filter reduces airflow across the evaporator coil, causing it to freeze. The meltwater then overwhelms the drain system and leaks inside.
Step-by-Step Fix for a Window AC Leaking Water Inside
Work through these steps in order — from the simplest and most common fix to the more involved repairs. You will need a spirit level, a screwdriver, a soft brush or pipe cleaner, a garden hose, and a replacement filter if yours is worn.
- Unplug the unit and check the slope. Place a spirit level on the top of the unit. The bubble should tilt slightly toward the outside — roughly a quarter-inch to half-inch per foot of depth. If it tilts inward or is level, pull the unit out, adjust the window AC bracket or support, and reinstall with the correct backward pitch.
- Inspect and clear the drain hole. Look at the rear bottom of the unit for the weep hole. Use a pipe cleaner, wire, or a blast of compressed air to clear debris. If the drain pan is accessible, wipe it clean and flush it with a mixture of water and white vinegar to dissolve mold and mineral buildup.
- Clean or replace the air filter. Remove the front grille and slide out the filter. Wash it with warm soapy water, rinse, and let it dry completely before reinstalling. If the filter is torn or permanently clogged, install a new one. A clean filter restores airflow and prevents coil freeze-up.
- Check for a frozen evaporator coil. If you see ice on the indoor coil, turn the unit off and let it thaw completely — this may take several hours. Do not chip at the ice. After thawing, clean the filter, verify airflow, and run the unit again. If the coil freezes repeatedly, the refrigerant charge may be low and you should consult a technician.
- Reseal the installation. Inspect the accordion side panels and the top seal. Replace cracked or missing foam insulation, add weather stripping around the window frame, and confirm the installation kit sits flush. Any gap that lets rain in will eventually show up as an indoor leak.
Cause and Fix Quick Reference
| Symptom | Likely Cause | Recommended Fix |
|---|---|---|
| Water drips from the indoor front grille | Clogged drain hole or drain pan overflow | Clear weep hole, flush drain pan with vinegar solution |
| Water pools on the windowsill and runs down the wall | Unit tilted inward or sitting level | Reinstall with a slight backward slope toward the outdoors |
| Leak only during humid weather or after long runtimes | Frozen evaporator coil melting rapidly | Thaw unit, clean filter, verify airflow, check refrigerant |
| Leak after rainstorms | Gaps in installation seal or side panels | Replace weather stripping, reseal accordion panels |
| Water with musty odor and visible debris | Mold and biofilm blocking the drain path | Deep clean drain pan and drain line, treat with vinegar |
How to Prevent Future Indoor Water Leaks
Once the immediate leak is fixed, adopt a short maintenance routine to keep the drainage path clear. These habits take only minutes and dramatically reduce the chance of a repeat leak.
- Clean the filter every two to four weeks during peak cooling season. A clean filter is the single most effective defense against coil freeze-up and overflow.
- Flush the drain hole monthly with a cup of water and a splash of white vinegar. This dissolves the biofilm that attracts mold and blocks the weep hole.
- Verify the slope each season. Units can shift slightly over time, especially on older window air conditioner supports. A quick spirit-level check takes seconds.
- Inspect the seal before rainy season. Replace worn foam and weather stripping around the window frame and side panels.
- Consider a unit with better drainage design. Some modern models route condensation more efficiently; if your current unit is aging, a replacement may be the more reliable long-term investment.
When to Call a Professional
Most indoor leaks are DIY-fixable. However, call a qualified HVAC technician if any of the following apply: the evaporator coil freezes repeatedly after cleaning, you suspect a refrigerant leak, the leak persists after correcting the slope and clearing the drain, or water has already caused visible damage to drywall, flooring, or electrical outlets near the window. A professional can also verify that the unit is correctly sized and installed for your window type — which matters if you have an unusual opening such as a sliding window or a crank-out window.
Ready to Replace a Persistent Leaker?
If your current unit has leaked repeatedly despite repairs, a replacement with a better drainage design and a proper installation kit may be the smarter long-term investment. Browse our recommended window units below.
View Recommended Window AC UnitsFrequently Asked Questions
Is it normal for a window AC to leak a little water inside?
No. A correctly installed and maintained window unit should never drip water into the room. A small amount of condensation on the outdoor side is normal, but any indoor moisture indicates a drainage, slope, or sealing problem that should be addressed promptly.
Can I use a window AC that leaks water inside?
It is not advisable. Continued indoor leaking can damage windowsills, drywall, flooring, and nearby electrical fixtures, and it creates a breeding ground for mold. Fix the leak or stop using the unit until it is repaired.
How much backward tilt does a window AC need?
A gentle slope of roughly a quarter-inch to half-inch per foot of unit depth toward the outdoors is the standard recommendation. The goal is enough pitch for gravity to carry condensation out the weep hole without making the unit look visibly crooked.
Why does my window AC leak only when it is humid?
High humidity means the evaporator coil condenses more water. If the drain hole is partially clogged or the drain pan is marginal, the extra volume overwhelms the system and water spills indoors. Cleaning the drain path usually resolves this.
Can a dirty filter cause an indoor water leak?
Yes. A clogged filter restricts airflow, which allows the evaporator coil to drop below freezing. Ice builds up, and when the unit cycles off, the ice melts faster than the drain pan can handle, causing overflow into the room.
Should I drill a bigger drain hole?
No. Enlarging the factory drain hole can void your warranty and alter the unit's structural integrity. Instead, clear the existing weep hole thoroughly with a pipe cleaner or compressed air and flush the pan with a vinegar solution.
What if the leak continues after I fix the slope and drain?
If the basics are correct and water still enters, inspect the installation seal for gaps, check for a cracked drain pan, and confirm the unit is not overcharged with refrigerant. If the problem persists, a technician should evaluate the coil and refrigerant circuit.
Can I place a tray under the unit to catch the water?
A tray is a temporary stopgap, not a fix. It must be emptied frequently, and standing water can spill, breed mold, and damage the sill. Address the root cause rather than relying on a catch tray.