AC Thermostat Installation: Complete DIY Guide & Tips
Everything you need to replace or install a thermostat for your air conditioner — wiring basics, tool checklist, step-by-step instructions, and smart setup advice.
START THE GUIDEThermostat Types and What They Mean for Installation
Before you touch a single wire, identify what kind of thermostat your system uses. Installation complexity differs significantly between models.
- Non-programmable thermostats — the simplest design, usually with a single mercury or digital bulb and two to four wires. These are the easiest to replace for a confident DIYer. See our guide on non-programmable thermostat basics if you are unsure which model you have.
- Programmable thermostats — add scheduling logic and typically use four to six wires. Wiring is still straightforward but requires careful labeling.
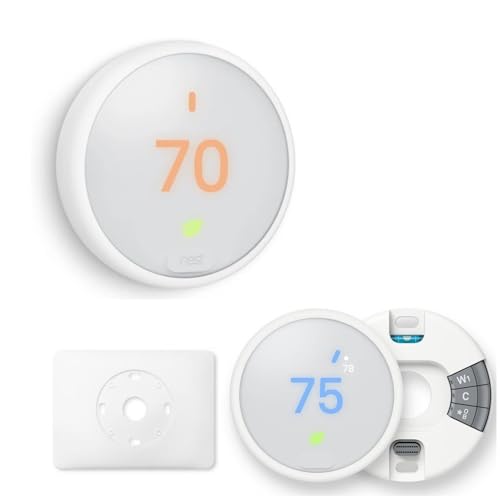
- Smart thermostats — include Wi-Fi modules, occupancy sensors, and app control. They often require a C-wire (common wire) for continuous power. If your existing wiring lacks a C-wire, you may need a power adapter kit or a professional install. Explore smart thermostat options for more context.
- Humidity-control thermostats — pair cooling with dehumidification logic and may require additional wiring terminals. Learn about thermostats with humidity control if you live in a humid climate.
Tools and Materials You Will Need
Understanding Thermostat Wiring Colors
Most low-voltage residential thermostats use a standard color code. While not every system uses every wire, the labels below are the common convention in North American HVAC systems.
| Terminal | Typical Color | Function |
|---|---|---|
| R / Rc / Rh | Red | 24V power from the transformer |
| W | White | Heating call (furnace or heat pump auxiliary) |
| Y | Yellow | Compressor / cooling call |
| G | Green | Indoor blower fan |
| C | Blue or Black | Common wire — required by most smart thermostats |
| O / B | Orange | Reversing valve (heat pumps only) |
| AUX / E | Various | Auxiliary or emergency heat |
Wire colors are a guide, not a guarantee. Always match terminals to the labels on your existing thermostat and the wiring diagram in your new unit's manual.
Step-by-Step Thermostat Installation
- Turn off power at the breaker. Locate the breaker that controls your air handler and condenser. Flip it to OFF. If you are unsure which breaker it is, turn off the main and use a voltage tester to confirm no power at the thermostat terminals.
- Remove the old thermostat cover. Most covers snap off or have a small release tab. Set screws aside in a cup so they do not get lost.
- Photograph and label the wiring. Take a clear photo of the terminal block. Then wrap a small piece of masking tape around each wire and write the terminal letter on it (R, W, Y, G, C).
- Disconnect the wires. Loosen each terminal screw and gently pull the wires free. Do not let the wires fall back into the wall — tape them to the wall if needed.
- Remove the old wall plate. Unscrew the mounting plate from the wall. Inspect the hole for any debris or damaged wire insulation.
- Mount the new wall plate. Feed the wires through the new plate, align it level, and secure it with screws. Use drywall anchors if the old holes do not line up.
- Connect the wires to the new thermostat. Match each labeled wire to the corresponding terminal. Tighten each screw firmly but do not overtighten — you can damage the terminal or break a wire. If your new smart thermostat needs a C-wire and you do not have one, consult the manufacturer's adapter kit instructions.
- Attach the thermostat body. Snap or screw the thermostat onto the wall plate according to the manufacturer's instructions.
- Restore power and test. Flip the breaker back on. Turn the thermostat to fan-only mode first to confirm the blower starts. Then switch to cool mode and set a temperature below room temperature. Verify that cool air begins to flow within a few minutes.
- Configure settings and schedule. For programmable and smart models, set the date, time, temperature schedule, and connect to Wi-Fi if applicable. Run a system test if the thermostat offers one.
Common Installation Mistakes to Avoid
- Skipping the breaker. The most dangerous mistake. Low-voltage wiring still carries 24V, and touching wires to the wrong terminal with power on can blow the transformer fuse.
- Not labeling wires. If wires fall back into the wall without labels, you may need to trace them with a multimeter or call a technician.
- Mismatching the O/B terminal on heat pumps. Incorrect reversing valve wiring causes the system to heat when it should cool and vice versa. Refer to your heat pump manual.
- Overlooking the C-wire requirement. Smart thermostats may power on without a C-wire but drain batteries or behave erratically. Use an adapter or have a technician run a new wire.
- Forcing the thermostat onto an uneven wall plate. A crooked mount can stress the terminals and cause intermittent connections.
When to Call a Professional
Thermostat replacement is a common DIY task, but certain situations warrant a licensed technician:
- Your system uses line-voltage wiring (typical in electric baseboard heaters).
- You want to add a C-wire and there is no existing spare conductor.
- The thermostat is part of a zoned system with multiple controllers.
- After installation, the AC does not respond, or you smell burning near the air handler.
If your AC turns on but is not cooling properly, the problem may lie elsewhere — see our troubleshooting resources on AC troubleshooting and why an AC is not cooling. Also review thermostat control fundamentals to understand how settings influence system behavior.
Related Guides You May Find Useful
Frequently Asked Questions
Do I need to turn off the breaker to install a thermostat?
Yes. Even low-voltage thermostat wiring carries 24 volts from the transformer. Turning off the breaker protects you from shock and prevents blowing the system fuse if a wire accidentally contacts the wrong terminal.
Can I install a smart thermostat without a C-wire?
Some smart thermostats include a power adapter kit that draws power from the furnace control board or uses a battery. However, running a dedicated C-wire provides the most reliable performance. If your system lacks a C-wire, check the manufacturer's compatibility guide before starting.
What if my new thermostat does not turn on after installation?
Check three things in order: the breaker is on, the R and C wires (or battery) are properly seated, and the thermostat is compatible with your system type. If the screen stays blank after these checks, test the terminals with a multimeter for 24V between R and C.
How long does thermostat installation take?
A straightforward replacement of a non-programmable or programmable thermostat typically takes 20 to 40 minutes. Smart thermostat installations may take 45 to 90 minutes if you need to install a C-wire adapter or configure Wi-Fi and scheduling.
Is it worth upgrading to a smart thermostat?
Smart thermostats offer scheduling, remote control, and usage insights that can help reduce energy consumption over time. They are a worthwhile upgrade for households with varied schedules. See our smart thermostat guide for a detailed comparison.