Air Duct Sealing: The Complete Homeowner's Guide
Discover how sealing leaky air ducts can improve cooling performance, reduce energy waste, and make every room in your home more comfortable.
Start LearningWhy this matters: The average home loses a significant portion of conditioned air through duct leaks before it ever reaches your rooms. Sealing those leaks is one of the most effective upgrades you can make to an existing HVAC system — and it works with any air conditioner type.
Why Air Duct Sealing Matters
Your ductwork is the delivery network for your entire cooling system. When joints, seams, and connections leak, the air you paid to cool escapes into attics, crawlspaces, and wall cavities. The result is a familiar set of problems: rooms that never feel comfortable, a system that runs longer than it should, and a home that feels uneven from one side to the other.
Sealing ducts addresses these issues at the source. Rather than compensating with a larger unit or higher thermostat settings, you make the existing system work the way it was designed to. This is especially relevant if you have noticed an air conditioner running but not lowering the temperature despite normal operation.
Quick reality check
In many homes, duct leakage is invisible. You will not see a hole in the duct from your living room. But a professional duct blaster test — or even a careful visual inspection of accessible joints — often reveals gaps that add up to meaningful losses across an entire system.
Signs Your Ducts Need Sealing
Duct leaks rarely announce themselves clearly. Instead, they show up as a collection of small frustrations that homeowners learn to tolerate. Watch for these indicators:
- Uneven room temperatures. One bedroom stays warm while another is comfortable, even with the same thermostat setting.
- Dust around vents. Leaks pull in attic or crawlspace air, which often carries dust and debris.
- Higher energy use without explanation. A system that works harder to deliver the same cooling shows up on your utility statement.
- Rooms that never reach the set temperature. If you relate to an air conditioner that will not cool to the set temperature, duct leakage is a common culprit.
- Visible gaps at accessible joints. Check the attic, basement, and garage — loose connections at the air handler and trunk lines are frequent trouble spots.
- Whistling or hissing sounds. Air escaping through a narrow gap can create noise near vents or the air handler.
If several of these sound familiar, duct sealing should be on your shortlist of upgrades. It pairs well with general air conditioner service and maintenance as part of a whole-system efficiency check.
Air Duct Sealing Methods Compared
There is no single best method for every situation. The right approach depends on where the ducts run, how accessible they are, and whether you are working with a contractor or handling accessible joints yourself. Here is a practical comparison:
| Method | Best For | Access Required | Durability | DIY-Friendly |
|---|---|---|---|---|
| Duct mastic | Sealing joints, seams, and connections | Direct access to the duct surface | Excellent — long-lasting brushable seal | Yes, for accessible ducts |
| Foil tape (acrylic adhesive) | Covering gaps and reinforcing mastic seals | Direct access | Good when applied to clean surfaces | Yes |
| Aerosol-based sealing (e.g., Aeroseal) | Sealing ducts hidden behind walls and ceilings | Minimal — sealed from inside the duct system | Very good — seals the entire network | No — professional service required |
| Duct insulation with sealing | Attics and unconditioned spaces where heat gain is also a problem | Access to insulated runs | Excellent — combines sealing with thermal protection | Partially — best for experienced DIYers |
For most homeowners, the realistic path is a hybrid: seal every accessible joint yourself with mastic and foil tape, then bring in a professional for the hidden sections if leakage remains significant after testing. The air duct repair category overlaps heavily with sealing — repairing crushed or disconnected sections before sealing them is essential for a lasting result.
Materials That Actually Work
The material you choose determines whether the seal survives a few months or a couple of decades. Here is how the main options stack up:
Duct Mastic
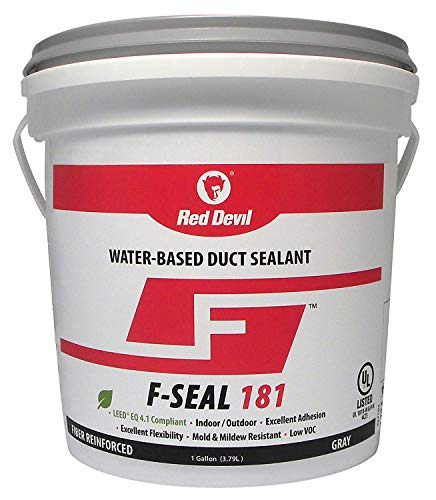
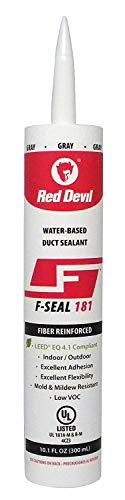
A thick, brushable or trowel-applied sealant designed specifically for HVAC ductwork. It adheres to galvanized metal, fiberglass duct board, and flex duct collars. Once cured, mastic forms a durable, slightly flexible seal that tolerates the vibration and temperature swings a duct system experiences. It is the gold standard for accessible joints and the material most HVAC technicians reach for first.
Foil Tape with Acrylic Adhesive
Unlike the cloth-backed "duct tape" sold in general hardware aisles, foil tape with an acrylic adhesive is engineered for ductwork. It resists heat and moisture far better than cloth tape, whose adhesive tends to dry out and fail. Foil tape is best used as a secondary layer over mastic or to cover gaps that are awkward to brush.
Aerosol-Based Sealant
A professional system that introduces a mist of sealant particles into the duct network under pressure. The particles accumulate at leak points and build a seal from the inside. This is the only practical way to seal ducts that run through finished walls and ceilings without major demolition. It is a professional-grade service, not a DIY product.
Duct Insulation and Wrap
For ducts running through unconditioned attics or crawlspaces, sealing and insulating go hand in hand. A sealed duct that is not insulated will still gain heat in summer and lose it in winter. Insulated duct wrap addresses both problems at once, and is a worthwhile long-term investment in warmer climates.
Step-by-Step: Sealing Accessible Ducts
If you have access to your ductwork through an attic, basement, garage, or crawlspace, you can seal many of the most important joints yourself. Here is a practical sequence:
- 1. Turn off the system. Shut down the air conditioner at the thermostat before you begin working near the air handler.
- 2. Inspect and map the ducts. Walk the accessible runs and note every joint, seam, boot connection, and collar. Photograph problem areas so you can compare later.
- 3. Clean the surfaces. Dust and oil prevent sealant from bonding. Wipe joints with a damp cloth and let them dry completely before applying mastic.
- 4. Repair structural damage first. Crushed flex duct, disconnected sections, or torn insulation should be repaired or replaced before sealing. Refer to air duct repair guidance for damaged runs.
- 5. Apply mastic to joints and seams. Use a brush to work a generous layer into every joint, including the connections at the air handler and the register boots. Coverage should be continuous, with no thin spots.
- 6. Reinforce with foil tape. Once mastic has cured, apply foil tape over larger gaps and seams for additional strength. Press firmly to ensure full adhesion.
- 7. Seal the air handler cabinet. Gaps around the air handler, filter slot, and plenum are common leak points. Use mastic and tape to close them, being careful not to block service access.
- 8. Insulate exposed runs. Wrap ducts in unconditioned spaces with duct insulation after sealing, paying attention to joints and elbows.
- 9. Test and verify. After the system runs again, check for improved airflow at vents and more even room temperatures. A professional duct blaster test provides a precise before-and-after measurement.
Before you climb into the attic
Sealing ducts is physical work in tight, sometimes hot spaces. If your ducts are hidden behind finished walls or the accessible runs are extensive, a professional evaluation is often the smarter starting point. The air conditioner service and repair category covers how to vet contractors and what to expect from a service visit.
Professional Sealing vs. DIY
The decision comes down to access and scope. Accessible joints in an attic or basement are well within reach for a careful homeowner. Hidden ducts, widespread leakage, or a system that also needs other repairs call for professional attention.
A professional approach typically includes a diagnostic test to measure leakage before and after, sealing of hidden sections with aerosol technology, and verification that the system's airflow is balanced after the work is complete. This matters because sealing can change pressure relationships in the system — a qualified technician will confirm that airflow at each register remains adequate.
If you are already exploring broader efficiency upgrades, it helps to understand how duct sealing fits alongside other improvements. The air conditioning and cooling overview is a useful starting point, and air filtration system for home guidance explains why a tighter duct system also supports better indoor air quality.
Benefits You Can Expect After Sealing
Well-sealed ducts deliver measurable improvements across comfort, performance, and longevity:
- More even cooling. Rooms at the far end of the duct run receive closer to their intended share of conditioned air.
- Shorter run times. The system reaches the thermostat setting faster because it is not cooling the attic along the way.
- Better humidity control. Leaks pull in humid outside air through the building envelope; sealing reduces that infiltration.
- Less dust. Sealed returns are less likely to draw in attic or crawlspace particles.
- Longer equipment life. A system that is not overworking itself tends to last longer and need fewer repairs. The air conditioner short cycling guide explains how excess strain can show up as rapid on-off behavior.
- Improved indoor air quality. Fewer leaks mean fewer pathways for pollutants to enter the airstream.
These benefits compound with other good habits. For example, sealing ducts works best when paired with regular air duct cleaning and air conditioning maintenance and a consistent air conditioner service and maintenance schedule.
Ready to make your cooling system work less and deliver more?
Explore related guides on duct repair, AC maintenance, and efficiency upgrades to build a complete plan for your home.
Explore Duct RepairFrequently Asked Questions
How do I know if my air ducts are leaking?
Look for uneven room temperatures, dust around vents, rising energy use, and rooms that never reach the thermostat setting. A professional duct blaster test provides an exact measurement of leakage.
What is the best material for sealing air ducts?
Duct mastic is the most durable and reliable option for accessible joints. Foil tape with an acrylic adhesive is a solid secondary layer. Cloth-backed duct tape is not recommended for long-term use because its adhesive degrades.
Can I seal air ducts myself?
Yes, accessible ducts in attics, basements, and garages can be sealed with mastic and foil tape. Ducts hidden behind walls are best handled by a professional using aerosol-based sealing technology.
How often should ducts be inspected for leaks?
A visual inspection of accessible ducts once a year, ideally alongside seasonal HVAC maintenance, is a sensible habit. A professional leakage test is worth considering every few years or whenever comfort problems appear.
Does duct sealing really improve air conditioner performance?
Yes. By reducing the amount of cooled air that escapes before reaching your rooms, sealing allows the system to reach target temperatures faster and run less often. Many homeowners notice more even cooling almost immediately after sealing.