Air Vents for Sheds: Complete Guide to Proper Shed Ventilation
Everything you need to know about choosing, sizing, and installing air vents for sheds. Prevent moisture damage, control heat buildup, and protect everything you store inside.
Explore Vent TypesWhy Shed Ventilation Matters
A shed is a closed box exposed to sun, rain, and temperature swings. Without proper airflow, warm moist air becomes trapped inside. That trapped air condenses on cool surfaces such as metal tools, wooden shelves, and the underside of the roof. Over time this condensation causes rust, warping, mold growth, and a musty smell that lingers on anything stored inside.
Air vents for sheds solve this by creating continuous passive airflow. Cooler, drier outside air enters through intake vents, absorbs heat and moisture inside the shed, and exits through exhaust vents placed higher up. This natural cycle keeps the interior drier and noticeably cooler during summer afternoons.
Ventilation also protects the structure itself. Wooden framing and siding last longer when moisture is allowed to escape. In sheds used as workshops or home offices, consistent airflow improves comfort and reduces the need for mechanical cooling. If you plan to work inside during hot months, pair passive vents with a small ventilation fan for a more controlled result.
Types of Air Vents for Sheds
The market offers several vent styles, each suited to a different installation location and shed design. The table below compares the most common options using a tier-based classification rather than numeric ranges, so the guidance stays relevant over time.
| Vent Type | Best Location | Market Tier | Best For |
|---|---|---|---|
| Gable vent | Gable end wall, near the peak | Essential tier | Classic sheds with a triangular gable; simple installation |
| Soffit vent | Underside of roof overhang | Balanced tier | Intake position that keeps rain out while feeding exhaust vents |
| Ridge vent | Along the roof ridge line | Balanced tier | Continuous exhaust across the full roof length |
| Wall louver vent | High or low on a side wall | Essential tier | Compact sheds without usable gable space |
| Turbine vent | Roof surface | Premium tier | Hot climates needing stronger exhaust with no power supply |
| Solar-powered vent | Roof or upper wall | Top-tier | Remote sheds where active airflow is desired without wiring |
| Foundation vent | Low on the wall or in the floor structure | Essential tier | Intake air at floor level to flush out heavy, damp air |
Gable Vents
Gable vents sit near the peak of a triangular gable end and act as exhaust points. They are the most recognizable shed vent style and work well when paired with low intake vents on the opposite wall. Mid-range gable vents include insect screens and overlapping louvers that shed rain effectively.
Soffit Vents
Soffit vents install under the roof overhang and pull air upward into the shed. They are protected from direct rain and blend into the structure. Combined with a ridge or gable exhaust, soffit vents create a steady convection loop with very little maintenance.
Ridge Vents
A ridge vent runs along the top of the roof and exhausts hot air across its entire length. It is the most efficient passive exhaust for sheds with a suitable roof pitch. Installation requires cutting a continuous slot in the roof deck, so it is best planned during construction or a roof replacement.
Wall Louver Vents
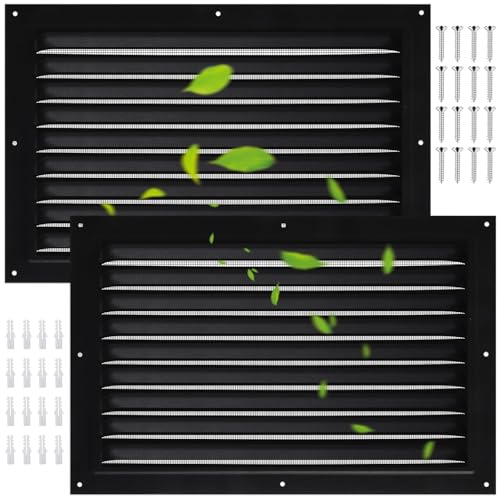
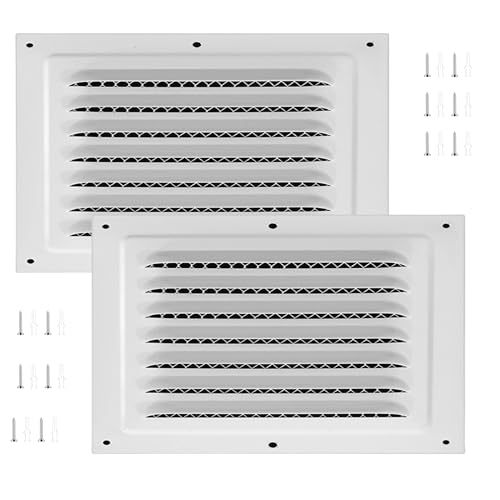
Louvered wall vents are a practical choice for small sheds. Install one low on the windward wall as intake and another high on the leeward wall as exhaust. Entry-level models with fixed louvers perform well; premium versions add adjustable dampers for seasonal control.
Turbine and Solar Vents
Turbine vents spin with the wind to pull air out of the shed, while solar-powered vents use a small fan driven by a photovoltaic panel. Both are active options for sheds in hot, still climates where passive convection alone is not enough. They sit in a higher tier because of added moving parts, but they deliver noticeably stronger airflow.
How to Size Shed Vents
Vent sizing is measured by net free area — the actual open space in a vent after subtracting louvers, screens, and framing. The widely used rule is one square foot of net free area per 150 square feet of floor area, split evenly between intake and exhaust. In humid climates or sheds used for moisture-sensitive storage, tighten the ratio to 1:100.
For example, a 10 ft × 12 ft shed has 120 square feet of floor area. At a 1:150 ratio, that calls for 0.8 square feet of total vent area — about 0.4 square feet of intake and 0.4 square feet of exhaust. Check the manufacturer's net free area figure on each vent, since a 12-inch louver vent may only provide 50 square inches of true opening.
Vent Placement and Airflow Paths
Placement matters as much as size. The goal is a low-to-high path that follows natural convection: cool air enters low, warms up, rises, and exits high. Follow these placement principles:
- Intake low, exhaust high. Put intake vents near the floor or in the soffit, and exhaust vents near the gable peak or ridge.
- Use opposing walls. Intake on the windward side and exhaust on the leeward side lets prevailing winds push air through the shed.
- Spread vents evenly. Multiple smaller vents distributed along a wall outperform one large vent in a corner.
- Keep openings clear. Do not place shelving or stacked storage directly in front of a vent opening.
If the shed is tightly built, a small air ventilation fan can supplement the passive path and prevent dead zones in corners.
Installation Basics
Most shed vents are installed with basic carpentry tools. Before cutting any opening, confirm that the location is free of wiring, framing studs, and roof structure. The general process looks like this:
- Mark the opening using the vent frame as a template.
- Cut carefully with a reciprocating saw or hole saw, staying inside the marked line.
- Test-fit the vent and check that louvers slope downward and outward for water shedding.
- Seal the perimeter with exterior-grade sealant to block drafts and water intrusion.
- Fasten with corrosion-resistant screws and verify the insect screen is intact.
For roof-mounted vents such as ridge or turbine models, follow the manufacturer's flashing instructions exactly. Improper flashing is the leading cause of roof leaks around vents. If you are uncomfortable working on the roof, have a professional handle roof-level vent installation.
Passive vs Active Ventilation
Passive vents rely on wind and temperature differences to move air. They are silent, need no power, and have no moving parts. Active systems use a fan — either powered by mains electricity, a small solar panel, or a wind-driven turbine — to force air exchange.
| Approach | Advantages | Considerations | Tier |
|---|---|---|---|
| Passive vents | No power, no noise, minimal upkeep | Airflow depends on weather conditions | Essential tier |
| Turbine vents | Strong exhaust in windy areas, no electricity | Moving parts wear over time; less effective in calm weather | Premium tier |
| Solar-powered fans | Consistent airflow without wiring; runs during peak heat | Output varies with sunlight; battery backup adds complexity | Top-tier |
| Mains-powered fans | Predictable, adjustable airflow | Requires electrical work and ongoing energy use | Balanced tier |
For most garden sheds, a passive intake-and-exhaust layout is sufficient. Upgrade to an active option only if you notice persistent condensation, stored items feel damp, or the shed sits in a hot, still location.
Common Mistakes to Avoid
- Intake and exhaust at the same height. Without a vertical gap, air stalls instead of circulating.
- Undersized vents. Small openings restrict airflow and let condensation persist.
- No insect screening. Open vents invite wasps, rodents, and debris into the shed.
- Sealing the shed too tightly elsewhere. If doors and windows are airtight, intake vents may not draw air. A small gap or dedicated intake is necessary.
- Ignoring roof flashing. Roof vents installed without proper flashing leak during heavy rain.
- Blocking vents with storage. Keep at least a foot of clearance around every vent opening.
These issues are easy to prevent during planning. Reviewing vent placement before cutting openings saves significant rework later. For sheds that also serve as workshops, airflow problems often surface as poor cooling performance — a challenge similar to the one described in our guide on air not blowing through vents in a house.
Vent Maintenance Tips
Shed vents need very little attention, but regular checks keep them working properly:
- Clear debris seasonally. Leaves, cobwebs, and dust reduce net free area over time.
- Inspect screens. Replace torn insect screens before pests move in.
- Check sealant annually. Reapply exterior sealant around vent frames if cracks appear.
- Lubricate moving parts. Turbine bearings benefit from a light seasonal application of lubricant.
- Confirm dampers open freely. Adjustable louver vents can seize if left untouched for long periods.
A quick inspection in spring and fall is usually enough. If you notice persistent moisture even with functioning vents, consider adding an air vent cleaner service or upgrading to a higher-capacity exhaust vent.
Choosing the Right Vents for Your Shed
Selection comes down to four questions: what type of shed you have, how humid your climate is, what you store inside, and how much installation effort you are willing to take on. The recommendations below use a consistent tier system to describe market position.
| Shed Scenario | Recommended Setup | Tier Guidance |
|---|---|---|
| Small garden shed (under 100 sq ft) | Two louvered wall vents, one low intake and one high exhaust | Essential tier |
| Medium storage shed (100–200 sq ft) | Soffit intake plus gable exhaust | Balanced tier |
| Workshop shed | Ridge exhaust plus soffit intake, with a small fan if needed | Premium tier |
| Hot, still climate | Solar-powered exhaust plus low intake vents | Top-tier |
| Humid climate or moisture-sensitive storage | Oversized intake and exhaust using the 1:100 sizing ratio | Balanced tier |
Whichever setup you choose, prioritize durable construction and proper sizing over extra features. Mid-range vents with insect screens and downward-facing louvers offer a solid balance for most sheds. Premium and top-tier options add active airflow or solar assistance for challenging climates.
Ready to Ventilate Your Shed?
Browse our curated selection of shed ventilation products, from entry-level louver vents to top-tier solar-powered exhaust systems.
View Recommended ProductsFrequently Asked Questions
How many air vents does a shed need?
A general rule is one square foot of vent opening per 150 square feet of shed floor area when vents are evenly split between intake and exhaust. In humid climates, use a 1:100 ratio for better moisture control.
Where should shed vents be placed?
Place intake vents low on the windward side and exhaust vents high on the leeward side or at the roof peak. This low-to-high airflow path uses natural convection and prevailing winds to keep air moving.
Do sheds need ventilation if they have a window?
Yes. A window alone rarely provides adequate airflow, especially when closed. Dedicated vents maintain continuous passive ventilation even when the shed is locked, preventing condensation and heat buildup.
What is the best vent type for a storage shed?
Gable vents paired with soffit or low-wall intake vents offer the best balance of airflow, weather protection, and simple installation for most storage sheds. Ridge vents are ideal when the roof design allows.
Can I install shed vents myself?
Yes, most wall and gable vents are doable with basic carpentry tools. Roof-mounted vents require care with flashing — if you are not comfortable working on a roof, hire a professional for those installations.