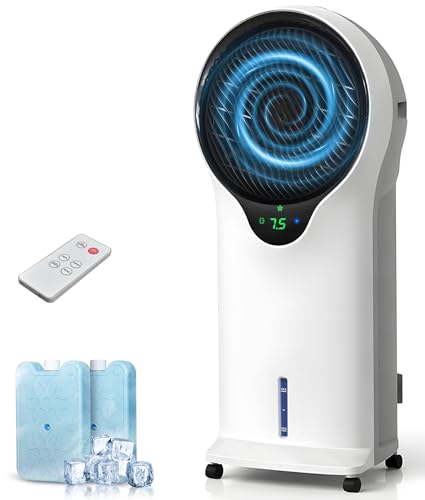
DIY Evaporative Air Cooler: A Complete Build and Usage Guide
An evaporative air cooler — often called a swamp cooler — is one of the simplest cooling devices you can assemble yourself. It works by pulling warm, dry air through a water-saturated pad, where evaporation absorbs heat and releases cooler, moister air into the room.
This guide walks you through how evaporative cooling works, the materials you need, a practical build process, operating tips, and honest limits so you can decide whether a DIY unit fits your climate and space before you commit.
Before investing time in a homemade build, it helps to understand what kind of cooling you are actually getting. Evaporative coolers are not a substitute for a compressor-based air conditioner in every situation. They shine in hot, arid climates with low humidity, where evaporation happens quickly and the cooling effect is pronounced. In muggy regions, the same device can struggle to produce a meaningful drop in temperature. If your home already relies on a conventional system, our overview of evaporative cooling systems for the home explains how the technology fits alongside ducted and ductless options.
How a DIY Evaporative Air Cooler Works
Every evaporative cooler, whether store-bought or homemade, relies on the same principle: as water changes from liquid to vapor, it absorbs heat from the surrounding air. The three core components are a fan to move air, a porous pad to hold water, and a water source to keep the pad saturated. The fan draws hot, dry outdoor air through the wet pad; the air cools as moisture evaporates into it, and the fan then pushes that cooler air into the room.
Because the process adds humidity to the airstream, airflow and ventilation matter as much as the pad itself. A well-designed unit keeps the pad evenly wet and moves a steady volume of air without creating excessive noise or splashing. For a deeper look at how the broader category performs, see our evaporative air cooler and portable air conditioner comparison, which outlines where each approach makes sense.
Evaporative Cooler vs. Refrigerated AC: Quick Comparison
| Factor | Evaporative Cooler | Refrigerated Air Conditioner |
|---|---|---|
| Cooling method | Water evaporation | Refrigerant compression cycle |
| Best climate | Hot and dry (low humidity) | Any climate |
| Effect on humidity | Adds moisture to the air | Removes moisture (dehumidifies) |
| Ventilation requirement | High — needs open airflow | Low — recirculates indoor air |
| Complexity | Simple mechanical parts | Sealed refrigerant circuit |
| Ideal for | Garages, patios, dry-climate rooms | Whole-home comfort in any climate |
If you are weighing a whole-home solution instead, the different types of central air conditioning systems article covers the mainstream configurations and how they differ in ductwork, zoning, and performance.
Materials and Tools You Will Need
A dependable DIY build does not require specialty equipment. The goal is a sturdy box with a large wet pad, a fan that moves enough air, and a water reservoir that keeps the pad damp without flooding the electronics. Choose a container with enough depth for the pad and a lid you can cut to fit the fan.
Core Components
- Container or housing: a rigid plastic tub, storage bin, or wooden crate large enough to hold the pad and fan. A lid keeps water in and debris out.
- Cooling pad: aspen excelsior, cellulose, or a synthetic evaporative pad. These are designed to hold water and allow air to pass while resisting mold growth.
- Fan: a box fan, axial fan, or a high-CFM computer/server fan array. Match fan size to housing size so airflow is not choked.
- Water pump: a small submersible pump to circulate water over the pad, or a gravity-fed drip system if you prefer a simpler setup.
- Water reservoir: the bottom of the housing itself, or a separate tray with a float valve if you want automatic refilling.
- Distribution tubing: vinyl or silicone tubing with small holes to spread water across the top of the pad.
- Power supply: a safe, appropriate adapter for the pump and fan. Keep all electrical connections away from water.
Tools
- Utility knife or rotary tool for cutting the housing and lid
- Drill with hole saw bits for tubing and fan openings
- Tape measure, marker, and straightedge
- Silicone sealant or waterproof caulk
- Zip ties or mounting brackets for the fan
- Safety glasses and gloves
Step-by-Step Build Process
The build below assumes a box-style cooler with a front-facing fan and a rear or side pad. Adapt the dimensions to your chosen container, but keep the pad area large relative to the fan opening — an undersized pad will dry out too quickly and reduce cooling performance.
- Plan the layout. Decide where the fan, pad, and water reservoir will sit. The fan should pull air through the pad, not blow directly onto it. Mark cut lines on the housing and lid.
- Cut the fan opening. Trace the fan frame on the lid or front panel, then cut slightly inside the line so the fan mounts flush. Seal gaps with caulk so air moves through the pad rather than leaking around the fan.
- Cut the pad opening. Create a window on the opposite side large enough to expose most of the pad surface. If the housing is tall, add a simple frame to hold the pad upright and prevent it from sagging.
- Install the water distribution line. Run tubing along the top edge of the pad frame and drill small holes at even intervals so water trickles down the pad face. Connect the tubing to the submersible pump in the reservoir.
- Mount the pump and route wiring. Place the pump at the lowest point of the reservoir, ideally in a small sump area. Route wiring through a sealed grommet and keep all connections elevated above the waterline.
- Test the water flow. Fill the reservoir and run the pump briefly. Adjust hole size or tubing position until the pad is evenly damp without pooling. Fix any leaks before proceeding.
- Mount the fan and verify airflow. Secure the fan, close the lid, and run it. You should feel a steady stream of air exiting the unit and a noticeable pull at the pad opening. If airflow feels weak, enlarge the pad opening or reduce fan obstructions.
- Add a float valve (optional). For longer run times, install a small float valve connected to a water line so the reservoir refills automatically. This is especially useful in dry climates where evaporation is fast.
Operating Tips for Better Cooling
A well-built cooler still needs to be used correctly. The biggest mistake people make is running an evaporative cooler in a closed room. Because the unit adds moisture to the air, you need cross-ventilation — an open window or door on the opposite side of the room lets the moist air escape and keeps the cooling effect going.
- Position near a fresh-air source. Place the cooler where it can draw dry outdoor air, and open a window or door on the far side of the room for exhaust.
- Keep the pad clean and wet. A dry pad cools nothing. Check water flow regularly, and clean mineral buildup from the pad every few weeks.
- Use it during the driest part of the day. Evaporative cooling is most effective in the afternoon heat when relative humidity is lowest.
- Do not oversize the unit for the room. Too much airflow in a small space can feel drafty and drive humidity up quickly.
- Drain and dry between uses. Standing water encourages mold and odors. Empty the reservoir and let the pad dry when the cooler is not in use.
If your goal is to lower overall cooling energy use, pairing an evaporative cooler with sensible thermostat habits helps. Our guide on how to reduce AC electricity bills covers scheduling, sealing, and airflow strategies that work with any cooling method.
When a DIY Evaporative Cooler Makes Sense
Evaporative cooling is a strong fit for garages, workshops, patios, and dry-climate homes where a conventional system is overkill or impractical. It is also a good low-complexity option for renters or temporary spaces. However, it is not the right choice for humid climates, sealed rooms without ventilation, or anyone who needs precise temperature control.
If you are evaluating whether to add a permanent cooling solution instead, our resources on adding air conditioning to a house and ductless heat and air conditioning explain the alternatives. For homes without ductwork, a DIY mini-split air conditioner is another path worth understanding before you decide.
Maintenance and Longevity
Homemade coolers need more attention than factory-sealed units. Mineral deposits from hard water clog pads, and standing water invites biological growth. A simple routine keeps the unit effective: rinse the pad weekly, scrub the reservoir with a mild solution, inspect tubing for cracks, and replace the pad when it becomes stiff or discolored. In hard-water areas, a pre-filter or a small water softener cartridge can extend pad life.
Frequently Asked Questions
Does a DIY evaporative cooler actually cool a room?
Yes, but the effect depends on humidity. In dry air, the temperature drop can be significant and immediate. In humid air, the cooling effect is small because the air cannot absorb much more moisture. Always pair the unit with ventilation for best results.
Can I use a DIY evaporative cooler indoors?
You can, but only with cross-ventilation. Running one in a closed room raises humidity without meaningful cooling. Open a window or door on the opposite side of the room so moist air can escape.
What pad material works best?
Aspen excelsior and cellulose pads are the most common choices. They hold water well and allow good airflow. Synthetic pads resist mold better but can be stiffer. Avoid foam or dense fabric, which restrict airflow and dry unevenly.
How often should I change the water?
Drain and refill the reservoir at least every couple of days during use, and more often in dusty environments. Stagnant water is the main cause of odors and mold in homemade coolers.
Is a DIY cooler safe to leave running overnight?
It is not recommended. Water plus electricity requires care, and unattended operation increases risk. Run the unit while you are present, and unplug it when not in use.
Ready to Compare Cooling Options?
Explore evaporative coolers and portable air conditioners side by side before you decide which direction fits your space.
Compare Cooling Options