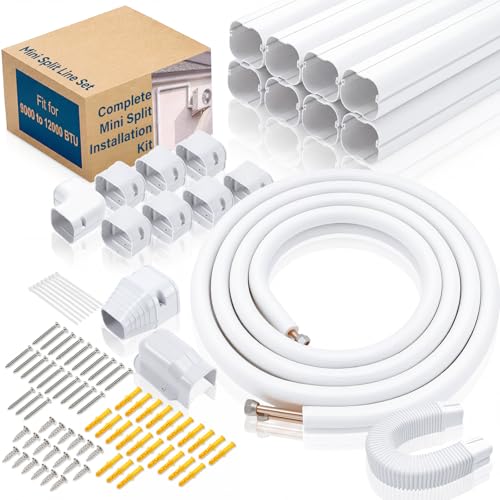
DIY Mini Split Installation: Complete Step-by-Step Guide
Learn how to install a ductless mini split on your own — from choosing the right location and mounting the indoor unit to wiring, vacuuming the lines, and testing the system safely.
Why DIY mini split installation is popular: Ductless mini split systems are among the most efficient ways to heat and cool a single room or an entire home without ductwork. Many homeowners consider doing the installation themselves to gain a deeper understanding of their system and to reduce reliance on outside contractors. This guide walks you through every practical step, highlights the tools you need, and explains the safety and legal points you must verify before you begin.
Before You Start: Permits, Safety, and Legal Considerations
DIY mini split installation is a rewarding project, but it involves refrigerant handling and electrical connections that are regulated in many jurisdictions. Before buying any equipment, confirm the following:
- Building permits: Many local building departments require a permit for HVAC installations, especially when new electrical circuits are added. Check with your local authority having jurisdiction.
- Refrigerant regulations: In several regions, only certified technicians may handle refrigerant. Some manufacturers offer pre-charged line sets that simplify the process, but local rules still apply.
- Electrical code: A dedicated circuit is usually required. If you are not comfortable working inside an electrical panel, hire a licensed electrician for that portion. You can review general electrical outlet considerations in our guide on outdoor electrical outlets.
- Warranty: Some manufacturers void the warranty if installation is not performed by a licensed professional. Read the warranty terms carefully before proceeding.
Tools and Materials You Will Need
A successful DIY mini split installation depends on having the right tools. The following list covers both essential and highly recommended items:
Mounting & Drilling
Drill with masonry bits, hole saw (typically 2.5–3 inches), stud finder, level, measuring tape, and wall brackets for the outdoor unit.
Refrigerant Tools
Manifold gauge set, vacuum pump (two-stage recommended), flaring tool, pipe cutter, torque wrench, and nitrogen (optional but ideal for pressure testing).
Electrical Tools
Wire strippers, multimeter, screwdrivers, electrical tape, conduit, and appropriate gauge wire based on the unit's specifications.
Hand Tools & Consumables
Adjustable wrenches, hex keys, PTFE tape, UV leak detector dye, cable ties, and a tube of sealant for the wall penetration.
Step-by-Step DIY Mini Split Installation
The sequence below assumes a single-zone ductless mini split. Multi-zone systems follow a similar process but require a branch box or multiple line sets. Always refer to the manufacturer's installation manual for unit-specific details.
- Choose the indoor and outdoor unit locations. The indoor unit should be mounted high on an interior wall with clear airflow and access to a wall penetration. The outdoor unit needs a level, stable surface with adequate clearance for airflow and service access. Avoid placing the outdoor unit where snow or debris can accumulate. Our guide on covering an outside AC unit can help you plan protection.
- Mount the indoor unit backplate. Use a stud finder to locate wall studs, then secure the mounting plate with lag bolts. Verify it is perfectly level — a tilted unit can leak condensate.
- Drill the wall penetration. Use a hole saw at a slight downward angle toward the outside so condensate drains properly. Install a wall sleeve and seal the gap with expanding foam or sealant after the lines are run.
- Mount the outdoor unit. Set the unit on wall brackets or a ground pad. Ensure it is level and has at least 12 inches of clearance on all sides. Secure it against wind uplift if required by local code.
- Run the line set and drain hose. Feed the refrigerant lines, communication wire, and condensate drain through the wall sleeve. Protect the flare ends with caps until connection. Keep the drain line sloping downward continuously.
- Connect the indoor unit. Hang the indoor unit on the backplate, then connect the flare fittings by hand and tighten with a torque wrench to the manufacturer's specification. Over-tightening can crack the flare; under-tightening causes leaks.
- Connect the outdoor unit. Route the line set to the service valves and connect the flare fittings using the same torque method. Connect the communication wire to the terminal block, matching color codes and terminal numbers exactly.
- Wire the electrical circuit. Install a dedicated circuit breaker and run the power supply to the outdoor unit disconnect box. Use the wire gauge specified in the manual. If this step is outside your comfort zone, hire a licensed electrician. You can explore general electrical outlet types in our electrical outlet plugs guide.
- Pressure test and vacuum the system. Connect the manifold gauge set to the service ports. Use a vacuum pump to evacuate the lines to below 500 microns (ideally 250–300 microns). Hold the vacuum for at least 15 minutes to confirm there are no leaks. If the vacuum rises, locate and repair the leak before proceeding.
- Release refrigerant and test. Open the service valves with a hex key to release refrigerant into the system. Check for leaks with soap bubbles or an electronic detector. Turn on the unit in cooling and heating modes, verify airflow, check for condensate drainage, and measure the temperature split across the indoor coil.
Installation Difficulty and Time Expectations
The table below provides a realistic overview of what different skill levels can expect. These are qualitative tiers, not absolute figures.
| Skill Tier | Best For | Typical Scope | Time Commitment |
|---|---|---|---|
| Essential tier (first-time DIYer) | Single-zone, pre-charged line set, simple wall mount | Mounting, basic wiring, and vacuuming with rented tools | Full day or weekend |
| Balanced tier (experienced DIYer) | Single-zone with custom line length and dedicated circuit | All steps including electrical and pressure testing | 4–8 hours |
| Professional-grade | Multi-zone or long line runs with brazed connections | Branch boxes, brazing, nitrogen purge, commissioning | Multi-day project |
Common Mistakes to Avoid
- Skipping the vacuum: Trapped moisture forms ice and damages the compressor over time. Always evacuate to the specified micron level.
- Over-tightening flare nuts: This is the most common cause of refrigerant leaks in DIY installs. Use a torque wrench.
- Poor condensate drainage: A drain line without a continuous downward slope will back up and leak indoors.
- Undersized wiring: Using wire that is too thin for the circuit creates a fire hazard and can void the warranty.
- Ignoring local codes: Unpermitted installations can complicate home sales and insurance claims.
When to Call a Professional Instead
Some situations call for a licensed HVAC technician or electrician regardless of your confidence level:
- Your local code requires a licensed professional for refrigerant or electrical work.
- The unit requires brazed connections rather than flare fittings.
- You need a multi-zone system with a branch box or long line runs.
- Your electrical panel does not have capacity for a new dedicated circuit.
- The installation involves a wall penetration through brick, stone, or structural elements.
If you decide to hire help, understanding the scope helps you ask the right questions. You can compare general installation considerations in our guide to mini split installation.
Frequently Asked Questions
Can a homeowner legally install a mini split themselves?
In many jurisdictions, homeowners may install a mini split on their own property, but local building codes and permit requirements vary. Some areas require a licensed HVAC technician for refrigerant handling and electrical work. Always check with your local building authority before starting.
What tools are needed for DIY mini split installation?
Essential tools include a drill, hole saw, torque wrench, manifold gauge set, vacuum pump, flaring tool, pipe cutter, level, screwdrivers, wire strippers, and a multimeter. Some kits include basic accessories, but professional-grade tools ensure a leak-free connection.
How long does a DIY mini split installation take?
A single-zone mini split installation typically takes 4 to 8 hours for an experienced DIYer. First-time installers should plan for a full day, including preparation, mounting, wiring, vacuuming, and testing.
Do I need a vacuum pump for mini split installation?
Yes. A vacuum pump is essential to remove air and moisture from the refrigerant lines before releasing refrigerant. Skipping this step can cause system inefficiency, ice formation, and compressor damage.
Can I install a mini split without a permit?
That depends on your local building department. Many areas require a permit for HVAC installations, particularly when new electrical circuits are involved. Installing without a required permit can lead to fines, failed inspections, and complications during a home sale.
What is the most common DIY installation mistake?
The most common mistake is failing to evacuate the system properly with a vacuum pump, or over-tightening flare fittings. Both issues lead to refrigerant leaks that reduce efficiency and can damage the compressor.
Ready to Choose the Right Mini Split for Your DIY Project?
Explore our recommended ductless mini split systems and compare features before you start your installation.
View Recommended Mini Splits