Ductless Mini Split AC Installation: Complete Step-by-Step Guide
Everything you need to know before, during, and after installing a ductless mini split system — from placement and permits to tools, refrigerant lines, and testing. Learn first, then decide whether to DIY or hire a pro.
What You'll Learn on This Page
- What Is a Ductless Mini Split AC and How Does It Work?
- DIY Installation vs Hiring a Professional
- Essential Tools and Materials for Installation
- Indoor and Outdoor Unit Placement
- Step-by-Step Installation Process
- Permits, Codes, and Safety Requirements
- Testing and Commissioning Your New System
- Common Installation Mistakes to Avoid
- Frequently Asked Questions
1. What Is a Ductless Mini Split AC and How Does It Work?
A ductless mini split is a split-system air conditioner that delivers cooled or heated air directly into a room without the need for a network of ductwork. The system consists of two main components: an indoor air-handling unit (often wall-mounted, ceiling-mounted, or floor-mounted) and an outdoor compressor/condenser unit. The two are connected by a conduit that carries refrigerant lines, electrical wiring, and a condensate drain.
Because there are no ducts, mini splits avoid the energy losses associated with ducted systems — typically 20% to 30% in a typical home. This makes them an excellent choice for room additions, older homes without ductwork, and spaces where you want independent zone control. If you are still deciding between ducted and ductless, our comparison of ductless vs ducted AC covers the trade-offs in detail.
Installation is the moment where a good mini split becomes a great system — or a source of ongoing frustration. Proper sizing, correct line-set routing, careful vacuuming, and accurate torque on flare fittings all determine whether the system runs efficiently for years or leaks refrigerant within months. This guide walks you through each stage so you can understand what a correct installation looks like, whether you perform it yourself or supervise a contractor.
2. DIY Installation vs Hiring a Professional
Many homeowners consider a DIY ductless mini split AC installation because the equipment is available through major retailers and some kits are marketed as plug-and-play. The reality is more nuanced. A DIY install is feasible for a confident homeowner with mechanical and electrical experience, especially when using a pre-charged line set that does not require brazing or recovering refrigerant. However, several steps carry legal and safety implications.
What a DIY Installer Must Handle
- Electrical work: Running a dedicated circuit from the panel, installing a disconnect, and connecting the indoor and outdoor units correctly. Many jurisdictions require a licensed electrician for this.
- Refrigerant circuit: Flaring copper lines to precise torque, pressure-testing with nitrogen, and pulling a deep vacuum (below 500 microns) before releasing refrigerant. EPA Section 608 rules apply to refrigerant handling.
- Condensate management: Ensuring a continuous slope for drainage, or installing a condensate pump where gravity drainage is not possible.
- Permits and inspections: Many municipalities require a permit for the electrical portion and sometimes for the mechanical portion of the installation.
When to Hire a Professional
Hiring a licensed HVAC contractor is the safer choice if you are not comfortable with electrical panels, refrigerant pressures, or vacuum procedures. A professional installer brings a vacuum pump, manifold gauges, nitrogen regulator, and torque wrench — tools that can exceed the value of the savings from a DIY install. Professionals also carry insurance and can register the manufacturer warranty on your behalf, which is often required for full coverage.
If you want to understand what a contractor should charge for labor and materials, our guide to ductless mini split AC installation cost breaks down the typical components of a professional quote without listing prices. The goal is to help you evaluate whether a quote is reasonable for your region and system complexity.
3. Essential Tools and Materials for Installation
Whether you DIY or supervise, knowing the tools involved helps you prepare and verify that the installer is properly equipped. The table below groups tools by function and indicates whether they are typically provided by the installer or rented.
| Tool / Material | Purpose | Typical Source |
|---|---|---|
| Vacuum pump (2-stage, 3–6 CFM) | Evacuate moisture and air from the refrigerant lines | Rent or contractor-owned |
| Manifold gauge set | Monitor vacuum and refrigerant pressures | Rent or contractor-owned |
| Micron gauge | Confirm vacuum depth below 500 microns | Contractor-owned |
| Torque wrench with flare crows feet | Tighten flare nuts to manufacturer specification | Purchase or contractor-owned |
| Flaring tool (eccentric cone type) | Create precise 45-degree flares on copper line ends | Purchase |
| Pipe cutter and deburring tool | Cut copper tubing cleanly and remove burrs | Purchase |
| Nitrogen regulator | Pressure-test the line set before evacuation | Contractor-owned |
| Hammer drill with hole saw (2.5–3 in.) | Create the wall penetration for the line-set bundle | Purchase or rent |
| Stud finder and level | Locate wall studs and mount the indoor unit level | Purchase |
| Wire strippers and electrical tape | Prepare and insulate interconnecting control wiring | Purchase |
| UV-resistant line-set tape and putty | Seal the wall penetration and protect insulation | Purchase |
| Condensate drain hose and pump (if needed) | Route condensate away from the indoor unit | Purchase |
Some single-zone kits ship with a pre-flared, pre-charged line set and a DIY-friendly flare connection that eliminates brazing. Even with these kits, a vacuum pump and torque wrench are still required to do the job correctly. If you are comparing system types before committing, our overview of ductless mini split systems explains how single-zone and multi-zone configurations differ in installation complexity.
4. Indoor and Outdoor Unit Placement
Placement decisions made in the first hour of an installation affect airflow, efficiency, noise, and serviceability for the life of the system. Take time to walk the space and plan both units before drilling any holes.
Indoor Unit Placement Guidelines
- Height: Mount the indoor unit 6 to 7 feet above the floor for optimal air distribution and easy filter access.
- Clearance: Maintain at least 6 inches of clearance above the unit and 12 inches on each side for airflow and service.
- Avoid obstructions: Do not place the unit directly above heat sources, electronics, or furniture that blocks the supply and return air paths.
- Line-set route: Choose a wall that allows a short, direct route to the outdoor unit, ideally on the same side of the building.
- Drainage: Confirm that condensate can drain by gravity. If not, plan for a condensate pump and a route to a drain or exterior.
Outdoor Unit Placement Guidelines
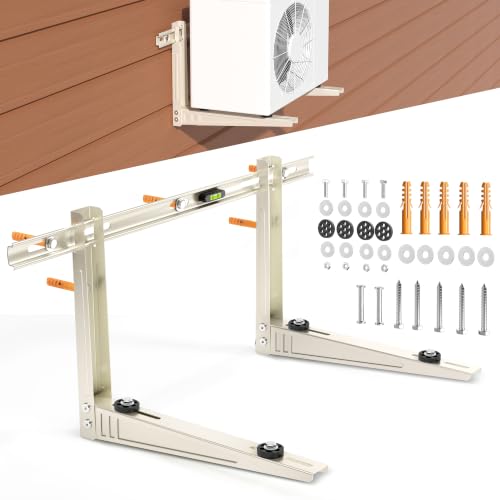
- Level surface: Mount on a wall bracket, concrete pad, or sturdy plastic riser. The unit must be level to prevent compressor vibration and oil migration.
- Clearance: Leave at least 12 inches of free space behind the unit and 24 inches in front for airflow and service access.
- Shade and shelter: A shaded location improves efficiency, but avoid enclosures that recirculate hot air.
- Distance: Keep the line-set run as short as practical. Long runs reduce capacity and require additional refrigerant charge.
- Snow and debris: In cold climates, raise the outdoor unit above expected snow line and keep the area clear of fallen leaves.
For multi-zone systems, each indoor head has its own line set routed to a single outdoor unit or to a branch box. Planning these routes before installation prevents awkward bends, kinked copper, and excess line length. If you are considering ceiling or floor-mounted indoor units, review our page on the ductless mini split air conditioner ceiling mount configuration for placement specifics.
5. Step-by-Step Installation Process
The sequence below reflects a standard single-zone wall-mounted installation. Multi-zone systems follow the same logic but repeat the indoor and line-set steps for each zone.
Step 1: Prepare the Site and Verify the Electrical Supply
Confirm that the electrical panel has capacity for a dedicated circuit sized to the system's nameplate amperage. Install the disconnect box near the outdoor unit if required by local code. Shut off power at the panel before any wiring work.
Step 2: Mount the Indoor Unit Backplate
Use a stud finder to locate wall studs, then mark the backplate position with a level. The backplate must be perfectly level — a tilted indoor unit causes condensate to drip from the wrong side. Drill pilot holes and secure the plate with lag bolts into studs or with appropriate wall anchors for the substrate.
Step 3: Drill the Wall Penetration
Drill a hole through the wall at a slight downward angle toward the outside, using a hole saw sized to the line-set bundle (typically 2.5 to 3 inches). The slight slope allows condensate to drain outward. Install a wall sleeve and seal both ends with putty after the line set is routed.
Step 4: Mount the Outdoor Unit
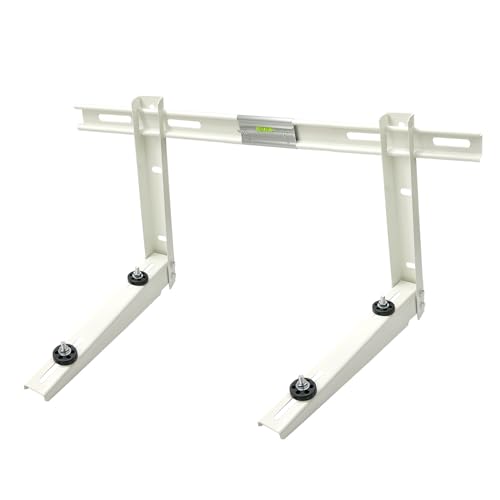
Install the wall bracket or level the concrete pad. Set the outdoor unit in place and secure it with the manufacturer-supplied bolts. Vibration isolators reduce noise transmission into the wall. Verify that the service valves are accessible and that there is adequate clearance for future maintenance.
Step 5: Route the Line Set and Drain
Feed the refrigerant lines, control wiring, and condensate drain through the wall sleeve as a single bundle. Avoid sharp bends — the minimum bend radius is typically 4 inches for 1/4-inch copper and 6 inches for 3/8-inch copper. Kinked copper restricts refrigerant flow and is a leading cause of installation failures. Tape the bundle along its length with UV-resistant tape, leaving the flare ends capped until connection.
Step 6: Connect the Indoor Unit and Drain
Hang the indoor unit on the backplate. Connect the flare nuts to the indoor unit's service ports using a torque wrench at the manufacturer's specified torque. Connect the condensate drain with a continuous downward slope. If a pump is used, mount it according to its instructions and route the discharge to a suitable drain.
Step 7: Connect the Outdoor Unit
Bend the line set carefully to reach the outdoor service valves. Connect the flare nuts with a torque wrench. Connect the control wiring according to the wiring diagram — typically a 14/4 or 12/4 cable for a 230V system, or a 14/3 for a 115V system. Secure the wiring with a strain relief and replace the service panel cover.
Step 8: Pressure Test with Nitrogen
Pressurize the line set to the manufacturer's specified test pressure (commonly 300 to 550 psi) with dry nitrogen. Allow it to sit for at least 30 minutes, and ideally overnight. A drop in pressure indicates a leak at a flare or braze joint. Repair any leak before proceeding.
Step 9: Evacuate the System
Connect the vacuum pump and manifold gauge to the service ports. Pull a vacuum to below 500 microns and hold it for at least 15 minutes with the pump isolated. A rising micron reading indicates moisture or a leak. Only after a stable vacuum should you release the refrigerant from the outdoor unit.
Step 10: Release Refrigerant and Verify Operation
Open the service valves fully with a hex key. Check the operating pressures against the manufacturer's charging chart, factoring in outdoor temperature and line-set length. If the line set exceeds the pre-charged length, add refrigerant by weight per the installation manual. Finally, power the system, set the remote, and verify cooling and heating operation, condensate drainage, and that no error codes appear.
6. Permits, Codes, and Safety Requirements
Permit requirements for a ductless mini split AC installation vary widely by jurisdiction. In most U.S. municipalities, the electrical portion of the installation requires a permit and inspection, and some jurisdictions also require a mechanical permit for the refrigerant circuit. Homeowner-association rules may govern outdoor unit placement and visibility from the street.
Before starting, contact your local building department and ask three questions: Does the installation require an electrical permit, a mechanical permit, or both? Is a licensed contractor required for either portion? What inspections are needed, and at what stages? Document the answers and keep the permit visible on-site.
Safety requirements include a dedicated circuit with proper overcurrent protection, a disconnect within sight of the outdoor unit, GFCI protection where required by the current electrical code, and proper grounding of both units. Refrigerant handling must comply with EPA Section 608 rules if you are not a certified technician. For homes with older electrical panels, an electrician may recommend a panel upgrade before the mini split is connected — a detail that is easy to overlook until the installation day. Our guide to the ductless mini split heat pump installation cost explains how these electrical upgrades fit into a typical project scope.
7. Testing and Commissioning Your New System
Commissioning is the final quality check. Run the system in cooling mode for at least 20 minutes, then verify the following:
- Temperature split: Measure the return-air and supply-air temperatures at the indoor unit. A difference of 15 to 20°F is typical for a properly charged system in cooling mode.
- Condensate drainage: Confirm that water flows freely from the drain line and that no water pools in the indoor unit or overflows the drain pan.
- Operating pressures: Compare suction and liquid-line pressures to the manufacturer's charging chart for the current outdoor temperature and line-set length.
- Noise and vibration: Listen for unusual compressor or fan noise and check that the outdoor unit does not transmit vibration into the wall.
- Error codes and remote functions: Confirm that the remote communicates with the indoor unit and that no diagnostic codes appear on the display.
- Heating mode (if applicable): Run a heat cycle to verify the reversing valve and defrost function on heat-pump models. Our guide to ductless mini split air conditioner with heat explains what normal heat-mode operation looks like.
Record the final pressures, temperature split, and vacuum reading for your records. If a contractor performed the work, ask for these values in writing — they are useful baselines for future service calls.
8. Common Installation Mistakes to Avoid
Most premature mini split failures trace back to a small number of installation errors. Avoid these pitfalls:
- Oversizing the system: An oversized mini split cools too quickly, cycles short, and leaves the room humid. Use a proper load calculation rather than a rule-of-thumb estimate.
- Kinked or over-bent line sets: Copper tubing that is kinked restricts refrigerant flow and cannot be repaired without cutting and re-flaring. Plan the route before bending.
- Under-torqued or over-torqued flares: A loose flare leaks refrigerant; an over-tightened flare cracks the copper cone. Always use a torque wrench at the manufacturer's specification.
- Skipping the nitrogen pressure test: A vacuum-only check will not reveal a slow leak under operating pressure. Pressure-test with nitrogen before evacuation.
- Insufficient vacuum: Pulling a vacuum for a few minutes does not remove moisture. Use a micron gauge and hold below 500 microns.
- Improper condensate slope: A drain that slopes back toward the indoor unit overflows the pan. Maintain a continuous downward slope, and use a pump if gravity drainage is not possible.
- Blocked outdoor airflow: Placing the outdoor unit in a tight enclosure or against a wall recirculates hot air and reduces capacity. Respect the clearance dimensions in the manual.
If you are installing in a room with an existing ducted system, ensure the mini split does not conflict with the thermostat or air balance of the central system. Our overview of ductless HVAC systems explains how ductless and ducted systems can coexist in a hybrid setup.
9. Frequently Asked Questions
How long does ductless mini split AC installation take?
A typical single-zone installation takes 4 to 8 hours for a professional. Multi-zone systems can take 1 to 2 days. DIY installations usually take longer because of the learning curve and the need to source specialized tools.
Can I install a ductless mini split AC myself?
Yes, a DIY installation is possible for a handy homeowner, especially with a pre-charged line set. However, you must handle electrical work, refrigerant lines, and vacuuming correctly. Many regions require a licensed HVAC technician for refrigerant handling and electrical connections, and permits are often required.
Do I need a permit for ductless mini split AC installation?
Most jurisdictions require a permit, primarily for the electrical work and refrigerant handling. Requirements vary by state and municipality. Always check with your local building department before starting to avoid fines and ensure compliance.
What tools are needed for a ductless mini split AC installation?
Essential tools include a drill with hole saw, vacuum pump and manifold gauge set, torque wrench, pipe cutter, flaring tool, level, screwdrivers, wire strippers, and a stud finder. Some kits include pre-flared line sets and pre-charged refrigerant, which simplifies the process.
Where should the indoor and outdoor units be placed?
The indoor unit should be mounted 6 to 7 feet above the floor, away from direct sunlight and heat sources, with clear airflow. The outdoor unit should be on a level surface with at least 12 inches of clearance around it, preferably in shade. Minimize the distance between the two units to optimize efficiency.