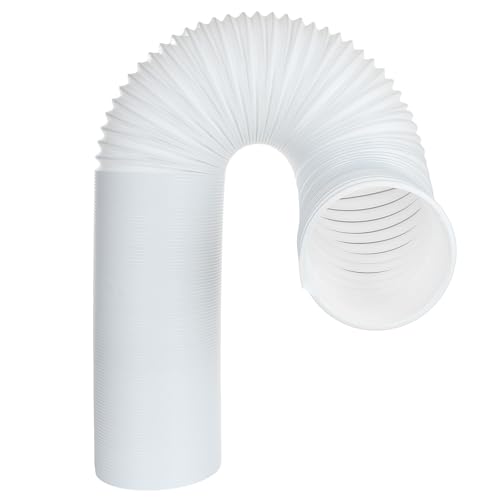
Flexible Exhaust Hose for Portable Air Conditioner
Everything you need to know about choosing, installing, insulating, and maintaining the exhaust hose that makes your portable AC work safely and efficiently.
A flexible exhaust hose is one of the most important — and most overlooked — components of a portable air conditioner. The unit cools the room by removing heat and moisture, and the hose is the channel that carries that hot exhaust air outside. If the hose is too short, too long, crushed, leaking, or poorly connected, the entire cooling system loses efficiency.
Most portable AC owners only think about the hose when something goes wrong: the room feels warm despite the unit running, the window kit does not fit, or the hose keeps popping out of the adapter. This guide explains how the hose works, which sizes and materials are available, how to install it correctly, and how to troubleshoot the most common issues. By the end, you will know exactly what to look for when replacing an old hose or setting up a new portable unit.
What the Exhaust Hose Actually Does
A portable air conditioner is a single-package unit: the evaporator, condenser, and compressor all sit inside one cabinet. It draws room air across the evaporator to cool it, then uses the condenser to release the absorbed heat. That heat must go somewhere — otherwise the unit would simply move heat around the room and never lower the temperature. The flexible exhaust hose carries the hot condenser air out through a window, wall vent, or sliding-door kit.
Because the hose handles hot, moist air, it is usually made from a multi-layer material: a PVC or aluminum inner liner, a reinforcing wire coil, and an outer protective layer. The wire coil gives the hose its flexibility so it can bend around furniture and route to the nearest window. The layered construction keeps the hose from collapsing under negative pressure and resists the temperature of the exhaust stream.
The hose is paired with two connectors: one end attaches to the unit's exhaust port, and the other attaches to a window or wall adapter. Both connections must be sealed tightly. Even a small leak near the indoor end lets hot air back into the room, which forces the compressor to run longer and reduces the effective cooling capacity of the unit.
Types of Flexible Exhaust Hose
Not all portable AC exhaust hoses are built the same way. The material and construction affect durability, heat transfer, and how easy the hose is to route and store. The table below summarizes the main categories you will encounter.
| Hose Type | Construction | Best For | Tier |
|---|---|---|---|
| Standard PVC hose | PVC film over a steel wire coil | Everyday residential portable units | entry-level |
| Aluminum foil hose | Aluminum foil layers with wire reinforcement | Budget units and short exhaust runs | entry-level |
| Insulated hose | PVC or foil core with a foam or fiberglass sleeve | Warm rooms, long runs, efficiency-focused setups | mid-range |
| Heavy-duty hose | Thicker multi-layer liner with reinforced coil | Frequent movement, commercial or multi-unit use | top-tier |
| Flexible duct hose | Aluminum or PVC duct with wire helix | Custom venting and longer runs with proper support | mid-range |
Insulated hoses are worth considering if your portable AC sits in a room that already runs warm, or if the hose must pass through a sunny area before reaching the window. The insulation slows heat transfer from the hot exhaust stream back into the room, which keeps the unit closer to its rated cooling capacity. Heavy-duty hoses are the better option when the unit is moved often or when the hose is exposed to repeated bending and sunlight.
Sizes and Compatibility
The two most common portable AC exhaust hose diameters are 5 inches and 6 inches. A smaller number of compact units use 4-inch hoses, and some larger or dual-hose models use 6-inch or larger connections. The size must match the exhaust port on the unit and the opening on the window kit adapter — a mismatch causes leaks and poor performance.
4-inch hose
Found on compact, low-capacity portable units. Best for small rooms and short exhaust runs. Limited airflow, so it is not suitable for high-BTU models.
5-inch hose
The most common size for mid-range residential portable ACs. A good balance between airflow and flexibility, and widely available as a replacement part.
6-inch hose
Used on higher-capacity units and dual-hose models. Moves more air per minute, which matters for larger rooms and longer vent runs.
When replacing a hose, measure the outer diameter of the unit's exhaust port and the inner diameter of the window adapter before ordering. Hose length also matters: most stock hoses are between 4 and 6 feet, and some units accept extensions up to roughly 9 feet. Extending beyond the manufacturer's recommendation increases static pressure and reduces cooling efficiency, so keep the run as short and straight as the room layout allows.
If your unit came with a dual-hose setup, each hose has a dedicated function — one intake and one exhaust. Do not swap them, and replace each with a hose of the same diameter and construction. For units that rely on a single hose, check whether the manufacturer specifies a maximum length; going beyond it can cause the compressor to overheat or the unit to cycle off prematurely.
Installation Step by Step
A correct installation takes only a few minutes and prevents most of the performance problems portable AC owners report. Follow the sequence below.
- Unpack and inspect the hose. Check for crushed sections, cracks, or missing connectors. A hose that was flattened in storage may not return to full diameter, which restricts airflow.
- Attach the hose to the unit. Twist the connector onto the exhaust port until it locks or seats firmly. Many units use a bayonet-style fitting; others use a friction collar. Do not force a mismatched connector.
- Route the hose to the window. Keep the path as short and straight as possible. Avoid sharp bends, kinks, and loops that trap hot air. If the hose must turn, use a gentle curve rather than a 90-degree fold.
- Connect the window adapter. Fit the hose end into the window kit plate and secure it. Close the window against the kit so the seal is tight. Use the foam or weatherstrip included with the kit to close gaps.
- Seal both ends. Check that the hose is fully seated at the unit and at the window. A loose connection at either end leaks hot air and undermines cooling.
- Test the airflow. Turn the unit on and feel for strong exhaust at the outdoor end. Weak airflow often indicates a kink, a crushed section, or a partially blocked window adapter.
For setups where the window is far from the unit, consider a longer run only if the manufacturer allows it, and insulate the hose along its full length. If you need to vent through a wall instead of a window, use a wall vent kit that matches the hose diameter and seal the penetration properly. The same principles apply: short run, tight connections, and no sharp bends.
Insulation and Efficiency
The exhaust hose carries hot air, so its surface warms up during operation. In a cooled room, that warm surface radiates heat back into the space — a small but real loss. Insulating the hose reduces this heat transfer and helps the unit deliver closer to its rated capacity. Insulation is especially useful when the hose runs through a warm area, when the run is long, or when the unit is working hard in a hot climate.
You can buy pre-insulated hoses or add a removable insulation sleeve to an existing hose. The sleeve wraps around the hose and is secured with hook-and-loop straps or zippers, so it can be removed for cleaning or storage. Choose a sleeve rated for the temperature of the exhaust stream and sized to the hose diameter. Avoid wrapping the hose so tightly that it compresses the wire coil or restricts the hose's flexibility.
Insulation is not a substitute for a short, straight run. If the hose is too long or has multiple bends, insulation helps but does not eliminate the added static pressure. Fix the routing first, then add insulation for the remaining heat loss.
Common Problems and Fixes
Most portable AC hose issues fall into a few categories. The table below maps symptoms to likely causes and practical fixes.
| Symptom | Likely Cause | Fix |
|---|---|---|
| Room stays warm despite unit running | Leaking connection, crushed hose, or hose too long | Reseat connectors, straighten the hose, shorten the run if possible |
| Hose keeps disconnecting from the unit | Worn connector, mismatched diameter, or missing locking ring | Replace the connector or hose with the correct size |
| Hose becomes very hot to the touch | Normal exhaust heat; worse with long runs or no insulation | Add an insulation sleeve and shorten the run |
| Weak airflow at the window end | Kink, crushed section, or blocked adapter | Straighten the hose, remove obstructions, check the adapter |
| Water dripping from the hose | Condensation forming on a cold hose surface | Insulate the hose and check the unit's drain system |
| Unit cycles on and off frequently | Restricted exhaust raising compressor temperature | Clear the hose, reduce length, and confirm the window vent is open |
If the hose is cracked or punctured, do not try to seal it with tape as a long-term fix. Tape can peel off under heat and vibration, and a partial seal still leaks hot air. Replace the hose with a matching part. If the connector is the problem, many manufacturers sell replacement connector kits separately, which is often enough to restore a tight fit without replacing the whole hose.
Condensation is a common complaint in humid climates. The exhaust stream is warm and moist, and the hose surface can drop below the dew point in a cool room. Insulating the hose reduces condensation, and checking the unit's drain plug or drain hose ensures water is routed away properly. If you notice water pooling around the unit, review the drain setup before assuming the hose is at fault.
When to Replace the Hose
Inspect the hose at the start of every cooling season and whenever you move the unit. Replace it if you find any of the following:
- Cracks, tears, or punctures in the outer layer
- Crushed or permanently flattened sections that restrict airflow
- Loose or broken connectors that no longer lock onto the unit or window adapter
- Persistent condensation that soaking or insulation does not resolve
- Visible wire coil exposed through the hose wall
Replacement hoses are widely available as universal kits with adjustable connectors, or as manufacturer-specific parts. A universal kit is convenient when the original hose is discontinued, but confirm the diameter and connector style before ordering. If your unit is still under warranty, check whether the manufacturer requires an approved replacement part to keep the warranty valid.
How to Choose the Right Hose
Use the checklist below to narrow down the options. The right hose is the one that matches your unit, fits your window setup, and suits how often you move the unit.
Match the diameter
Measure the exhaust port and window adapter. A 5-inch hose will not seal on a 6-inch port, and adapters are not always interchangeable between sizes.
Check the connector style
Bayonet, threaded, and friction-fit connectors are common. Buy a hose that matches your unit's fitting, or a kit that includes the right adapters.
Choose the length carefully
Stay within the manufacturer's maximum. A longer hose adds static pressure and reduces cooling, even if it reaches the window more easily.
Consider insulation
An insulated hose or a removable sleeve reduces heat transfer and condensation. It is a worthwhile upgrade for long runs and warm rooms.
Think about durability
Heavy-duty multi-layer hoses resist crushing and UV exposure better than thin foil hoses. Choose based on how often the unit is moved.
Confirm the window kit fit
The hose is only as good as its connection to the window plate. Check that the adapter matches your window kit or buy a complete kit.
If you are setting up a portable unit for the first time, the exhaust hose is also a good moment to review the rest of the venting path. Our guide to the exhaust vent for portable air conditioner covers window kits, wall vents, and sealing options in more detail. For homes that need a more permanent cooling solution, the ENERGY STAR portable air conditioner overview explains how efficiency ratings interact with venting and installation quality.
If you are still comparing portable units more broadly, the portable air conditioner guide covers sizing, BTU ranges, and single-hose versus dual-hose designs. And if your project involves flexible ducting beyond the portable AC hose, the flexible ducting for HVAC reference explains how larger duct systems handle similar airflow and insulation challenges.
Frequently Asked Questions
Most portable air conditioners use either a 5-inch or 6-inch diameter exhaust hose. The correct size depends on your unit's BTU capacity and the manufacturer's specifications. Always match the hose diameter to the unit's exhaust port and window kit adapter. Compact units may use a 4-inch hose, while high-capacity and dual-hose models often use 6-inch hoses.
Yes, but with caution. Extending the hose beyond the manufacturer's recommended length can reduce cooling efficiency because the unit must work harder to push hot air out. Keep the run as short and straight as possible, and insulate any added length to prevent heat re-entering the room. Check your manual for the maximum allowed length before adding an extension.
Inspect the hose every cooling season. Replace it when you notice cracks, punctures, crushed sections, or poor fit at the connectors. A damaged hose leaks hot air back into the room and forces the unit to run longer, reducing efficiency and comfort.
Yes. The hose carries hot exhaust air, so its surface can become warm to the touch. Insulating the hose, especially in short runs or warm rooms, helps reduce heat transfer and improves overall cooling performance. Avoid routing the hose where people or pets might brush against it during operation.
A properly sized flexible duct hose can work as a replacement if it matches the unit's exhaust port diameter and can be securely connected to the window kit. However, use a hose rated for the temperature and airflow of your unit, and ensure a tight seal at both ends. A generic duct hose that is too thin may crush under pressure or leak at the connectors.
The most common causes are a missing locking ring, a mismatched adapter, or a window kit that does not grip the hose end securely. Check that the hose is fully inserted into the adapter and that any locking collar is tightened. If the adapter is worn or cracked, replace it. Supporting the hose with a bracket can also reduce strain on the connection.
For broader troubleshooting, including issues that are not hose-related, see our FAQ hub. If you are dealing with a portable unit that is not cooling even with a good hose, the problem may be elsewhere in the system — start with airflow, filters, and the window seal before replacing parts.