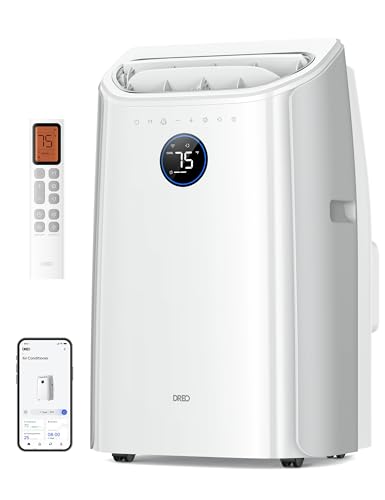
Energy Star Portable Air Conditioner: The Complete Buyer's Guide
Everything you need to know about certified portable cooling — efficiency ratings, sizing, hose types, installation, maintenance, and how to compare models before you decide.
Jump to Buying ChecklistWhy this guide matters: An Energy Star portable air conditioner is one of the few cooling categories where certification genuinely separates efficient engineering from ordinary hardware. If you are researching before purchasing, this page explains what the label actually measures, which specifications matter in real rooms, and how to avoid the most common sizing and installation mistakes.
What Is an Energy Star Portable Air Conditioner?
Energy Star is a voluntary certification program managed by the U.S. Environmental Protection Agency. A portable air conditioner earns the label only when an independent laboratory confirms that its measured efficiency meets or exceeds the threshold set for its cooling capacity class. In practice, certified units are built with more efficient compressors, larger or better-designed heat exchangers, improved airflow paths, and smarter electronic controls than baseline models of the same size.
For portable cooling, efficiency is expressed through the Combined Energy Efficiency Ratio, or CEER. This single number blends cooling performance with standby power draw, giving a more realistic picture than a simple instantaneous ratio. Because portable units exhaust hot air through a hose and inevitably lose some cooling to duct losses, the CEER standard is specifically designed to account for that real-world penalty. When you browse Energy Star rated portable air conditioners, the certified models are the ones that passed this benchmark in their capacity band.
The distinction matters because portable air conditioners are not covered by every efficiency rule that applies to window units or central systems. The certification program gives shoppers a reliable shortcut: instead of decoding unfamiliar test data across dozens of listings, a single verified label tells you the unit has cleared a defined efficiency bar for its class.
Key Benefits of Choosing a Certified Portable AC
Certification is not a marketing gimmick. It reflects measurable engineering differences that show up in daily use and over the life of the appliance. Below are the practical advantages owners notice most often.
Lower Power Draw
Efficient compressors and heat exchangers deliver the same cooling with less electricity, which is especially noticeable during long summer run cycles.
More Consistent Cooling
Better controls and airflow design reduce short cycling, so room temperature stays steadier instead of swinging between too warm and too cold.
Standby Efficiency
CEER includes standby power, meaning certified units are engineered to draw very little when idle or on a timer — a detail many shoppers overlook.
Long-Term Reliability
Manufacturers targeting certification typically use higher-grade components, which often translates into a longer service life and fewer mid-season failures.
Environmental Responsibility
Less electricity per unit of cooling means a smaller carbon footprint, and certified models increasingly use lower-GWP refrigerants aligned with modern environmental rules.
Efficient in the Long Run
The efficiency gap compounds across seasons. Over several years, a certified unit typically consumes meaningfully less energy than a non-certified counterpart of equal capacity.
How a Portable Air Conditioner Works
A portable air conditioner is a self-contained refrigeration system on wheels. Inside the cabinet, a compressor circulates refrigerant between an evaporator coil and a condenser coil. Room air is pulled across the evaporator, where heat is absorbed and moisture condenses out. The chilled air is then blown back into the room. Meanwhile, the absorbed heat is released through the condenser and must be expelled outdoors — that is the job of the exhaust hose.
Because the hot exhaust has to leave the room, every portable unit needs a path to the outside: a double-hung window, a sliding window or door, or a dedicated wall vent. The exhaust vent for portable air conditioner setups vary in sophistication, from simple window kits to sealed slider adapters. Getting this connection right is arguably the single biggest factor in how well any portable unit performs.
Single-Hose vs. Dual-Hose Design
Single-hose units draw cooling air from the room and push it outside along with the heat. That creates negative pressure, which pulls warm outdoor air back in through gaps around doors and windows, quietly undermining efficiency. Dual-hose models solve this by drawing intake air from outside and returning it outside, so the room is not depressurized. Dual-hose designs are generally more efficient in practice and are common among higher-tier certified models. The flexible exhaust hose for portable air conditioner systems on dual-hose units are wider and require a slightly larger window opening, so plan for that during installation.
Condensate Handling
Portable units remove humidity, which becomes water. Entry-level and mid-range models collect it in a tank that must be emptied manually, while premium units use self-evaporative technology that recycles condensate over the condenser coil to improve efficiency and reduce emptying frequency. If you plan to run the unit overnight or in a humid climate, self-evaporation is worth prioritizing. Related designs such as fully evaporating portable air conditioners are engineered specifically to minimize or eliminate manual draining.
How to Size an Energy Star Portable Air Conditioner
Capacity is measured in British Thermal Units per hour (BTU/h). Undersizing leaves the room warm on hot afternoons; oversizing cools quickly but short-cycles, which removes humidity poorly and wastes energy. The goal is a match, not a maximum.
| Room Area (sq ft) | Typical BTU Range | Best For | Market Tier Usually Needed |
|---|---|---|---|
| Up to 150 | 5,000 – 6,000 | Bedrooms, small home offices | Entry-level |
| 150 – 250 | 8,000 – 10,000 | Medium bedrooms, studios | Mid-range |
| 250 – 400 | 10,000 – 12,000 | Living rooms, open-plan spaces | Mid-range |
| 400 – 550 | 12,000 – 14,000 | Large living areas, lofts | Premium |
| 550+ | 14,000+ | Open-plan homes, multi-zone use | Premium / top-tier |
Start with roughly 20 BTU per square foot, then adjust. Add capacity for south- or west-facing windows with direct sun, ceilings above eight feet, kitchens, rooms with multiple occupants, and poorly insulated walls. Subtract a little for heavily shaded rooms or basements. If you are cooling a bedroom for sleep, err slightly smaller for quieter operation; if you are cooling a living area that fills with people in the evening, err slightly larger. More detailed sizing logic is available in the AC sizing guide.
Also consider that portable units are spot coolers, not whole-home systems. They cool the room they sit in, and effectiveness drops sharply with distance and with open doorways. For multi-room coverage, a Energy Star mini split or a certified multi-zone system is a better structural fit.
Efficiency Metrics That Actually Matter
CEER: The Core Portable AC Metric
The Combined Energy Efficiency Ratio is the headline number for portable air conditioners. Higher is better. Because CEER incorporates standby power and is tested under conditions that reflect duct losses, it is the most honest single indicator of how a portable unit will perform in a real room. When comparing two certified models of the same capacity, the one with the higher CEER will generally consume less electricity for the same cooling output.
SEER and EER: Context, Not the Main Event
You will often see SEER and EER discussed alongside portable units, but those metrics are primarily used for central systems and window units respectively. SEER is a seasonal rating for whole-home equipment; it is useful background when comparing a portable stopgap against a permanent solution, but it is not the certification metric for portable ACs. EER measures instantaneous efficiency at a single test point and can be informative, though it does not capture standby losses. For a deeper explanation of how these ratings differ, see the guides on SEER ratings and EER ratings.
Refrigerant and Environmental Impact
Modern certified portable units increasingly use refrigerants with a lower global warming potential, reflecting the industry-wide transition away from older high-GWP blends. If environmental performance is a priority, check the refrigerant type in the specifications. The EPA refrigerant handling rules explain why this transition is regulated and what it means for servicing and disposal.
Features Worth Comparing Before You Decide
Two certified units of identical capacity can differ enormously in daily usability. These are the features that separate a good experience from a frustrating one.
- Noise level (dB): Portable units are inherently louder than window or mini-split systems because the compressor sits in the room. Premium models use vibration isolation and better fan geometry to bring noise down. If the unit is for a bedroom, prioritize quiet operation over raw capacity.
- Hose configuration: Dual-hose is the efficiency leader; single-hose is simpler to install and often lighter. Match the choice to your window type and how long you plan to run the unit daily.
- Self-evaporation: Reduces or eliminates manual draining, which is a major quality-of-life improvement in humid climates. Premium and top-tier models almost always include it.
- Smart controls: Wi-Fi, app scheduling, and voice assistant support let you pre-cool a room before you arrive and set efficient overnight schedules. Many high-end units pair this with programmable thermostats and occupancy logic.
- Dehumidification mode: Useful in shoulder seasons when it is humid but not hot. A dedicated dry mode runs the compressor and fan differently from cooling mode.
- Fan-only and sleep modes: Sleep mode gradually raises the setpoint and lowers fan speed, which saves energy overnight without waking you.
- Window kit quality: A sealed, well-fitted window adapter is not a luxury. Gaps around the hose are the leading cause of disappointing performance. If your window is unusual, budget time for a proper adapter or a windowless-friendly alternative.
- Castors and form factor: Portability is the entire point. Check wheel quality and cabinet dimensions against the doorways and thresholds the unit will cross. Compact designs in the small-room free-standing category are easier to move daily.
Installation and Placement Best Practices
A certified unit installed poorly will underperform an ordinary unit installed well. Follow these steps for the best real-world results.
- Choose the right window. A double-hung or sliding window near the cooling zone is ideal. Avoid windows with direct, harsh afternoon sun if alternatives exist, and make sure the window can close securely around the adapter.
- Seal the window kit properly. Use the foam or plastic panels supplied, and add weather stripping or removable caulk around gaps. Every leak is warm air pulled back into the room.
- Keep the hose short and straight. Route the exhaust hose as directly as possible. Loops, kinks, and long extensions trap heat and reduce efficiency. If the hose must bend, make a gentle curve, not a sharp fold.
- Position the unit centrally. Cold air blows in one direction. Placing the unit near the center of the room or aimed along the long axis distributes cooling far better than tucking it into a corner.
- Clear the intake and exhaust. Leave space around the front grille and the back of the unit. Do not push it flush against furniture or drapery.
- Check the electrical circuit. Portable ACs draw significant current. Confirm the outlet and breaker can handle the load, especially if the unit shares a circuit with other high-draw appliances. For electrical preparation guidance, see the electrical panel checklist.
- Level the unit and lock the castors. A tilted cabinet can cause condensate to spill or the compressor to run noisily.
- Test and measure. After installation, run the unit for an hour and note the temperature drop across the room. If cooling is weak, re-check seals and hose routing before assuming the unit is undersized.
If you are comparing portable cooling against permanent options, it helps to understand the broader landscape. Window units are typically more efficient per BTU because the compressor sits outside the conditioned space; the Wi-Fi-enabled Energy Star window AC category is a strong alternative where a window is available. Ductless mini-splits are the efficiency leaders for long-term use; the Energy Star mini split heat pump adds heating for year-round value. Portable units win when portability, rental-friendly installation, or no-permanent-modification constraints dominate the decision.
Maintenance That Protects Efficiency
Efficiency degrades quietly. A dirty filter forces the fan to work harder, reduces airflow across the evaporator, and can lead to coil icing. The maintenance routine for a portable unit is simple, but it must be consistent.
- Clean or replace the filter every two weeks during heavy use. Most portable units use a washable mesh filter. Rinse, dry completely, and reinstall. Replacement intervals depend on dust and pet hair in the home; the filter replacement guidance applies broadly to portable and window units alike.
- Empty the condensate tank before it fills. Most units shut off automatically when full, but standing water encourages odor and mold. If the unit has a continuous drain option, use it for long runs.
- Inspect and clean the exhaust hose and window adapter seasonally. Dust and lint collect in the hose and adapter seals. Wipe them down and check for cracks.
- Check the coils annually. If you can access the evaporator behind the filter, a soft brush and coil cleaner remove buildup. Reassemble carefully to avoid bending fins.
- Store properly in the off-season. Drain all water, clean the filter, coil, and cabinet, and store upright in a dry space. Cover the unit to keep dust out of the blower.
- Watch for warning signs. Reduced cooling, unusual noise, water leaks, or a musty smell usually indicate a maintenance issue rather than a failed unit. A fan and AC combination used strategically can extend the comfort range while you troubleshoot.
Pre-Purchase Checklist
Before you commit to any specific model, confirm each of the following. This list is designed to catch the mismatches that cause returns and disappointing first summers.
- Room area and BTU match. Measure length and width, multiply for square footage, and adjust for sun, ceiling height, and occupancy.
- Energy Star label verified. Confirm the certification applies to the exact model number, not just the product family. Browse certified portable air conditioners as a starting shortlist.
- CEER value noted. Compare within the same capacity class. Higher is better; do not compare CEER across different BTU bands.
- Hose type chosen. Decide between single-hose simplicity and dual-hose efficiency based on window type and expected daily runtime.
- Window compatibility confirmed. Check the adapter fits your window type and the sash can close securely. Unusual windows may need a specialized kit.
- Noise tolerance checked. Look up the decibel rating and read owner feedback about compressor cycling noise. For bedrooms, prioritize low dB ratings.
- Drain strategy decided. Self-evaporation, manual tank, or continuous drain hose — pick the one that fits your routine.
- Smart features weighed. Wi-Fi and scheduling are convenience and efficiency features; decide whether they justify moving up a tier.
- Physical fit and mobility. Cabinet dimensions, wheel quality, and weight matter if the unit moves between rooms.
- Warranty and support reviewed. Check the compressor and parts coverage, and confirm the brand has accessible service in your region.
Ready to Compare Certified Models?
The recommended products section below shows Energy Star portable air conditioners currently available through our retail partner, organized so you can compare capacity, hose configuration, and feature tiers at a glance.
View Recommended Models