Exhaust Vent for Portable Air Conditioner: The Complete Guide
Everything you need to know about portable AC vent hoses, window kits, installation, and airflow efficiency before you buy
How a Portable AC Exhaust Vent Works
A portable air conditioner draws in warm room air, cools it through an evaporator coil, and blows the cooled air back into the room. The heat absorbed from the room, plus the heat generated by the compressor, must be rejected outdoors. That is the job of the exhaust vent system. It consists of three main parts:
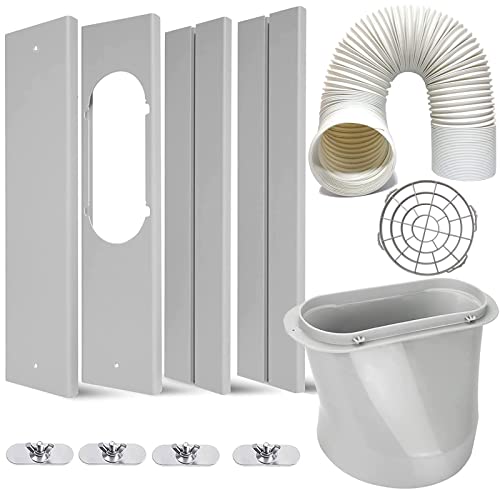
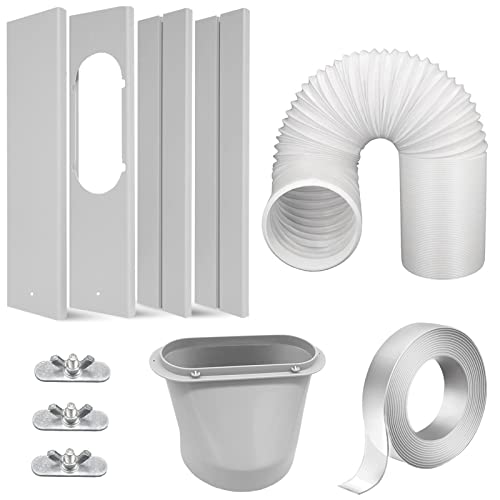
- The exhaust hose — a flexible duct, usually 5 to 7 inches in diameter, that carries hot air from the unit to the outside.
- The window or wall adapter — a connector that secures the hose end and seals the opening so outdoor air cannot leak back in.
- The window kit or wall plate — a panel that fills the gap in a sliding window, casement window, sliding door, or wall opening.
Some units are dual-hose designs that also draw in outdoor air for condenser cooling, which improves efficiency. Single-hose models pull room air through the unit and exhaust it outside, creating negative pressure that can pull warm air in through gaps. Understanding this difference helps you choose the right configuration for your room. If you are comparing efficient models, our guide to ENERGY STAR portable air conditioners explains which vent designs perform best.
Key Components of a Portable AC Vent System
Not all vent hardware is equal. The quality of each component affects how much cooling reaches your room and how much noise the unit produces.
Exhaust Hose
The hose is the backbone of the system. Look for a hose with a smooth interior, a reinforced helix, and heat-resistant material. Cheap hoses kink easily and radiate heat back into the room. Many portable AC hoses are counterclockwise threaded on both ends; check the connector direction before buying a replacement. If your hose is damaged or you need a longer run, see our detailed guide to a flexible exhaust hose for portable air conditioner units, including length limits and connector compatibility.
Window Kit and Adapters
A window kit typically includes sliding panels, a hose connector plate, and foam seals. Universal kits fit most horizontal or vertical sliding windows, while casement windows need a specialized fabric or acrylic insert. Poor sealing is the most common cause of poor cooling because hot outdoor air sneaks in around the panel. Choose a kit with a locking mechanism and weatherstripping for a tight fit.
Backflow Damper and Hose Insulation
Some hoses include an internal flap that closes when the unit is off, preventing outdoor heat from entering. Hose insulation sleeves are an easy upgrade that reduces heat radiation from the hot exhaust duct back into the room. Both are small additions with a noticeable effect on comfort.
Vent Kit Tiers: Which Level Fits Your Setup?
Basic Window Kit
Sliding panels and a simple hose connector for standard horizontal windows.
Best for: renters, short seasonal use, single-room cooling where the window shape is standard.
Sealed Universal Kit
Includes foam seals, weatherstripping, and a locking panel for a tighter fit.
Best for: most homes that want reliable cooling without custom fabrication.
Specialty or Wall Vent Kit
Casement inserts, sliding-door kits, or permanent wall plates with insulated sleeves.
Best for: unusual window shapes, year-round installations, and multi-season efficiency.
How to Choose the Right Exhaust Vent Setup
Start with your window type, then match the hose and kit to the unit's rated airflow. A vent system that is too restrictive chokes the compressor and reduces cooling capacity.
- Window type: Horizontal sliders are the easiest. Vertical sliders, casement, and awning windows need specific adapters. Sliding glass doors can use a taller panel kit.
- Hose length: Keep the run as short and straight as possible. Every extra foot of hose and every bend adds back pressure.
- Hose diameter: Match the hose to the unit's exhaust outlet. Adapters exist, but downsizing reduces airflow.
- Sealing: Foam gaskets, weatherstripping, and tape around the panel edges matter more than most buyers expect.
- Permanent vs temporary: If you plan to use the unit every summer, a wall vent or insulated window insert is a worthwhile long-term investment.
If you are also deciding between venting styles, our overview of a free-standing air conditioner with no window needed explains which alternatives exist when a window vent is not practical.
Step-by-Step Exhaust Vent Installation
- Position the unit. Place the portable AC near the window or wall outlet, leaving clearance around the air intake and outlet as recommended by the manufacturer.
- Assemble the window kit. Fit the sliding panels into the window track and adjust the width until the panel fills the opening snugly.
- Connect the hose to the unit. Thread the hose connector onto the exhaust outlet. Most connectors twist clockwise; check the arrow markings.
- Attach the hose to the window adapter. Route the hose with as few bends as possible and connect it to the adapter plate.
- Seal the gaps. Add foam weatherstripping around the panel edges, and close and lock the window against the kit.
- Test airflow. Turn the unit on and check that warm air flows freely outside. A weak exhaust stream suggests a kink, a blocked damper, or an oversized hose run.
- Insulate if needed. Wrap the hose in an insulation sleeve if the room feels warmer near the duct.
Maximizing Cooling Efficiency Through Better Venting
Venting is one of the highest-leverage improvements you can make to portable AC performance. Small fixes often deliver more comfort than upgrading the unit itself.
- Shorten the hose. Trim excess length only if the manufacturer allows it; otherwise, coil the excess loosely rather than bending it sharply.
- Seal the window opening. Use foam tape, weatherstripping, and a locking panel to stop hot air infiltration.
- Insulate the exhaust hose. An insulated sleeve keeps heat inside the duct instead of radiating into the room.
- Use a backflow damper. It prevents outdoor heat from entering when the unit cycles off.
- Keep the outdoor end clear. Do not block the exterior vent with curtains, furniture, or plants.
- Choose a dual-hose model for larger rooms. Dual-hose units balance pressure and cool more consistently in open spaces.
For broader efficiency guidance, see our overview of ENERGY STAR qualified air conditioners and the differences between vented and non-vented designs in our article on a free-standing air conditioning unit without an exhaust hose.
Vent Setup Comparison by Space and Window Type
| Space / Window Type | Recommended Vent Approach | Best For |
|---|---|---|
| Horizontal sliding window | Standard sliding window kit with foam seals | Apartments and bedrooms, essential to balanced tier |
| Vertical sliding window | Vertical panel kit or adjustable fabric insert | Older homes with sash windows |
| Casement or awning window | Specialty casement insert with hose adapter | Top-tier kits for unusual window shapes |
| Sliding glass door | Tall sliding-door panel kit with reinforced seals | Living rooms and open-plan spaces |
| Wall venting | Permanent wall plate with insulated sleeve and damper | Year-round installations and commercial-grade setups |
Maintaining the Exhaust Vent System
A clean, intact vent system keeps airflow strong and prevents the unit from overheating. Build these checks into your seasonal routine:
- Inspect the hose for cracks, kinks, and crushed sections before each cooling season.
- Clean the hose interior with a vacuum brush to remove dust buildup.
- Replace worn foam seals and weatherstripping on the window kit.
- Check the backflow damper for debris that prevents it from closing fully.
- Verify that the outdoor vent opening is unobstructed by screens, plants, or snow.
- Store the hose coiled loosely, not tightly compressed, during the off-season.
If you notice warm air blowing back into the room, the issue is usually a poor seal or a missing damper. Fixing it is one of the simplest ways to restore cooling performance without replacing the unit.
Frequently Asked Questions
Can a portable air conditioner work without an exhaust vent?
No. A portable air conditioner must exhaust hot air outside through a vent hose. Without proper venting, the unit recirculates heat back into the room and cannot cool effectively, and it may overheat and shut down.
What is the maximum length for a portable AC exhaust hose?
Most manufacturers recommend keeping the exhaust hose as short as possible, ideally under 5 to 7 feet. Longer runs increase back pressure, reduce cooling efficiency, and force the compressor to work harder.
Do portable air conditioners need to be vented through a window?
A window is the most common venting route, using a window kit with a sliding panel. Other options include through-the-wall venting, drop ceilings, sliding doors, and dryer-style vent outlets, depending on your space and building rules.
How do I stop hot air from coming back through the exhaust hose?
Use a hose with an internal flap or backflow damper, seal gaps around the window kit with foam or weatherstripping, keep the hose as short and straight as possible, and insulate the hose to reduce heat radiation back into the room.
Is a dual-hose portable AC better than a single-hose model?
Dual-hose models are generally more efficient because they draw in outdoor air for condenser cooling instead of pulling conditioned room air out. They reduce negative pressure and perform better in larger or open rooms, while single-hose units remain a practical choice for small, closed spaces.
Ready to Set Up Your Portable AC Vent?
Use the product section below to compare vent hoses, window kits, and portable AC units suited to your window type and room size. Learn first, understand your needs, then choose the right product.