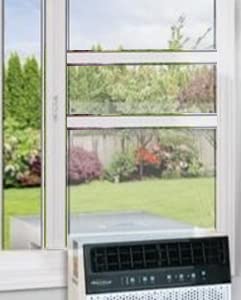
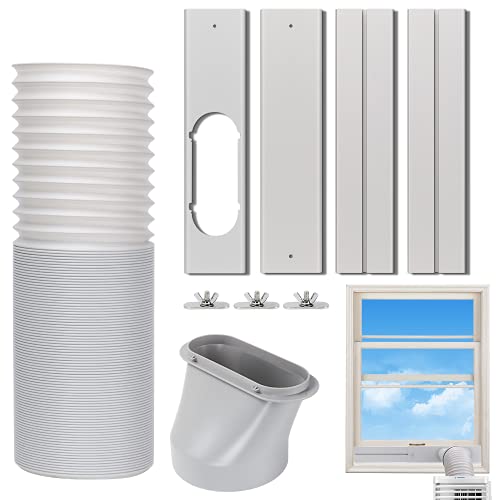
How to Install a Window Air Conditioner in a Sliding Window
A complete, safety-first guide to mounting, sealing, and securing a window AC unit in a horizontal sliding window — including tools, step-by-step instructions, and troubleshooting.
START THE GUIDEWhy this guide matters: Sliding windows open sideways, not up and down. That changes how a window AC unit sits, how the weight is supported, and how the opening is sealed. Done correctly, a sliding-window installation cools just as well as a double-hung setup — and it stays secure through summer storms. This guide walks you through the entire process from measuring to sealing, so you can plan the job with confidence before you buy or install anything.
Understanding the Sliding Window Challenge
Most window air conditioners are engineered for double-hung windows, where the lower sash slides upward and the unit rests on the sill. A sliding window works differently: one pane glides horizontally past the other, and the opening is tall and narrow rather than wide and short. This creates two practical issues.
First, the unit must be oriented so the cold-air outlet faces into the room and the condenser exhaust faces outside. On many units, the chassis can be rotated, but the side panels and support brackets are designed for vertical openings. Second, the sliding sash itself offers little structural support — it is meant to glide, not to hold a heavy appliance.
The solution is a combination of the right unit type, a solid outdoor support bracket, and a proper seal around the opening. The rest of this guide covers each piece in order. If you are still comparing unit styles before committing, our overview of how an air conditioner works explains the cooling cycle and why airflow direction matters.
Tools and Materials You Will Need
Gather everything before you start. A sliding-window install typically takes two to three hours for a first-timer, and having the right parts on hand avoids mid-job trips.
| Category | Item | Purpose |
|---|---|---|
| Measuring | Tape measure, pencil, notepad | Record window opening width and height, and unit dimensions |
| Tools | Drill with bits, screwdriver set, level, utility knife | Bracket mounting, frame assembly, trimming foam |
| Support | Outdoor AC support bracket or heavy-duty window frame kit | Carry the unit's weight safely outside the window |
| Sealing | Accordion side panels, rigid foam board, weather stripping, foil tape | Close gaps above and beside the unit |
| Safety | Work gloves, safety glasses, assistant for lifting | Protect hands and eyes; two people should lift the unit |
| Optional | Window AC sealing kit, foam insulation strips, caulk | Extra draft protection in windy or rainy climates |
If you are unsure whether your unit is heavy enough to need a bracket, a good rule is simple: any unit above roughly 50 pounds should have external support. Entry-level units are lighter, but mid-range and premium models with larger compressors are heavier and benefit most from a bracket.
Step-by-Step Installation
Step 1 — Measure the Window Opening and the Unit
Open the sliding window fully and measure the clear opening width and height. Then measure the AC unit's chassis width and height, including the side panels in their compressed position. Compare both sets of numbers against the manufacturer's minimum and maximum window opening specifications.
- Typical minimum opening width: about 23 to 26 inches
- Typical minimum opening height: about 14 to 16 inches
- Confirm the unit supports horizontal or side-sliding installation
If the opening is too narrow, do not force the unit. A unit that does not fit flush will leak air and vibrate. For context on how different unit sizes behave in real rooms, see our guide on how hard it is to install a window AC unit.
Step 2 — Choose the Right Unit Orientation
Check the manual for whether the unit can be rotated for a horizontal window. Many models allow this by removing the chassis from the cabinet and reinstalling it rotated 90 degrees, but not all do. If your unit cannot be rotated, you will need a support frame that holds it in its standard orientation within the sliding opening, with the exhaust facing out.
Never block the condenser exhaust or the indoor air intake. Restricted airflow reduces cooling performance and can shorten the life of the compressor. Our explainer on how inverter AC works is useful if you are deciding between compressor types before installation.
Step 3 — Install the Outdoor Support Bracket
This is the most important safety step. The bracket attaches to the exterior wall or window frame and supports the unit from below, transferring weight away from the sliding sash.
- Mark bracket mounting points with a level to keep the unit slightly tilted toward the outside for drainage.
- Drill pilot holes and fasten the bracket with the included lag screws or masonry anchors, depending on your wall type.
- Confirm the bracket is rated for the unit's weight and fits the window depth.
If you are also considering a wall-mounted alternative, our guide on how to install a wall mounted AC unit covers that route in detail.
Step 4 — Set the Unit in Place
With a helper, lift the unit onto the bracket and slide it into the window opening. The front should face into the room and the rear should overhang the exterior by the amount specified in the manual — usually a few inches, enough for the exhaust to clear the wall.
- Keep the unit level side to side; a slight backward tilt helps condensate drain outside.
- Close the sliding sash until it touches the unit frame, but do not force it against the glass.
- Check that the unit does not wobble when gently pushed.
Step 5 — Seal the Gaps
In a sliding window, the gap above the unit and the gap beside the sash are the main leak points. Seal them in layers:
- Side panels: Extend the accordion panels to the window frame and lock them with the provided screws.
- Upper gap: Cut rigid foam board to fit the space above the unit, wrap the edges in foil tape, and press it into place. This is removable at the end of the season.
- Edges and seams: Apply weather stripping or foam insulation strips along the sash contact points.
- Optional: Use a window AC sealing kit for a cleaner finish and better draft protection.
Good sealing keeps hot outdoor air out and stops insects and rain from entering. It also reduces the load on the unit, which matters for long-term efficiency. For related reading on indoor comfort, see our guide on how to tell the humidity in your house.
Step 6 — Secure the Window and Test
Lock the sliding sash in place using a window lock, a wooden dowel cut to fit the track, or the security bracket included with many units. This prevents the sash from being pushed open from outside.
Plug the unit into a dedicated circuit, turn it on, and check:
- Cold air flows into the room within a few minutes
- No rattling or excessive vibration
- Condensate drips outside, not into the room
- No air leaks around the foam board or side panels
Our guide on how to test a new AC walks through a fuller commissioning checklist. If the unit runs but does not cool, see house AC turns on but no cold air for troubleshooting steps.
Common Mistakes to Avoid
Most sliding-window installation problems trace back to a handful of avoidable errors. Here are the ones that show up most often:
- Forgetting the bracket: The single most common and most dangerous mistake. Always support the unit externally.
- Installing a vertical-only unit horizontally: Check the manual before rotating the chassis. Some compressors are not designed to run on their side.
- Sealing only one side: Gaps above and beside the unit both leak. Seal both.
- Skipping the backward tilt: Without a slight tilt, condensate can pool and drip indoors.
- Over-tightening the sash: Forcing the sliding pane against the unit frame can crack glass or bend the track.
If you are weighing a sliding-window install against other options, our guides on installing a window AC in a sliding glass door and installing a window AC in a standard window cover the alternatives.
Window Type Comparison for AC Installation
| Window Type | Opening Direction | Support Challenge | Best For |
|---|---|---|---|
| Double-hung | Vertical (up/down) | Low — sill carries weight | Standard window AC units, entry-level to mid-range |
| Sliding | Horizontal (side to side) | High — needs external bracket | Rotatable units or frame kits, mid-range and premium |
| Casement | Crank outward | High — special brackets required | Casement-specific units only |
| Sliding glass door | Horizontal, floor to ceiling | Moderate — door frame kit | Portable AC or door kit with window unit |
Maintenance After Installation
Once the unit is in place, a light maintenance routine keeps it efficient and extends its service life. Check the filter every two to four weeks during heavy use, clean the exterior coils at the start of the season, and inspect the seal around the foam board after storms.
At the end of the cooling season, remove the unit, clean it, and store it indoors if possible. Leaving it in place through winter is fine in mild climates, but a cover protects the coils. If you plan to remove and reinstall each year, keep the bracket mounted and label the foam board pieces so they go back in the same position. For a broader maintenance schedule, see our guide on how long an AC lasts.
Frequently Asked Questions
Can a standard window air conditioner fit in a sliding window?
A standard window air conditioner can fit in a sliding window, but only if the unit supports horizontal or side-sliding installation. Most units are built for double-hung windows, so check the manual first. If your unit cannot be rotated, use a support frame that holds it securely in the side-opening window with the exhaust facing out.
How do I seal the gap above a window AC in a sliding window?
Seal the gap with rigid foam board cut to size and wrapped in foil tape, or use an accordion side panel plus weather stripping. A window AC sealing kit is a clean option for windy or rainy climates. The goal is a removable, draft-proof seal that still lets you remove the unit at the end of the season.
Do I need a support bracket for a window AC in a sliding window?
Yes. Sliding window tracks are not designed to carry the weight of an air conditioner. An outdoor bracket bolted to the wall or a heavy-duty frame secured to the sill distributes the load safely and prevents the unit from tilting or falling.
How much space does a window AC need on each side in a sliding window?
Most units require a minimum opening width of about 23 to 26 inches and a minimum height of 14 to 16 inches. In a sliding window, the width is the critical dimension. Always confirm the exact minimum and maximum opening in the manufacturer's specifications before installation.
Can I install a window AC in a sliding window without drilling?
Some frame kits use tension or clamping rather than drilling, but they are only suitable for lighter units and still require a secure external support. For heavier mid-range and premium units, drilling into the wall for a bracket is the safer and more durable choice.