Outdoor AC Unit Replacement
Your complete guide to understanding when and how to replace an outdoor condenser unit. Learn the warning signs, replacement process, sizing considerations, and top-tier equipment options to make an informed decision for your home.
START LEARNINGWhy the Outdoor Unit Matters: The outdoor AC unit — also called the condenser — is the heart of your cooling system. It releases heat absorbed from your home and houses the compressor that circulates refrigerant. When this unit fails, your entire cooling system stops working. Understanding outdoor AC unit replacement helps you plan ahead, avoid emergency breakdowns, and choose a system that delivers reliable comfort and energy efficiency for years.
Signs Your Outdoor AC Unit Needs Replacement
Outdoor units are built to last, but they don't last forever. Recognizing the warning signs early gives you time to plan a replacement on your terms rather than during a heatwave emergency. Here are the most common indicators that your outdoor condenser is nearing the end of its service life.
Age Beyond 12–15 Years
Most outdoor condensers have a service life of 12 to 15 years. If your unit is older and showing wear, replacement is often a smarter long-term investment than repeated repairs. Modern units are significantly more efficient, meaning the upgrade pays you back through lower energy use over time.
Frequent Repairs
If you've called a technician three or more times in the past two seasons for the same outdoor unit, the pattern suggests systemic wear. Repeated repairs on an aging condenser can exceed the value of a new, more reliable system. This is especially true when the compressor — the most critical component — starts failing.
Rising Energy Consumption
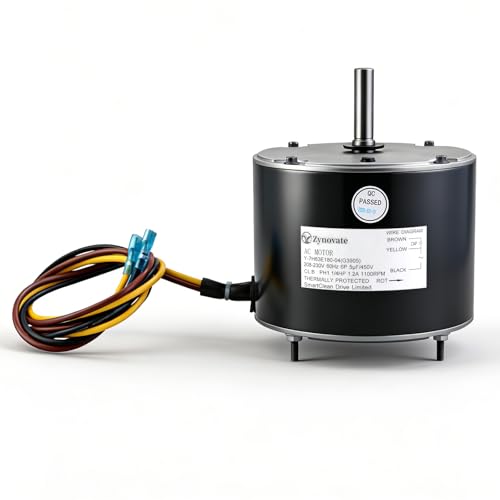
A declining outdoor unit loses efficiency as components wear. If your energy bills climb without changes in usage or weather, the condenser may be working harder than it should. Degraded coils, a weakening compressor, or failing fan motors all force the system to consume more power for the same cooling output.
Unusual Noises
Grinding, screeching, or loud rattling from the outdoor unit often signals failing bearings, a damaged fan, or compressor strain. While some noises come from loose parts, persistent mechanical sounds on an older unit usually point toward major component wear that may not be worth repairing.
Refrigerant Leaks
If your system needs refrigerant refills frequently, there's a leak somewhere in the sealed system. On older outdoor units, leaks often develop in the coils or connections. When leaks recur, replacing the unit may be more reliable than chasing the problem. Learn more about refrigerant leak repair before deciding.
Visible Corrosion or Damage
Rust on the cabinet, corroded coils, or physical damage from storms or debris can compromise the unit's performance and safety. Heavy corrosion on the condenser coils reduces heat transfer efficiency and can lead to system failure. If damage is extensive, replacement is the practical path.
Inadequate Cooling
When the outdoor unit can no longer keep your home comfortable on hot days, and the problem isn't a simple fix like a dirty filter or low refrigerant, the compressor or coils may be failing. This is a strong signal that replacement should be on your radar. See our guide on AC not blowing cold air for troubleshooting steps first.
Outdated Refrigerant Type
If your outdoor unit uses R-22 (Freon), replacement is especially important. R-22 has been phased out due to environmental regulations, and replacement refrigerant is no longer produced in the U.S. Modern systems use R-410A or newer refrigerants like R-32 and R-454B, which are more efficient and environmentally responsible.
Repair or Replace? A Decision Framework
One of the most common questions homeowners face is whether to repair an aging outdoor unit or replace it. The decision isn't always obvious, but a few factors can guide you toward the right choice for your situation.
Consider replacement when: The unit is over 12 years old, repairs exceed half the value of a new unit, the compressor is failing, the system uses R-22, or you've had multiple repairs in recent years. Consider repair when: The unit is under 10 years old, the issue is isolated (like a capacitor, contactor, or fan motor), and the system has otherwise been reliable.
For a deeper look at when to call a professional versus when to plan a replacement, see our guide on HVAC replacement and our breakdown of HVAC cost and installation considerations.
Planning Ahead Saves Stress
If your outdoor unit is showing multiple warning signs, start researching now rather than waiting for a breakdown. Understanding the installation process and what a new AC unit involves gives you time to compare options and choose the right system for your home.
The Outdoor AC Unit Replacement Process
Replacing an outdoor condenser is a multi-step process that involves more than simply swapping one box for another. The system must be properly sized, matched to your indoor coil, and installed to manufacturer specifications for warranty coverage and reliable performance. Here's what to expect from start to finish.
- Professional Assessment and Load Calculation — A qualified technician evaluates your home's cooling needs using a Manual J load calculation. This determines the correct system size for your home, considering square footage, insulation, window area, and local climate. Proper sizing is critical: an oversized or undersized unit leads to inefficiency and premature wear. Learn more about how to size an air conditioner.
- System Selection and Matching — The outdoor condenser must be matched with a compatible indoor coil and air handler or furnace. Mismatched components reduce efficiency and can void warranties. Your contractor will help you choose a system with the right capacity and efficiency rating for your home and budget tier.
- Permits and Scheduling — Most jurisdictions require a permit for HVAC replacement. Your contractor typically handles this, but it's worth confirming. See our guide on how to get an AC permit for details.
- Removal of the Old Unit — The technician safely recovers refrigerant from the old system, disconnects electrical and refrigerant lines, and removes the old outdoor unit. Proper refrigerant recovery is required by EPA regulations and protects the environment.
- Installation of the New Unit — The new condenser is placed on a level pad, connected to the refrigerant lines and electrical supply, and the system is evacuated and charged with the correct refrigerant amount. The contractor checks all connections and ensures the unit is level and secure.
- Testing and Commissioning — The system is started and tested for proper operation. The technician checks refrigerant pressures, temperature differential, airflow, and electrical draw. Any issues are addressed before the job is considered complete.
- Walkthrough and Documentation — Your contractor should walk you through the new system, explain filter maintenance, and provide warranty documentation. Register the warranty promptly to ensure full coverage. See our guide on AC warranty registration.
Sizing and Compatibility Considerations
The outdoor unit is part of a matched system. When replacing it, you must consider both the capacity (measured in BTUs) and the compatibility of the outdoor condenser with your indoor equipment. Here are the key points to keep in mind.
| Factor | Why It Matters | What to Check |
|---|---|---|
| Cooling Capacity (BTU) | The system must match your home's cooling load. Oversized units short-cycle, while undersized units run constantly and struggle to cool. | Verify with a Manual J load calculation — don't rely solely on the old unit's size. |
| Refrigerant Type | New systems use R-410A or R-32/R-454B. These refrigerants operate at different pressures than R-22 and require compatible components. | Ensure the outdoor unit, indoor coil, and line set are all rated for the same refrigerant. |
| SEER2 / EER2 Rating | Efficiency ratings determine energy use. Higher ratings mean lower operating costs over the system's life. | Check local minimum efficiency standards and consider a higher-efficiency unit for long-term savings. |
| Electrical Requirements | Different units draw different amperage. The circuit breaker, wiring, and disconnect must be sized correctly. | Confirm the new unit's electrical requirements with your contractor and verify your panel capacity. |
| Line Set Compatibility | The refrigerant lines connect the outdoor unit to the indoor coil. Old line sets may not be compatible with newer refrigerants or may be damaged. | Inspect line sets for condition and compatibility; replacement may be necessary. See line set replacement. |
| Physical Space and Clearance | The outdoor unit needs adequate airflow clearance around it for proper heat rejection. | Ensure the new unit fits the available space with proper clearances as specified by the manufacturer. |
Choosing the Right Outdoor Unit for Your Home
Outdoor AC units come in different tiers of quality and efficiency. Understanding these tiers helps you choose a system that matches your priorities — whether that's essential reliability, balanced performance, or top-tier efficiency with advanced features. Here's how the tiers generally break down.
Essential tier: These units cover the basics reliably. They meet minimum efficiency standards and are a solid choice for homeowners who need dependable cooling without extra features. They're well-specified for the category and good value for their tier.
Balanced tier (mid-range): These units offer better efficiency ratings, quieter operation, and more durable construction than entry-level models. They represent a strong middle ground for most homeowners, with features like two-stage compressors or enhanced coil protection that improve comfort and longevity.
High-end tier: These units deliver premium efficiency (often variable-speed or inverter-driven compressors), quieter operation, and advanced diagnostics. They're a long-term investment for homeowners who plan to stay in their home and want the lowest energy use and best comfort. They're also feature-rich for their class.
Top-tier / professional-grade: These are the flagship models with the highest efficiency ratings, the most advanced compressor technology, and the longest warranties. They're designed for homeowners who want the best available performance and are willing to invest accordingly.
No matter which tier you choose, the key is ensuring the unit is properly sized, correctly matched to your indoor equipment, and installed by a qualified professional. For more guidance on the replacement decision, see our guide on replacing your home air conditioner and replacing an AC condenser.
Frequently Asked Questions
How long does an outdoor AC unit last?
With proper maintenance, most outdoor condensers last 12 to 15 years. Factors like climate, usage patterns, and regular servicing affect longevity. Units in hot climates or those that run constantly may have shorter lifespans. Annual maintenance — including coil cleaning and refrigerant checks — helps maximize service life. See our guide on cleaning condenser coils and HVAC tune-ups.
Can I replace just the outdoor unit?
In some cases, yes — but it's not always advisable. The outdoor unit must be matched with the indoor coil and air handler for proper performance and warranty coverage. If your indoor equipment is old or incompatible with the new refrigerant type, replacing both may be necessary. A qualified contractor can advise you on the best approach for your specific system. Learn more about full HVAC replacement.
How long does replacement take?
A typical outdoor unit replacement takes about 4 to 8 hours for a straightforward swap. If line sets need replacement, electrical work is required, or the indoor coil is also being replaced, the job may take longer. Your contractor will provide a timeline based on your specific installation.
Do I need a permit for outdoor AC replacement?
Most municipalities require a permit for HVAC replacement, including outdoor condenser swaps. The permit ensures the work meets local building codes and is inspected for safety and compliance. Your contractor typically handles the permitting process. See our guide on how to get an AC permit for more information.
What maintenance does a new outdoor unit need?
New outdoor units benefit from annual maintenance: cleaning the condenser coils, checking refrigerant levels, inspecting electrical connections, and ensuring proper airflow. Regularly changing your indoor air filter also reduces strain on the outdoor unit. See our guide on how to clean an AC filter and consider an HVAC maintenance plan for scheduled service.
Can I install an outdoor AC unit myself?
Outdoor AC replacement involves refrigerant handling, electrical connections, and system charging — tasks that require specialized tools, training, and EPA certification. DIY installation is not recommended and can void warranties, violate regulations, and create safety hazards. Professional installation ensures the system is properly matched, charged, and tested. See our installation guide for what the process involves.
Ready to Explore Your Options?
If you've determined that replacement is the right path, the next step is choosing the right unit for your home. Browse our recommended outdoor AC units below to compare features, efficiency tiers, and system types. Each option is selected for reliability and performance within its class.