
How to Install an Air Conditioner in the Window
A complete step-by-step guide to safely and correctly install a window air conditioner, from choosing the right window to sealing gaps and testing performance.
START THE GUIDEWhy proper installation matters: A window air conditioner that is installed incorrectly can leak air, vibrate excessively, drain poorly, or even fall out of the window. This guide walks you through every stage of the process so you can enjoy efficient cooling without safety risks. Whether you are installing a unit for the first time or replacing an old one, the principles below apply to virtually every standard window AC.
Tools and Materials You Will Need
Before you begin, gather everything in one place. Having the right tools on hand reduces installation time and helps you avoid shortcuts that compromise safety or efficiency.
Drill and Drill Bits
Used to pilot holes for screws and to attach the support bracket or side panels securely to the window frame.
Screwdriver Set
Phillips and flathead screwdrivers for tightening mounting screws and adjusting the unit's frame components.
Measuring Tape
Essential for confirming window opening dimensions and verifying that the unit fits with the required clearances.
Spirit Level
Ensures the air conditioner sits level, which is critical for proper condensate drainage and quiet operation.
Utility Knife
Helpful for trimming weather stripping, foam insulation, or side panels to fit the window opening precisely.
Weather Sealing Foam
Closes gaps between the unit and the window frame to prevent cool air from escaping and warm air from entering.
Support Bracket (Optional but Recommended)
An exterior bracket transfers the unit's weight to the wall, reducing strain on the window frame—especially for mid-range and premium units.
Mounting Screws and Side Panels
Most units ship with these, but verify they are present. Side panels close the gap between the unit and the window sash.
Editor's Tip: If you are installing a heavier unit, such as an inverter model or one with a larger cooling capacity, a support bracket is strongly recommended. It distributes weight safely and reduces vibration noise.
Step-by-Step Window AC Installation
Choose the Right Window
Not every window is suitable for an air conditioner. Select a window that meets the following criteria:
- Structural support: The window frame must be strong enough to bear the unit's weight. Double-hung windows with solid wood or vinyl frames are common choices.
- Proximity to an outlet: The unit should be within reach of a dedicated electrical circuit. Avoid using extension cords.
- Shade and airflow: A window that receives less direct sunlight helps the unit run more efficiently.
- Clearance: Ensure no obstructions outside, such as shrubs or fences, block airflow to the condenser.
Windows under porches or awnings are often ideal because they are shielded from rain and direct sun.
Measure the Window and the Unit
Accuracy at this stage prevents frustrating returns and ensures a safe fit.
- Measure the width of the window opening at its narrowest point.
- Measure the height of the opening from the sill to the bottom of the upper sash.
- Check the unit's dimensions in the product manual. Most manufacturers specify minimum and maximum window widths.
- Verify the weight of the unit against the window frame's capacity. For heavier units, plan to install a support bracket.
Write these measurements down and keep them nearby during installation.
Prepare the Window
A clean, smooth surface helps the unit sit properly and seals more effectively.
- Remove the window screen, if present, and set it aside.
- Clean the window sill and frame with a damp cloth to remove dust and debris.
- Check that the window opens and closes smoothly. A sticky window may need lubrication or minor repair before installation.
- Inspect the frame for rot, cracks, or loose pieces. Repair any damage before proceeding.
Install the Support Bracket (Recommended)
A support bracket is optional for lightweight units but highly recommended for mid-range and premium models, as well as for any unit weighing more than about 50 pounds.
- Follow the bracket manufacturer's instructions for positioning. Most brackets attach to the exterior wall below the window.
- Use a drill to create pilot holes, then secure the bracket with the provided screws.
- Verify that the bracket is level and firmly anchored before placing the unit.
If you skip the bracket, ensure the window frame is solid and the unit is properly secured with the included mounting hardware.
⚠️ Safety Warning: Window air conditioners can weigh anywhere from 40 to over 100 pounds. Always lift with a helper, use proper lifting technique, and never lean out of the window while handling the unit. If you are unsure about the window frame's strength, consult a professional.
Place the Unit in the Window
With the bracket in place or the frame prepared, lift the air conditioner into the window opening.
- Open the window sash wide enough to accommodate the unit's height.
- With a helper, lift the unit and slide it into the opening. The front of the unit should face indoors, and the vented back should face outside.
- Center the unit in the window. Most units have a slight outward tilt (about 1/4 inch per foot) to allow condensate to drain outside.
- Check the tilt with a spirit level. Adjust the unit or bracket until the correct slope is achieved.
Secure the Unit and Close the Window
Proper securing prevents movement, vibration, and accidental falls.
- Lower the window sash until it rests firmly on top of the air conditioner. The sash should press against the unit's top seal.
- Install the side panels (accordion-style panels) that came with the unit. These bridge the gap between the unit and the window frame.
- Use screws to fasten the side panels to the window frame and to the unit, following the manufacturer's instructions.
- If your unit includes a window lock or security bracket, install it now to prevent the window from being opened from outside.
Seal the Gaps
Sealing is one of the most overlooked steps, yet it has a major impact on efficiency and comfort.
- Use foam weather stripping to fill gaps between the side panels and the window frame.
- Apply insulating foam around the top and bottom edges of the unit where it meets the window sash and sill.
- Check for daylight visible around the unit. If you can see light, air can escape—seal it.
- For older windows with irregular gaps, consider using a specialized window AC insulation kit.
Test the Unit
Before you settle in for the season, run a complete test.
- Plug the unit directly into a dedicated outlet. Avoid extension cords and power strips.
- Turn the unit on and set it to cooling mode. Listen for unusual noises or vibrations.
- Check that cool air is flowing from the front vents within a few minutes.
- Inspect the exterior for proper condensate drainage. Water should drip from the drain holes, not pool inside the unit or leak into the room.
- Feel around the seals for drafts. If you detect air leaks, add more insulation.
Window Types and Installation Compatibility
Not all windows are equally suited for air conditioner installation. The table below summarizes compatibility by window type.
| Window Type | Compatibility | Best For | Notes |
|---|---|---|---|
| Double-Hung | Excellent | Most homes | Standard choice; the lower sash closes onto the unit securely. |
| Single-Hung | Good | Older homes | Works similarly to double-hung; verify sash strength. |
| Sliding | Moderate | Modern homes | Requires a special bracket or adapter; side panels may need modification. |
| Casement | Poor | Not recommended | Crank-out design does not support standard window units. |
| Awning | Poor | Not recommended | Top-hinged design is incompatible with standard units. |
Maintenance After Installation
Once your window air conditioner is installed, a few simple maintenance habits will keep it running efficiently for years:
- Clean or replace the filter every two to four weeks during peak cooling season. A clogged filter reduces airflow and strains the compressor.
- Inspect the seals at the start of each cooling season and reapply weather stripping if needed.
- Check the tilt annually to ensure condensate still drains properly.
- Remove the unit during the off-season if your window design allows, or cover it with a weatherproof cover to protect it from debris.
Frequently Asked Questions
Can I install a window air conditioner by myself?
Lightweight units under about 50 pounds can often be installed by one person, but a helper is strongly recommended for lifting and positioning. Heavier units, especially inverter models and larger-capacity units, should always be handled by two people. If you are unsure about the window frame's strength or the electrical requirements, consider hiring a professional.
Do I need a support bracket for my window AC?
A support bracket is optional for lightweight units but highly recommended for any unit that is mid-range or heavier. It transfers weight from the window frame to the exterior wall, reducing vibration and improving safety. Many manufacturers now specify that a bracket is required for warranty coverage on heavier models.
How much tilt should a window air conditioner have?
Most manufacturers recommend a slight outward tilt of about 1/4 inch per foot of unit depth. This allows condensate to drain outside rather than pooling inside the unit or leaking into the room. Use a spirit level to verify the tilt after placement.
What if my window is too wide for the side panels?
If the window opening is wider than the unit's maximum specified width, the side panels may not bridge the gap completely. In this case, you can use additional insulation board or a window AC gap filler kit to seal the remaining space. Never leave a gap unsealed, as it compromises efficiency and security.
Can I use an extension cord with a window air conditioner?
No. Window air conditioners draw a significant amount of current, and extension cords can overheat, causing a fire hazard. Always plug the unit directly into a dedicated wall outlet that meets the electrical requirements listed in the manual. If the nearest outlet is not suitable, have a qualified electrician install a dedicated circuit.
How do I prevent my window AC from falling out?
Use a support bracket whenever possible, especially for heavier units. Secure the side panels to the window frame with screws, and install any window lock or security bracket that came with the unit. Never rely solely on the window sash to hold the unit in place.
Recommended Window Air Conditioners for Easy Installation
⚠️ AFFILIATE DISCLOSURE: This website contains affiliate links. As an Amazon Associate, we earn from qualifying purchases. If you make a purchase through these links, we may receive a small commission at no additional cost to you. Read our full affiliate policy.
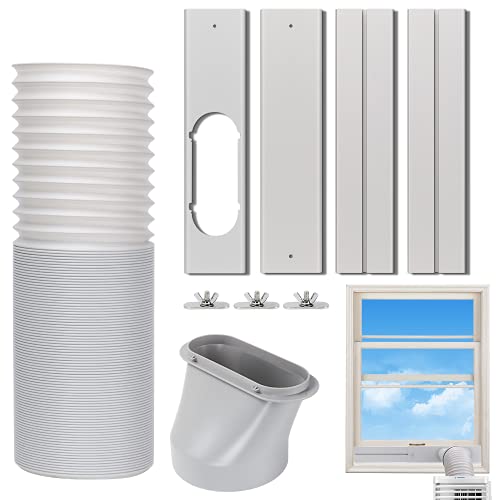
Portable AC Window Vent Kit, Sliding Window AC Seal Kit 5.9" Exhaust Hose | No Coupler, Exhaust Hose Length 59", Plates 17-64", Universal Air Conditioner Window Seal Kit for Horizontal/Vertical Window
Check price on Amazon
HOOMEE 157”(400CM) Universal Window Seal for Mobile Air Conditioner and Tumble Dryer – Window Kit Works with Portable AC, Easy to Install - Air Exchange Guards with Zip and Adhesive Fastener
Check price on Amazon
HOOMEE 118”(300CM) Universal Window Seal for Mobile Air Conditioner and Tumble Dryer – Window Kit Works with Portable AC, Easy to Install - Air Exchange Guards with Zip and Adhesive Fastener
Check price on Amazon
Sliding Window Kit – Sliding Window Air Conditioner Seal Kit | Fit For Soleus Air Hybrid “Saddle” Air Conditioners for horizontal sliding windows (Air Conditioner Not Included)
Check price on Amazon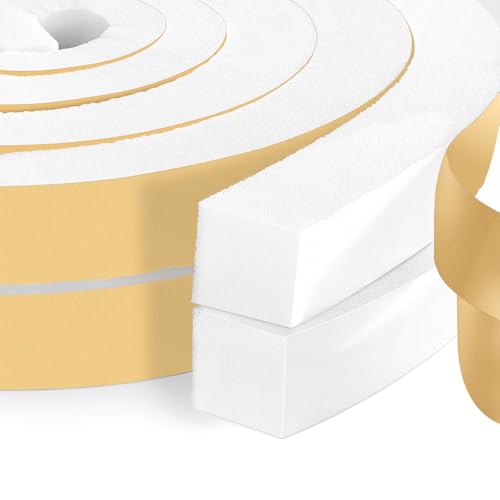
High Density Foam Tape Air Conditioner Window Seal, 1x1 Inch Thick Foam Stripe with Adhesive for Window AC Insulation, Weather Stripping for Doors and Windows Insulation, AC Foam Tape, White
Check price on Amazon
HOOMEE 220”(560CM) Universal Window Seal for Mobile Air Conditioner and Tumble Dryer – Window Kit Works with Portable AC, Easy to Install - Air Exchange Guards with Zip and Adhesive Fastener
Check price on AmazonDisclaimer
Some of the content on this site uses AI assistance. Information is provided for educational purposes only. We are not responsible for any losses resulting from the use of this information. By using this site, you waive any right to bring legal claims against us arising from your use of the information provided. If you do not agree, please do not use this site. Read the full disclaimer.