How to Put In a AC Window Unit: Complete Installation Guide
A window air conditioner can cool a room quickly and efficiently when it is installed correctly. This guide walks you through every step, from measuring your window to sealing the unit so it runs quietly and safely all season.
START THE INSTALLATIONWhy proper installation matters: A window AC unit that is installed incorrectly can leak, vibrate, or even fall. Taking the time to follow each step carefully protects your home, your unit, and your comfort. This guide covers tools, safety, mounting, sealing, and the most common mistakes to avoid.
Before You Begin: Is Your Window Ready?
Window air conditioners are designed for double-hung windows, though many models also work with sliding windows when a special kit is used. Before you buy or install, check three things: the window's width and height, the sill's strength, and whether the unit will be supported from the outside. A unit that fits loosely will rattle, and a sill that cannot hold the weight is a safety hazard.
Most entry-level and mid-range window units come with a basic installation kit that includes foam panels, a sash lock, and screws. Higher-end and premium models often include a support bracket or a more robust window kit. If your unit does not include a bracket and you are installing above the first floor, consider adding one for peace of mind.
Tools and Materials You Will Need
Gather these items before you start so the installation goes smoothly. You likely already own most of them.
Measuring Tape
For checking window and unit dimensions.
Phillips Screwdriver
For assembling brackets and securing the unit.
Spirit Level
To confirm the slight tilt toward the outside.
Drill (optional)
Needed if you are installing a bracket or drilling pilot holes.
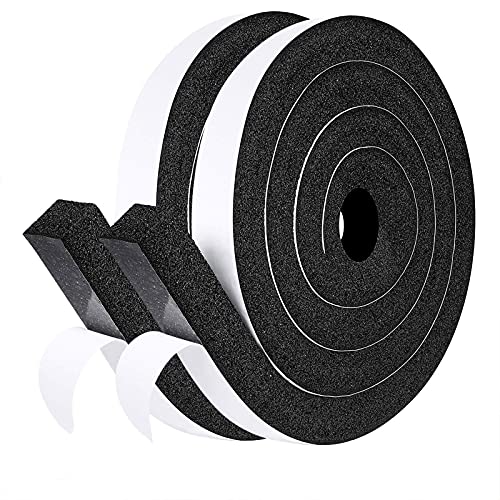
Weatherstripping or Foam Sealant
To close gaps around the unit and sash.
Support Bracket (recommended)
Adds stability for heavier units and upper-floor windows.
Helper
Essential for lifting and positioning mid-range and premium units.
Work Gloves
Protect your hands from sharp metal edges.
Step-by-Step: How to Put In a AC Window Unit
Follow these steps in order. If at any point the unit feels unstable or the window does not close properly, stop and reassess before continuing.
-
Choose the Right Window
Select a window that can support the unit's weight and is close to the room you want to cool. Avoid windows above walkways or areas where condensation dripping would be a problem. Check that the window opens and closes freely and that the sill is not rotted or loose.
-
Measure the Window and Unit
Measure the window opening's width and height. Compare these to the unit's minimum and maximum window width specifications. The unit should fit with the window closed against the top of the cabinet, and the sash should rest securely on the unit's top rail.
-
Prepare the Window and Sill
Clean the sill and remove any obstructions. If you are using a bracket, install it according to the manufacturer's instructions. The bracket should be level and firmly attached to the exterior wall or sill. For upper-floor installations, a bracket is strongly recommended.
-
Assemble the Unit and Install the Side Panels
Attach the included side panels to the unit's cabinet. These panels expand to fill the gap between the unit and the window frame. Do not tighten the screws fully yet; you may need to adjust the panels after the unit is in place.
-
Lift the Unit into the Window
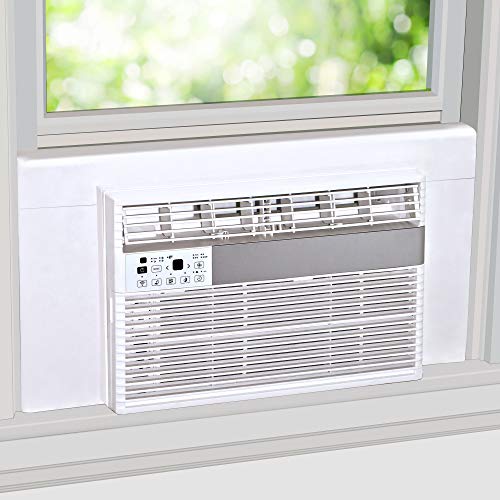
With a helper, lift the unit and set it into the window opening. The unit should rest on the sill and, if used, the bracket. The back of the unit should extend outside the window, and the front should face the room. Ensure the unit is centered in the opening.
Warning: Never lift a heavy window unit alone. Mid-range and premium units often weigh enough to cause injury if dropped. Use proper lifting technique and ask for help. -
Check the Tilt
Place a spirit level on top of the unit. The unit should tilt slightly toward the outside, about 1/4 to 1/2 inch across its depth. This tilt allows condensation to drain outdoors. If the unit tilts inward, water may pool inside or leak into your room.
-
Secure the Unit and Close the Window
Lower the window sash so it rests on the unit's top rail. Use the included sash lock or a screw to prevent the window from being opened from the outside. Extend the side panels to fill the window opening and tighten their screws. Make sure the unit cannot slide side to side.
-
Seal the Gaps
Use the foam insulation panels included with the unit to fill gaps between the side panels and the window frame. Add weatherstripping or foam sealant around the edges of the unit and the sash. Proper sealing keeps cool air in, keeps hot air out, and prevents insects from entering.
-
Test the Unit
Plug the unit into a dedicated outlet that matches its electrical requirements. Turn it on and check for cool air, unusual noises, and vibration. Listen for rattling that might indicate a loose panel or an unstable mount. Adjust the panels or bracket if needed.
-
Final Safety Check
Push gently on the unit from the inside to confirm it is secure. Check that the window sash is locked and that the unit does not move. Verify that the power cord is not pinched and that the outlet is not overloaded. If everything is stable, your installation is complete.
Window AC Installation Considerations by Unit Tier
The complexity of installation varies with the unit's size and tier. Use this table to set expectations before you begin.
| Tier | Typical Weight | Installation Complexity | Best For |
|---|---|---|---|
| Entry-level | Light | Low: often a one-person job with basic tools | Small bedrooms and home offices |
| Mid-range | Moderate | Medium: a helper and a bracket are recommended | Living rooms and larger bedrooms |
| Premium | Heavy | High: two people and a sturdy bracket are essential | Large rooms and open-plan spaces |
| High-end tier | Heavy | High: professional installation may be preferable | Whole-floor cooling and long-term use |
Common Mistakes to Avoid
Most window AC problems trace back to a few avoidable errors. Watch for these during installation.
- No outward tilt: A level or inward-tilted unit traps water and can leak into the room.
- Unsupported overhang: The back of the unit must be supported, especially on upper floors.
- Loose side panels: Gaps let hot air in and cause the compressor to work harder.
- Wrong outlet: Window units draw significant current; use a dedicated circuit as specified in the manual.
- Blocked airflow: Keep curtains and furniture away from the front and rear grilles.
Caring for Your Window Unit After Installation
Once the unit is in place, a little maintenance goes a long way. Clean or replace the air filter every few weeks during heavy use. Check the exterior bracket and mounting hardware at the start of each season. Remove the unit before winter if your model is not designed for year-round outdoor exposure, or cover it with a weatherproof cover. These habits keep the unit efficient and extend its service life.
Related Guides on AC Units Guide
Frequently Asked Questions
Do I need a bracket to install a window AC unit?
A bracket is strongly recommended for heavier units and for windows where the sill cannot safely support the unit's weight. Many mid-range and premium window units include mounting hardware, but a dedicated exterior bracket adds stability and safety, especially on upper floors.
How much should a window AC unit tilt?
The unit should tilt slightly toward the outside, roughly 1/4 to 1/2 inch across the depth of the unit. This allows condensation to drain outdoors instead of pooling inside the unit or leaking into your room.
Can I install a window AC unit by myself?
Yes, many homeowners install window units themselves, especially lighter models. However, units above a certain weight require two people or professional help. Always check the unit's weight and your window's structural condition before starting.
How do I seal gaps around a window AC unit?
Use the foam insulation panels included with most units, then fill remaining gaps with weatherstripping or foam sealant. Proper sealing prevents cool air from escaping and keeps insects and outside air from entering.
What tools do I need to put in a window AC unit?
You typically need a screwdriver, measuring tape, level, drill (for brackets), weatherstripping or foam sealant, and a helper for heavier units. Some installations also require a window bracket kit and support blocks.
Ready to Choose the Right Window Unit?
Now that you know how to put in a AC window unit, explore our recommended models and find the best fit for your room size and cooling needs.
VIEW RECOMMENDED WINDOW AC UNITS