
Installation of Mini Split Heat Pump: Complete Step-by-Step Guide
Everything you need to know before installing a ductless mini split heat pump — from placement and electrical planning to line set routing, vacuuming, and commissioning. A reliable installation protects your investment and maximizes efficiency for years.
Jump to Installation StepsWhy this guide matters: A mini split heat pump is only as good as its installation. Improper placement, undersized electrical circuits, poor line set routing, or incomplete vacuuming can reduce efficiency, shorten equipment life, and void manufacturer warranties. This guide walks you through the professional installation process so you can plan confidently, verify contractor work, or decide whether a DIY path is realistic for your skill level.
What You'll Learn
- What a Mini Split Heat Pump Installation Involves
- Pre-Installation Planning
- Indoor and Outdoor Unit Placement
- Electrical Requirements and Safety
- Tools and Materials Checklist
- Step-by-Step Installation Process
- Testing and Commissioning
- Common Installation Mistakes to Avoid
- DIY vs Professional Installation
- Post-Installation Maintenance
- Frequently Asked Questions
What a Mini Split Heat Pump Installation Involves
A ductless mini split heat pump consists of two primary components: an indoor air-handling unit (often wall-mounted, but also available as ceiling cassette or floor console) and an outdoor condenser unit. Unlike traditional central systems, mini splits do not rely on ductwork — refrigerant lines and a condensate drain connect the two units through a small wall penetration, typically three inches in diameter.
The installation process covers six major phases: site survey and load calculation, placement of both units, wall penetration and mounting, line set and drain routing, electrical connection, and system evacuation and commissioning. Each phase builds on the previous one, so skipping or rushing any step compromises the entire system. If you are still comparing system types, our split systems overview helps clarify how mini splits differ from central and window units.
Because a heat pump both heats and cools, the installation must also account for defrost drainage, cold-climate performance, and year-round condensate management. For homes in colder regions, pairing a standard mini split with cold-climate accessories is worth discussing with your installer — our guide on hyper heat mini split systems explains when that upgrade makes sense.
Pre-Installation Planning
Careful planning before a single hole is drilled prevents the most common and most costly installation errors. Start with a proper room-by-room load calculation rather than relying on square footage rules of thumb. Our HVAC sizing guide explains why oversizing a heat pump causes short cycling, poor humidity control, and premature wear.
Confirm the following before ordering equipment:
- Room load: A manual load calculation determines the correct capacity in BTUs for each indoor head.
- Number of zones: Multi-zone systems use one outdoor unit with multiple indoor heads, which changes line set routing and electrical planning.
- Electrical service capacity: Verify your panel has available breaker space and sufficient amperage.
- Permits: Most jurisdictions require a mechanical and electrical permit for a new heat pump installation.
- Warranty terms: Many manufacturers require installation by a licensed technician to validate the warranty.
If your home has limited space for conventional ductwork, the small duct high velocity approach is an alternative worth comparing — but for single-room comfort, mini splits remain the most efficient option. Homeowners who want a fully integrated system should review the broader HVAC system buying guide before committing.
Indoor and Outdoor Unit Placement
Placement determines comfort, efficiency, noise, and serviceability. Treat these guidelines as non-negotiable minimums.
Indoor Unit Placement
- Mount 6 to 8 feet above the floor, with at least 6 inches of clearance from the ceiling.
- Keep 12 to 18 inches of clearance on the sides and bottom for airflow and filter access.
- Aim the discharge louver across the room's long axis, not directly at seating or sleeping areas.
- Avoid locations above heat sources, near doors that swing open frequently, or in direct sunlight.
- Choose a wall with structural backing — exterior walls are ideal for short line set runs.
Outdoor Unit Placement
- Mount on a sturdy pad or wall bracket at least 12 inches above grade to prevent snow and debris blockage.
- Maintain 12 inches of clearance behind the unit, 24 inches in front, and 12 inches on the sides.
- Avoid enclosed spaces that recirculate hot discharge air — this destroys efficiency.
- Position away from bedroom windows to reduce noise intrusion, and orient the fan away from seating areas.
- Keep the unit above the typical snow line in cold climates for reliable heating operation.
⚠️ Placement Warning
Never install an outdoor unit in a recessed alcove, under a deck with limited airflow, or where it can discharge air directly into a wall. Recirculated hot air causes high-pressure faults and dramatically reduces system lifespan.
Careful placement also supports quieter operation. If noise is a top priority, our quiet air conditioner guide covers the specific mounting and vibration-isolation techniques that make the biggest difference.
Electrical Requirements and Safety
Mini split heat pumps require a dedicated circuit sized to the manufacturer's specifications — typically a 15-amp to 30-amp breaker depending on capacity and whether the system is 115V or 230V. The circuit must include a properly grounded conductor and, in most cases, a disconnect within sight of the outdoor unit.
| System Category | Typical Voltage | Typical Breaker | Best For |
|---|---|---|---|
| Entry-level single-zone (small rooms) | 115V | 15–20A dedicated circuit | Bedrooms, home offices, small studios |
| Mid-range single-zone | 230V | 20–25A dedicated circuit | Living rooms, large bedrooms |
| Multi-zone systems | 230V | 25–30A dedicated circuit | Whole-home or multi-room zoning |
| Cold-climate / high-capacity | 230V | 30A dedicated circuit | Cold climates, large open spaces |
Electrical work must comply with local codes and the National Electrical Code (NEC). If your panel is full or you are unsure about available capacity, consult our electrical panel check guide before scheduling installation. Hiring a licensed electrician for the dedicated circuit is strongly recommended — an undersized or improperly grounded circuit is a fire and shock hazard. For broader guidance on connecting tradespeople, see our overview of HVAC service providers.
Wiring Best Practices
- Use the wire gauge specified in the installation manual — do not substitute a smaller gauge.
- Run line voltage and low-voltage communication cable in separate conduits to prevent signal interference.
- Seal every conduit penetration with appropriate weatherproof sealant.
- Install a surge protector at the disconnect to protect the inverter board — an often-overlooked safeguard for the expensive control board.
- Label the breaker clearly at the panel for future service.
Tools and Materials Checklist
Having the right tools on hand keeps the installation safe and efficient. Professional-grade tools also make a measurable difference to the final result — especially the vacuum pump and manifold gauge set.
- Vacuum pump (rated for the system volume) and micron gauge
- Manifold gauge set and refrigerant charging hoses
- Torque wrench with crowfoot adapters for flare fittings
- Flaring tool (if line set is field-fabricated)
- Nitrogen regulator (for pressure testing and purging)
- Core removal tools and Schrader valve tools
- Drill with hole saw (3-inch for standard wall penetration)
- Stud finder, level, and layout square
- Line set cover kit and UV-resistant cable ties
- Weatherproof sealant and expanding foam
- Condensate drain tubing with correct slope and trap
- Vibration isolation pads or brackets
- Hex keys, adjustable wrenches, and pipe cutter
- Digital thermometer and clamp meter for commissioning
If you are comparing whether to hire specialists or tackle the work yourself, our overview of HVAC specialists clarifies which tasks genuinely require licensed trade work.
Step-by-Step Installation Process
The sequence below reflects best practice for a typical single-zone wall-mounted mini split heat pump. Multi-zone systems follow the same logic but with additional indoor heads and a branch box or multi-port outdoor unit.
- Confirm the load calculation and equipment match. Verify the indoor and outdoor model numbers pair correctly and that the selected capacity matches the room load.
- Mark the indoor mounting plate. Use a stud finder and level to locate studs, then mark the plate position with the recommended clearances from the ceiling and adjacent walls.
- Drill the wall penetration. Cut a 3-inch hole with a slight downward slope toward the outside so condensate drains outward. Seal the sleeve with weatherproof sealant after routing.
- Mount the indoor unit plate. Anchor the plate into studs with the supplied fasteners. Confirm it is level — an unlevel unit causes condensate to drip from the wrong side.
- Position the outdoor unit. Set the pad or bracket, place vibration pads, and level the unit. Leave the service valves accessible.
- Route the line set and drain. Run refrigerant lines and communication cable through the wall sleeve, protecting them with a line set cover. Slope the condensate drain at a minimum of 1/4 inch per foot with no traps or uphill sections.
- Form the flare connections. Cut tubing square, deburr, and flare with a calibrated tool. Apply a drop of refrigerant oil to the flare seat — never to the threads — and torque to the manufacturer's specification.
- Pressure test with dry nitrogen. Isolate the service valves and pressurize to the level specified in the manual (typically 500 psi). Hold for at least 30 minutes and watch for any pressure decay.
- Evacuate the system. Connect the vacuum pump and micron gauge, and evacuate to 500 microns or below. Close the valve and confirm the vacuum holds for 10 minutes — a rising micron reading indicates a leak.
- Release refrigerant and leak check. Open the service valves, then leak-check every flare and fitting with an electronic detector or soap solution.
- Connect electrical. Terminate line voltage and communication wiring per the manual and local code, install the disconnect, and label the breaker.
- Hang the indoor unit and finish the trim. Secure the indoor unit to the plate, connect the drain, and install the line set cover and wall trim.
💡 Pro Tip: The Vacuum Matters Most
Moisture and non-condensable gases left in the refrigerant circuit are the leading cause of premature compressor failure. A proper evacuation to 500 microns with a confirmed hold is more important than almost any other single step. Use a micron gauge at the service port — manifold gauge needles are not precise enough to confirm a deep vacuum.
Installation quality directly determines long-term reliability. Homeowners who prefer a hands-off approach should review how to HVAC system installation is typically scoped and priced by tier, and can compare qualified HVAC service companies in their area before booking.
Testing and Commissioning
Commissioning confirms that the installed system performs as designed. A thorough technician will complete the following checks before declaring the job complete:
- Start-up current draw: Clamp-meter reading within the nameplate range.
- Refrigerant pressures: Suction and discharge pressures within the manufacturer's expected range for the outdoor temperature.
- Temperature split: A 15 to 20°F difference between return and supply air in cooling mode.
- Heating mode check: Verify heat pump heating operation and defrost cycle behavior.
- Condensate drainage: Confirm the drain flows freely and does not back up.
- Noise and vibration: Listen for abnormal sound at both units and check that panels are secure.
- Smart thermostat or remote pairing: Confirm app connectivity and scheduling work correctly.
- Filter and access panel: Confirm the indoor filter is installed and easily accessible for routine cleaning.
If the system includes a smart thermostat for zone control, our smart thermostat guide explains compatible models and configuration tips. Commissioning results should be documented in writing — request a copy from your installer for warranty records.
Common Installation Mistakes to Avoid
Even experienced installers occasionally cut corners. Knowing the common failure points helps you verify the work and avoid expensive callbacks.
- Skipping the nitrogen pressure test and relying only on a vacuum hold — slow leaks may not show up for months.
- Over-torquing flares — this cracks the flare seat and guarantees a refrigerant leak.
- Insufficient evacuation — leaving moisture in the circuit attacks the compressor oil and causes acid formation.
- Condensate drain running uphill — water backs up into the indoor unit and drips from the housing.
- Oversized breaker with undersized wire — a serious fire hazard, and a code violation.
- Outdoor unit in a recirculation zone — the unit overheats and trips on high pressure.
- Unsealed wall penetration — invites pests, drafts, and moisture intrusion.
- No surge protection — one power event can destroy an inverter control board.
If you discover these issues after installation, our guide on HVAC system inspection explains how a professional assessment can catch problems before they escalate, and HVAC system repair covers the most likely corrective actions.
DIY vs Professional Installation
Mini split installation is sometimes marketed as a DIY-friendly project, and for a handy homeowner with HVAC experience, a single-zone install with pre-charged line sets is possible. However, several realities should inform the decision:
| Tier | Who It Suits | Key Trade-offs |
|---|---|---|
| Entry-level / starter tier (single-zone, pre-charged) | Confident DIYers with basic electrical and mechanical skills | Limited warranty support; requires owning vacuum and torque tools |
| Mid-range (single-zone, standard split) | Homeowners comfortable hiring a licensed electrician separately | Refrigerant handling requires EPA Section 608 certification |
| High-end / multi-zone | Homes with multiple rooms and complex line routing | Strongly recommend professional installation for warranty and performance |
| Cold-climate / hyper heat tier | Regions with sub-zero winters | Requires manufacturer-specific commissioning and controls expertise |
Refrigerant handling is regulated — in the United States, EPA Section 608 certification is required to purchase and handle refrigerant. Many manufacturers also require licensed installation to honor their warranty. For most homeowners, professional installation is the sensible choice; for a full breakdown of what the work entails, see mini split installation scope and tiers.
Post-Installation Maintenance
A correctly installed mini split heat pump requires modest ongoing care to stay efficient. Build the following routine into your household calendar:
- Monthly: Rinse or vacuum the indoor washable filter.
- Quarterly: Wipe the indoor unit exterior and check the condensate drain for algae or debris.
- Seasonally: Clear leaves and debris from around the outdoor unit and confirm clearances are maintained.
- Annually: Schedule professional maintenance to clean coils, check refrigerant pressures, and inspect electrical connections.
For a complete routine, see our HVAC unit maintenance guide. If your system ever stops cooling or makes unusual noises, the steps in troubleshooting an AC that runs but does not cool help you decide whether to call a technician. Property managers with commercial installs should also review HVAC for commercial buildings for additional compliance considerations.
Frequently Asked Questions
How long does a mini split heat pump installation take?
A single-zone installation typically takes a professional crew 4 to 8 hours. Multi-zone systems with additional indoor heads can take 1 to 2 days depending on line set routing complexity and electrical work.
Do I need a permit to install a mini split heat pump?
Most jurisdictions require both a mechanical permit and an electrical permit. Permit requirements vary by location, so confirm with your local building department before scheduling work — unpermitted installations can complicate resale and insurance claims.
Can I install a mini split heat pump myself?
It is technically possible for a single-zone pre-charged system if you have HVAC experience and own the right tools. However, refrigerant handling requires EPA certification, and most manufacturers require licensed installation to honor the warranty. For multi-zone or cold-climate systems, professional installation is strongly recommended.
What size hole is needed for the line set?
A standard wall penetration for a mini split line set is 3 inches in diameter. The hole should slope slightly downward toward the exterior to assist condensate drainage, and must be sealed with weatherproof sealant after routing.
Why is vacuuming the system so important?
Evacuation removes moisture and non-condensable gases from the refrigerant circuit. Residual moisture reacts with refrigerant and compressor oil to form acids that cause premature compressor failure. A proper evacuation to 500 microns or below, confirmed with a micron gauge hold test, is the single most important quality check.
Can a mini split heat pump heat my home in winter?
Yes — standard mini split heat pumps provide efficient heating down to around 5°F. For colder climates, cold-climate models maintain capacity well below zero. Proper placement above the snow line and correct defrost drainage are critical installation considerations for winter performance.
Does the outdoor unit need to be level?
Yes. An unlevel outdoor unit stresses the compressor and can cause vibration and oil return problems. Set it on a sturdy pad or bracket with vibration isolation pads and confirm level in both directions.
What maintenance is required after installation?
Clean or rinse the indoor filter monthly, check the condensate drain quarterly, clear debris around the outdoor unit seasonally, and schedule an annual professional maintenance visit. These steps preserve efficiency and protect the warranty.
Top Mini Split Heat Pump Systems for Professional Installation
⚠️ AFFILIATE DISCLOSURE: This website contains affiliate links. As an Amazon Associate, we earn from qualifying purchases. If you make a purchase through these links, we may receive a small commission at no additional cost to you. Read our full affiliate policy.

Mini Split Training: The Field Manual for Ductless Heat Pumps: Components, Troubleshooting, Testing, Maintenance, Sizing & Installation
Check price on Amazon
ROVSUN 9000 BTU Wifi Enabled Mini Split Air Conditioner & Heater with Inverter, 20 SEER2 Energy Saving 115V Ductless Split AC Unit with Pre-Charged Condenser, Heat Pump & Installation Kit
Check price on Amazon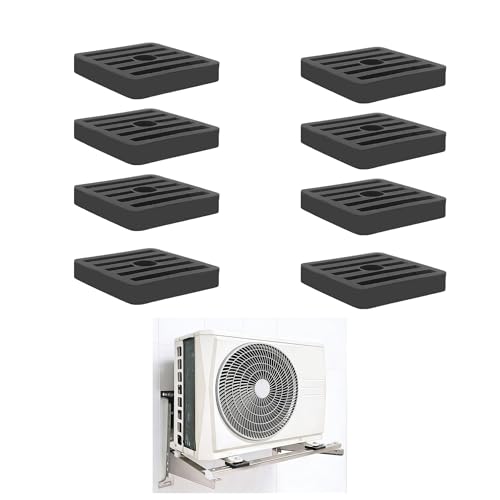
8Pcs Mini Split Anti Vibration Rubber Pads - Small Split Wall Mounting Bracket Isolation Mat for Air Conditioner Condenser Heat Pump System Outdoor Condenser Unit A/C HVAC, 1.85" x 1.85" x 0.31"
Check price on Amazon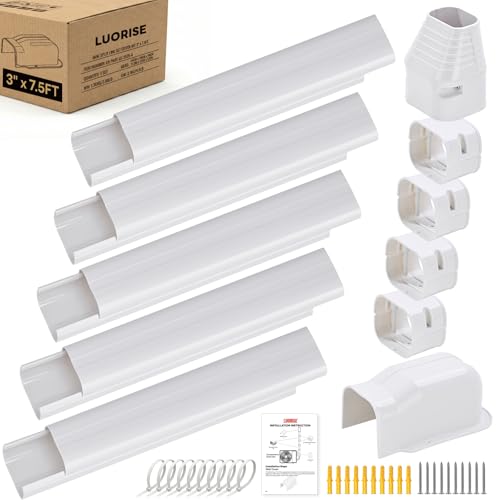
LUORISE 3" 7.5Ft Mini Split Line Set Cover Kit, PP AC Tubing Cover | Weather-resistant PP cover hides and protects ductless mini split AC and heat pump pipes; paintable white finish
Check price on Amazon
4 Pack Floor Mounting Base Kit for Mini Split AC Condenser Heat Pump | Mini Split Rubber Feet, Heavy-Duty Rubber Anti-Vibration Isolator Mount Bracket for Air Conditioner Support Up to 1100 LB
Check price on Amazon
18000 BTU Mini Split AC/Heating System, 19 SEER2 230V, Heat Pump | Ductless Inverter AC Unit, Energy‑Efficient Dual Cooling & Heating for rooms up to 1250 Sq. Ft., Installation Kit Included
Check price on Amazon