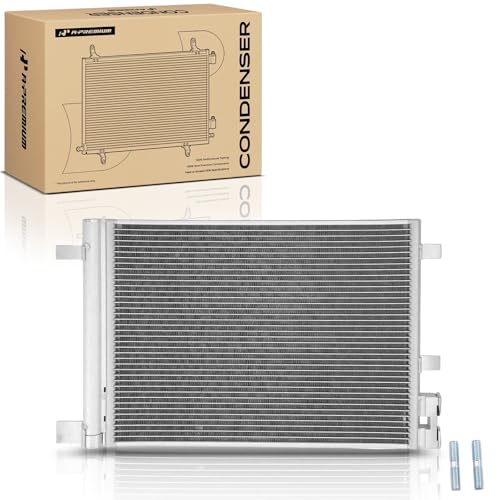
What a Car AC Condenser Does
The AC condenser is a critical component of your vehicle's air conditioning system. Its primary job is to release heat absorbed from the cabin into the outside air. It works alongside the compressor, evaporator, expansion valve, and receiver-drier to complete the refrigeration cycle that keeps your car cool on hot days.
Located at the front of the vehicle — typically in front of the radiator — the condenser is a network of tubes and fins that allows refrigerant to dissipate heat as it passes through. When air flows across the fins (helped by the vehicle's movement or the radiator fan), the refrigerant condenses from a high-pressure gas into a high-pressure liquid, ready to continue the cycle.
Because of its forward position, the condenser is exposed to road debris, stones, insects, and corrosive elements. This exposure makes it one of the most vulnerable components in the AC system. A damaged or clogged condenser cannot shed heat efficiently, which leads to poor cooling performance and can eventually damage the compressor.
How it fits in the system: The compressor pressurizes refrigerant gas → the condenser cools and condenses it into liquid → the expansion valve drops pressure → the evaporator absorbs cabin heat → the cycle repeats. If the condenser fails, the entire loop suffers.
If you notice your AC system struggling, understanding the full reasons for car AC not blowing cold air can help you pinpoint whether the condenser is the culprit or if another component needs attention.
Signs Your Condenser Needs Replacement
Catching a failing condenser early can save you from a much larger repair bill down the road. Here are the most common indicators that your condenser may need replacement:
- Weak or no cooling: The AC blows warm or only slightly cool air even when the system is fully charged. This is often the first sign of reduced condenser efficiency.
- Visible physical damage: Bent, crushed, or missing fins; holes from road debris; or a visibly leaking condenser core.
- Refrigerant leaks: Oily residue or UV dye traces around the condenser fittings and core indicate a leak. A system that needs frequent recharging often has a condenser leak.
- Compressor cycling rapidly: If the compressor engages and disengages in short cycles, it may be reacting to abnormal pressures caused by a restricted condenser.
- Corrosion and blockage: Heavy oxidation, road salt damage, or debris packed between the fins reduces airflow and heat transfer.
- Overheating or high-side pressure issues: A blocked condenser can cause the high-side pressure to spike, which the system may interpret as a fault condition.
If you're experiencing cooling issues but aren't sure of the cause, start with a broader diagnosis of why your car AC isn't blowing cold air. For a quick first-aid approach, you might also review a quick fix for car AC not blowing cold air before committing to a full replacement.
Warning: Never open the AC system yourself without proper recovery equipment. Refrigerant is under high pressure and can cause severe frostbite or eye injury. Always have the system professionally recovered before disassembly.
Types of Car AC Condensers
Not all car AC condensers are built the same. Understanding the type your vehicle uses helps you choose the right replacement and set realistic expectations for performance and durability.
Tube-and-Fin Condensers
This is the most common design in older and many current vehicles. Refrigerant flows through tubes, and fins attached to the tubes increase surface area for heat transfer. They're straightforward and generally serviceable, but the fins are vulnerable to road debris and corrosion.
Parallel-Flow Condensers
Modern vehicles increasingly use parallel-flow (or micro-channel) condensers. These feature multiple small channels running in parallel, which improves heat exchange efficiency and allows a more compact design. They're lighter and more efficient than traditional tube-and-fin designs, but they can be more sensitive to internal blockages and are often less repairable if damaged.
Serpentine Condensers
A variation where the refrigerant snakes through a continuous tube with fins. These are durable and common in older vehicles. They offer good resistance to vibration but may be less efficient than parallel-flow designs.
Choosing Based on Your Vehicle
The right condenser type is determined by your vehicle's make, model, and year. Always consult your owner's manual or a trusted parts supplier to confirm the correct fitment. When comparing tiers, entry-level condensers are typically conventional tube-and-fin units, while mid-range and premium options often feature parallel-flow designs with enhanced corrosion protection and more precise manufacturing tolerances.
If you're considering a broader AC system overhaul, it's worth understanding how replacing an air conditioner works in other contexts — the principles of system matching and component compatibility apply to vehicles too.
Tools and Materials You Need
Having the right tools on hand makes the job safer and faster. Here's what you'll need for a typical car AC condenser replacement:
Essential Tools
Socket and Wrench Set
Metric and SAE sizes to handle bumper, grille, and condenser mounting bolts.
Screwdrivers
Phillips and flathead for trim clips, panels, and hose clamps.
Pliers and Line Disconnect Tools
For spring-lock couplings and retaining clips on AC lines.
Torque Wrench
Ensures mounting bolts and line fittings are tightened to specification.
Safety Glasses and Gloves
Protects against refrigerant spray, sharp fins, and debris.
Refrigerant Recovery Equipment
Required for safe removal of refrigerant before disassembly (or access to a professional recovery service).
Materials and Consumables
- New condenser: Correct fitment for your vehicle.
- New receiver-drier or accumulator: Strongly recommended whenever the system is opened.
- O-rings and seals: Fresh seals for all AC line connections.
- Refrigerant and compressor oil: Correct type and quantity for your system.
- UV dye (optional): Helps detect leaks after the job.
- Cleaning supplies: For removing debris and inspecting the area.
For a deeper look at the maintenance side of AC ownership, see this guide on preventive maintenance of air conditioning units — many of the same principles of cleanliness and inspection apply to car systems.
Safety Precautions
Working on a car AC system involves pressurized refrigerant, sharp components, and electrical connections. Follow these precautions to stay safe:
- Never vent refrigerant to the atmosphere. It's illegal in most jurisdictions and harmful to the environment. Have the system recovered by a certified technician or use approved recovery equipment.
- Wear eye protection and gloves. Liquid refrigerant can cause severe frostbite and eye damage.
- Work in a well-ventilated area. Refrigerant vapors can displace oxygen in enclosed spaces.
- Disconnect the battery before working near electrical components such as the radiator fan and condenser fan.
- Support the vehicle securely if you need to raise it. Use jack stands, never rely on a jack alone.
- Handle the condenser carefully. The fins are sharp and can cut; the core can be damaged by impact.
- Do not open the system until it has been fully recovered. Residual pressure can cause sudden and dangerous release.
Important: If you are not comfortable working with pressurized refrigerant or are unsure about any step, have a qualified automotive AC technician handle the recovery and recharge. The mechanical swap is DIY-friendly, but refrigerant handling is not.
Step-by-Step Replacement Process
The following steps outline a typical condenser replacement. Exact procedures vary by vehicle — always consult your service manual for model-specific instructions.
-
Recover the refrigerant
Have a certified technician recover all refrigerant from the system using approved equipment. Do not proceed until the system is empty and verified at zero pressure.
-
Disconnect the battery and prepare the workspace
Disconnect the negative battery terminal. Raise and support the vehicle if needed, and ensure you have clear access to the front of the radiator and condenser assembly.
-
Remove the front bumper cover or grille
On many vehicles, the condenser is accessed by removing the front bumper cover, grille, or both. Carefully detach trim clips, bolts, and any sensors or wiring attached to these panels. Keep fasteners organized.
-
Disconnect the AC lines from the condenser
Using the appropriate line disconnect tool, carefully separate the high-pressure and low-pressure lines from the condenser. Cap or plug the open lines immediately to prevent moisture and debris from entering the system. Inspect the O-rings and fittings for wear.
-
Remove the condenser mounting hardware
Remove the bolts or brackets securing the condenser to the radiator support or frame. Support the condenser as you remove the last fastener to prevent it from dropping.
-
Extract the old condenser
Lift the condenser out carefully, watching for attached lines, brackets, or sensors. Note the orientation and any mounting isolators so you can replicate them on installation.
-
Compare the new condenser
Before installation, compare the new condenser to the old one. Verify fitting locations, port sizes, and overall dimensions match. Check that the new unit includes any necessary brackets or adapters.
-
Install the new condenser
Position the new condenser in the mounting location and secure it with the original hardware, torquing to specification. Ensure rubber isolators (if used) are in place to reduce vibration.
-
Reconnect the AC lines with new O-rings
Install fresh O-rings on all line fittings. Lubricate them with a small amount of compatible refrigerant oil, then reconnect the lines and torque the fittings to the manufacturer's specification. Do not overtighten — this can damage the O-rings or threads.
-
Replace the receiver-drier or accumulator
Since the system has been opened, replace the receiver-drier (or accumulator) to ensure moisture isn't trapped in the system. This is a small component with a big impact on system longevity.
-
Reinstall the bumper cover or grille
Reattach all panels, trim clips, sensors, and wiring you removed. Double-check that nothing is pinched or left disconnected.
-
Evacuate and recharge the system
Have a technician evacuate the system with a vacuum pump to remove air and moisture, then recharge with the correct amount and type of refrigerant and compressor oil. This step is essential — skipping it leads to poor performance and premature failure.
-
Test the system
Start the engine, turn on the AC, and verify cold air from the vents. Check for leaks at all fittings using a leak detector or UV dye. Monitor system pressures to confirm proper operation.
If you're also dealing with related AC issues, it may help to review recharging an auto AC system and the broader topic of recharging air conditioners to understand how charge levels affect performance.
Choosing the Right Replacement Condenser
Selecting the correct condenser is about more than just fitment. The right choice balances durability, efficiency, and compatibility with your vehicle's system.
Match the Specification
Always match the condenser to your vehicle's make, model, year, and engine configuration. Differences in port locations, mounting points, and internal volume can affect performance and fitment. Use a trusted parts catalog or consult a professional to confirm compatibility.
Consider the Tier
Condensers are available across several market tiers:
- Entry-level: Conventional tube-and-fin designs with basic corrosion protection. Suitable for older vehicles or mild climates.
- Mid-range: Often parallel-flow or improved tube-and-fin designs with better coatings and more precise construction. A solid choice for most daily-driven vehicles.
- Premium: High-efficiency parallel-flow condensers with advanced corrosion-resistant coatings, reinforced headers, and tighter manufacturing tolerances. Ideal for vehicles in harsh climates or those expected to last many more years.
For most drivers, a mid-range condenser offers a good balance of durability and performance. Premium options make more sense in coastal or road-salt environments where corrosion is a major factor.
Check for Included Components
Some condensers ship with new O-rings, mounting hardware, or even a receiver-drier. If yours doesn't, factor those consumables into your planning. Buying a kit that includes the receiver-drier and seals can simplify the job and ensure all parts are compatible.
If you're also evaluating other vehicle AC components, the principles in replacing a coil in an AC unit can help you understand how coils and heat exchangers interact in any system.
Testing Your New Condenser
After the replacement and recharge, verify that everything is working correctly:
- Vent temperature: With the engine running and AC on maximum, measure the temperature at the center vent. It should be significantly colder than ambient air (typically 35–45°F / 2–7°C drop depending on conditions).
- System pressures: Check both low-side and high-side pressures against the manufacturer's specifications. Abnormal readings can indicate undercharge, overcharge, or a remaining restriction.
- Visual leak inspection: Look for oily residue or dye traces at all connections. Recheck after a few days of driving.
- Compressor behavior: The compressor should engage smoothly and run without rapid cycling. If it cycles frequently, further diagnosis is needed.
- Cooling consistency: Drive the vehicle and confirm the AC maintains cold output even in stop-and-go traffic, which tests the condenser fan and airflow.
If cooling is still weak after replacement, revisit the broader reasons why an air conditioner is not cooling — the condenser may not have been the only issue. For a more detailed explanation of system behavior, air conditioner not cooling in the house covers principles that apply to vehicle systems as well.
Common Mistakes to Avoid
Even experienced DIYers can run into trouble. Here are the most common pitfalls and how to avoid them:
- Skipping refrigerant recovery: Venting refrigerant is illegal and dangerous. Always recover it properly.
- Reusing old O-rings: Old seals are a leading cause of leaks after a repair. Always use new O-rings and lubricate them correctly.
- Forgetting to replace the receiver-drier: Once the system is opened, the desiccant is exposed to moisture. A saturated drier can contaminate the system.
- Overtightening line fittings: This can crush O-rings or damage threads, creating leaks. Use a torque wrench and follow specifications.
- Leaving the system open too long: Moisture and debris can enter open lines. Cap them immediately and minimize open time.
- Skipping the evacuation step: Air and moisture in the system reduce efficiency and can form corrosive acids. Evacuation is non-negotiable.
- Not checking fan operation: A failed condenser fan can cause high pressures and poor cooling even with a new condenser. Test the fan during reassembly.
- Using the wrong refrigerant or oil: Different systems require specific refrigerants and oils. Using the wrong type can damage the compressor and void warranties.
If you're also maintaining other AC equipment, the lessons in servicing an HVAC system and servicing air conditioning units reinforce the importance of proper evacuation and charging — principles that apply whether you're working on a car or a home system.
Frequently Asked Questions
How long does it take to replace a car AC condenser?
For most vehicles, replacing an AC condenser takes approximately 2 to 4 hours for an experienced DIYer. Professional shops typically complete the job in 1.5 to 3 hours. The exact time depends on the vehicle's design, accessibility of the condenser, and whether additional components need replacement.
Can I replace my car AC condenser myself?
Yes, replacing a car AC condenser is a feasible DIY project for those with intermediate mechanical skills. However, you must have the system's refrigerant professionally recovered first, and the system must be professionally evacuated and recharged afterward. The mechanical replacement itself involves removing the front bumper or grille, disconnecting lines, and swapping the condenser.
What are the signs that my car AC condenser needs replacement?
Common signs include weak or no cooling from the AC vents, visible damage or corrosion on the condenser fins, refrigerant leaks detected near the condenser, and the AC compressor cycling rapidly or not engaging. Physical inspection often reveals bent fins, debris blockage, or oily residue indicating a leak.
Do I need to replace the receiver-drier when replacing the condenser?
Yes, it is strongly recommended to replace the receiver-drier (or accumulator, depending on system design) whenever the AC system is opened for condenser replacement. The receiver-drier contains desiccant that absorbs moisture; once exposed to air, its effectiveness degrades, and a saturated desiccant can lead to system corrosion and premature failure.
What tools are needed to replace a car AC condenser?
Essential tools include a socket and wrench set, screwdrivers, pliers, a refrigerant recovery machine (or access to professional recovery service), new O-rings and seals, a torque wrench, and safety equipment such as gloves and eye protection. Some vehicles may require specialized line disconnect tools.
How do I know if my condenser is leaking or just clogged?
A leak typically shows oily residue or UV dye traces at fittings or on the condenser core, and the system loses refrigerant over time. A clogged condenser may show no leak signs but cause high-side pressure to spike and cooling performance to drop, especially at idle. A pressure test and visual inspection can distinguish between the two.
Can a damaged condenser cause compressor failure?
Yes. If the condenser is restricted or unable to shed heat, high-side pressure can rise abnormally, forcing the compressor to work harder and run hotter. Over time, this can lead to compressor overheating, lubrication breakdown, and eventual failure. Replacing a failing condenser promptly helps protect the compressor.
Ready to Find the Right Condenser for Your Vehicle?
Explore our recommended automotive AC condensers and components. Each option is selected for compatibility, durability, and performance across different vehicle types and climates.
View Recommended Condensers