Venting a Portable Air Conditioner Through a Casement Window
Casement windows open outward on a crank, which makes them tricky to pair with a portable AC exhaust hose. This guide explains every reliable method, from dedicated seal kits to DIY panels, so you can vent hot air out without sacrificing comfort or security.
Quick answer: A casement window cannot hold a standard sliding-window vent kit because it opens sideways. The most reliable solution is a casement-specific window seal kit with a zippered hose port, or a custom-cut rigid panel (acrylic, polycarbonate, or plywood) fitted into the window frame with a hose collar. Both methods seal the opening, keep insects out, and let the exhaust hose sit securely in place.
Why Casement Windows Need a Different Approach
Most portable air conditioners ship with a sliding-window kit: a flat plastic panel that extends to fill a horizontal or vertical track, with an opening for the exhaust hose. A casement window works on a completely different mechanism. The sash swings outward on hinges and is held by a crank operator, so there is no track for a panel to sit in and no flat surface for the hose collar.
That does not mean a portable AC is off the table. It means you need a venting method that adapts to the geometry of the casement frame. The three practical approaches are a dedicated casement window seal kit, a custom rigid panel, and a hybrid approach using a universal window seal. Each has trade-offs in installation effort, seal quality, and how much the window can still open.
Method 1: Casement Window Seal Kits (Easiest and Most Reliable)
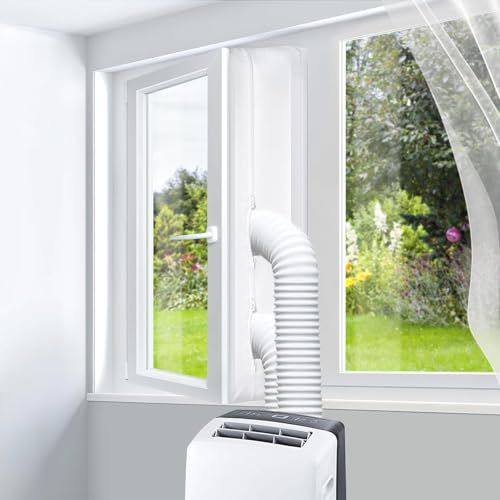
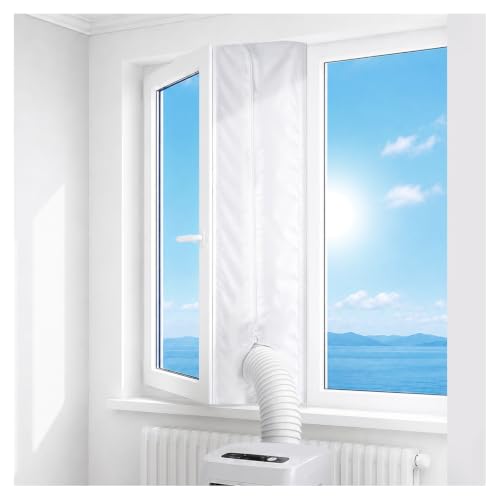
A casement window seal kit is a fabric or plastic sleeve that attaches to the window frame and the sash with adhesive strips or hook-and-loop tape. When the window closes against the sleeve, the opening is sealed except for a zippered or elastic port where the exhaust hose exits. These kits are designed specifically for the outward-swinging motion of casement windows, so they conform to the frame without needing a rigid panel.
How to install a casement seal kit
- Measure the window opening. Record the width and height of the casement frame and the diameter of your exhaust hose (typically 5 to 6 inches). Confirm the kit covers your window size.
- Clean the frame surfaces. Wipe the window frame and the inner sash edge with a damp cloth and let them dry completely. Adhesive strips bond poorly to dust, pollen, or condensation.
- Attach the seal to the frame. Peel the backing from the adhesive side and press the sleeve onto the window frame, following the kit instructions for which edge goes on the frame versus the sash.
- Close the window onto the seal. Crank the casement shut so the sash presses against the fabric. The seal should compress slightly, leaving no visible gap around the perimeter.
- Insert the exhaust hose. Route the hose through the zippered port and tighten the collar or drawstring. Connect the other end to the portable AC's exhaust outlet.
- Check the seal. Run the AC on fan mode and feel around the edges for escaping air. Small leaks are normal, but a steady draft means the seal needs repositioning.
Method 2: Custom Rigid Panel (Best Seal and Security)
If you want a permanent, airtight solution, cut a rigid panel to fit the casement opening and drill a hole for the hose collar. Acrylic and polycarbonate are popular because they let light through, while exterior-grade plywood is the most durable option for a workshop or garage. The panel sits in the window frame, the casement closes against it, and the hose connects through a collar mounted in the hole.
Materials and tools
- Rigid panel material: 1/4-inch acrylic, polycarbonate, or exterior plywood
- Hose collar or flange sized to your exhaust hose diameter
- Jigsaw or hole saw, drill, and sandpaper
- Weatherstripping or foam tape for the panel edges
- Optional: window lock or clamp to hold the panel in place
Step-by-step installation
- Measure the casement opening precisely. Measure the clear opening between the frame stops, not the outer frame. Subtract 1/8 inch from each dimension so the panel fits without binding.
- Cut the panel to size. Use a jigsaw with a fine-tooth blade for acrylic or polycarbonate to avoid cracking. Sand the edges smooth.
- Mark and cut the hose hole. Trace the collar's outer diameter on the panel, then cut with a hole saw or jigsaw. The hole should be slightly smaller than the collar flange so it seats snugly.
- Mount the collar. Screw or bolt the hose collar to the panel, sealing the joint with silicone caulk on the exterior side.
- Add weatherstripping. Apply foam tape or self-adhesive weatherstripping around the panel perimeter to close gaps between the panel and the frame.
- Install the panel. Set the panel in the opening and close the casement against it. If the window does not press firmly, add a clamp or a small window lock to hold the panel in place.
- Connect the hose. Attach the exhaust hose to the collar and run a bead of caulk around any remaining gaps. Test with the AC on high fan.
A rigid panel is the most secure option because it cannot be pushed in from outside, and it creates a near-airtight seal. It is also the best choice for windows that face a busy street or an apartment corridor. The trade-off is that the window can no longer be opened for ventilation while the panel is installed.
Method 3: Universal Window Seal With a Casement Adapter
Some universal window seal kits include a casement adapter: a rigid frame that clips onto the seal and holds the hose collar at the right angle. These kits are a middle ground between fabric seals and custom panels. They are easier to install than a cut panel but more secure than a plain fabric sleeve because the adapter keeps the hose from sagging or pulling the seal loose.
When shopping, confirm the kit explicitly lists casement windows. A universal seal designed for sliding windows may not have the right adapter geometry, and the hose will sit at an awkward angle that strains the connection. If you already own a sliding-window kit, a separate casement adapter is usually the simplest upgrade.
Comparing the Three Venting Methods
| Method | Best For | Seal Quality | Installation Effort | Window Still Opens? |
|---|---|---|---|---|
| Casement seal kit | Renters, occasional use, quick setup | Good | Low | Yes, with hose removed |
| Custom rigid panel | Permanent installs, security-sensitive rooms | Excellent | Moderate to high | No, while installed |
| Universal seal + adapter | Owners of universal kits, semi-permanent use | Good to very good | Moderate | Yes, with hose removed |
Common Mistakes to Avoid
- Leaving the window partly open without a seal. Hot outdoor air rushes back in, and the portable AC fights a losing battle. The unit runs continuously and never reaches the set temperature.
- Using a sliding-window panel in a casement frame. The panel has nothing to rest on and will fall out or leave large gaps. It is not a substitute for a casement-specific solution.
- Kinking or over-extending the exhaust hose. A crushed hose restricts airflow and can overheat the unit. Keep bends gentle and the hose as short as the manufacturer allows.
- Skipping the insect screen. An open casement with a fabric seal still leaves a path for mosquitoes and flies. Choose a kit with an integrated mesh or add a screen behind the hose port.
- Ignoring the drain. Portable ACs produce condensate. In humid climates, check the drain plug or use a condensate pump so water does not overflow onto the window sill.
- Blocking the outdoor intake. Some portable units draw outside air for cooling the condenser. Make sure the hose collar and the area around it are not sealed so tightly that the unit starves for air. Check your model's manual for the required clearance.
When a Casement Window Is Not a Good Fit
Some casement windows are simply impractical to vent through. Very small windows, windows with deep recessed frames, and casements that open less than 8 inches may not accept a seal kit or panel. In those cases, consider a wall vent for your portable AC, which uses a permanent exterior hood and avoids the window entirely. Another option is a portable AC setup without a window for rooms where window access is limited, though these solutions have their own efficiency trade-offs.
If you are still deciding between a portable unit and a window unit, our overview of types of air conditioning units explains how each category handles venting and installation. For rooms with sliding windows instead of casement, a vertical sliding window kit is the standard pairing.
Frequently Asked Questions
Can I vent a portable AC through a casement window without a kit?
You can improvise with cardboard, foam board, or a plywood panel cut to fit the opening, but the seal will be weaker and the setup is less secure. A dedicated casement seal kit or a properly cut rigid panel is more reliable and looks cleaner. If you use a DIY panel, seal the edges with weatherstripping and secure it so it cannot fall out.
How much should the casement window be open when venting?
Only as much as the seal kit or panel requires. A fabric seal kit typically needs the window open just enough to fit the sleeve, usually 4 to 6 inches. A rigid panel needs the window open to the panel thickness plus the weatherstripping, often 1 to 2 inches. The goal is the smallest opening that still lets the hose exit without pinching.
Does a casement window seal kit work with any portable AC brand?
Most kits are brand-agnostic and fit any hose with a standard 5- or 6-inch diameter. Check the hose diameter and the window dimensions before buying. Some kits include adapters for smaller or larger hoses, and a few are shaped for specific window frame depths.
Will venting through a casement window let insects in?
Not if the seal is intact and the hose port is closed around the hose. Fabric kits with a zippered port seal tightly enough to keep most insects out. For extra protection, choose a kit with an integrated mesh screen or add a fine mesh behind the port. A rigid panel with a caulked collar is the most insect-proof option.
Can I leave the portable AC vented through the casement window overnight?
Yes, provided the seal is secure and the window cannot be forced open from outside. A fabric kit alone is not a security barrier, so use a window lock or a rigid panel if the window is accessible from the ground or a fire escape. Also confirm the unit's condensation tank will not overflow overnight.
What if my casement window opens outward and has a crank handle in the way?
Most casement seal kits are designed to route around the crank operator, but deep handles can interfere. If the handle blocks the seal, a rigid panel installed in the frame (with the sash closed against it) avoids the problem entirely. Some kits include a notch or cutout for the operator arm.
Final Checklist Before You Buy
- Measure the casement opening width, height, and frame depth.
- Confirm your exhaust hose diameter (usually 5 or 6 inches).
- Decide whether the window needs to remain openable (fabric kit) or can be sealed permanently (rigid panel).
- Check whether your portable AC is single-hose or dual-hose.
- Plan for condensate drainage, especially in humid climates.
- Verify the kit includes insect screening or add mesh separately.
- For security-sensitive windows, choose a rigid panel with a lock or clamp.
Ready to Set Up Your Portable AC?
Browse casement-compatible venting kits and portable air conditioners selected for window compatibility and seal quality.
Explore Venting Options