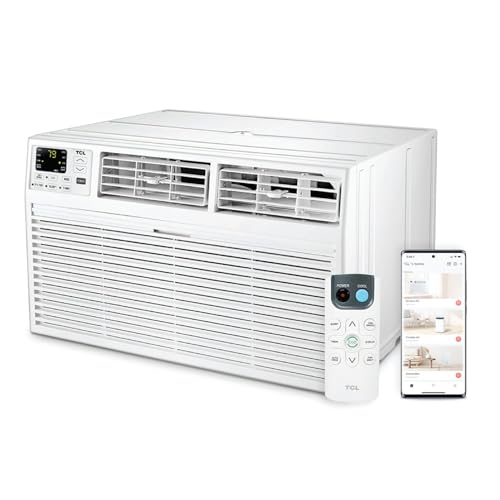
Understanding Portable AC Venting Basics
A portable air conditioner pulls warm air from the room, cools it, and then releases the absorbed heat through an exhaust hose. That hose must be directed outdoors — otherwise the unit recirculates hot air and the room never cools properly. While most users start with a window kit, a wall vent offers a cleaner, more permanent setup that does not interfere with window usage or home security.
Venting through a wall is especially useful for rooms without suitable windows, such as basements, home offices, and converted garages. It is also a strong option for renters who have permission to make minor modifications, or for homeowners who want a long-term solution. If you are still deciding between venting methods, compare the pros and cons of using a portable air conditioner without a window against a dedicated wall installation.
Tools, Materials, and Preparation
Before you begin, gather the right equipment. A proper wall vent kit is the core component; it includes an exterior hood, an interior flange, and often a short duct segment. You will also need a stud finder, a drill, a hole saw sized to your kit (commonly 5–6 inches), a level, exterior-grade sealant, and weatherproof flashing if the wall is exposed to rain. A helper is strongly recommended for holding the exterior hood while you secure the interior flange.
Choose a wall location that is close to the AC unit, away from doors and windows, and free of electrical wiring or plumbing. Interior walls are not suitable — the vent must lead directly outdoors. Also confirm that the exterior side is not blocked by shrubs, fences, or neighboring structures. For reference on compatible accessories, see universal exhaust hose options for portable air conditioners and universal window seal kits to understand how hose diameters are standardized.
Step-by-Step Wall Vent Installation
- Select the vent location. Pick a spot on an exterior wall close to your portable AC, ideally 12–48 inches above the floor so the exhaust hose can slope slightly downward to the outside. This helps condensation drain out rather than back into the unit.
- Check for obstructions. Use a stud finder to locate studs, and scan for wiring and pipes. Mark the center point of the hole and confirm that the exterior side is clear.
- Drill the pilot hole. Start with a small pilot hole through the wall to verify the location on both the interior and exterior sides. This confirms your measurements before committing to a large cut.
- Cut the main hole. Using the hole saw size specified by your kit, cut through the wall from the interior. Work slowly and keep the drill steady. A helper on the exterior side can catch the core plug and watch for unexpected materials.
- Test-fit the vent kit. Insert the interior flange and check that the exterior hood aligns properly. The kit should fit snugly with minimal gaps.
- Seal and secure the interior flange. Apply exterior-grade sealant around the flange, then screw it into place. This prevents air leaks and moisture intrusion.
- Install the exterior hood. Secure the exterior hood with screws and apply weatherproof sealant around its perimeter. If the wall is exposed to rain, add flashing above the hood to direct water away.
- Connect the exhaust hose. Attach the portable AC's exhaust hose to the interior vent adapter. Keep the hose as short and straight as possible, and avoid sharp bends that restrict airflow.
- Test the system. Run the portable AC on fan mode first to check for leaks, then switch to cooling. Verify that warm air is exiting the exterior hood and that the room cools efficiently.
Choosing the Right Wall Vent Kit
Wall vent kits vary in diameter, materials, and included components. Match the kit to your portable AC's exhaust hose diameter — most residential portable units use 5-inch or 6-inch hoses. Kits built from heavy-duty metal or UV-resistant plastic are more durable outdoors. Some kits include a built-in backdraft damper that prevents outside air from entering when the AC is off, which improves energy efficiency in cooler months.
If your portable AC uses a non-standard hose, look for adjustable adapters or universal air conditioner accessories that bridge the gap. For homes where a full wall penetration is not possible, alternatives include venting through a casement window or casement window venting solutions.
| Tier | Key Features | Best For |
|---|---|---|
| Essential tier | Basic plastic flange, no damper, minimal sealing | Renters or temporary setups |
| Balanced tier | Metal or UV-resistant plastic, backdraft damper, adjustable hose adapter | Most residential installations |
| Top-tier | Heavy-duty construction, weatherproof hood, insulated duct section | Long-term installations on exposed walls |
Common Mistakes to Avoid
- Venting into a garage or attic. The hot air must go outdoors, not into another enclosed space.
- Using too long or kinked a hose. Excess length and sharp bends reduce cooling performance and stress the unit.
- Skipping the backdraft damper. Without one, outside air and pests can enter through the vent when the AC is off.
- Poor sealing. Gaps around the flange let hot air back in, undermining the entire installation.
- Ignoring local codes. Some jurisdictions restrict wall penetrations on certain wall types or in historic districts.
Maintenance and Long-Term Care
Inspect the exterior hood seasonally for debris, bird nests, or insect activity. Clean the interior flange and hose adapter to prevent dust buildup. If you notice warm air leaking around the vent when the AC is off, replace the damper or add weatherstripping. For broader upkeep guidance, see our ventilation cleaning and vent cleaning service resources. If your home has a ducted system in addition to the portable unit, maintaining air duct vents and wall ventilation generally keeps indoor air quality healthy.
When a Wall Vent Is the Right Choice
A wall vent is ideal when you want a permanent solution, when windows are unsuitable or frequently opened, or when you want to improve home security by removing a window insert. It is less suitable for renters without modification permission or for rooms where the exterior wall is inaccessible. If you are comparing portable units in general, review our guides to ventless portable air conditioning units and portable air conditioner options to understand the trade-offs.
Frequently Asked Questions
Can you vent a portable air conditioner through a wall?
Yes. A wall vent kit creates a permanent outdoor exhaust path. It is a common and effective alternative to window kits.
What size hole do I need?
Most kits require a 5- to 6-inch hole. Always confirm the diameter specified by your kit and your portable AC's exhaust hose before cutting.
How high should the wall vent be?
Position it 12–48 inches above the floor so the exhaust hose can slope slightly downward, allowing condensation to drain outside.
Do I need a permit?
Requirements vary by location. Check with your local building department before making an exterior wall penetration, especially on load-bearing or historic walls.
Can I vent into a garage or attic?
No. The exhaust must go outdoors. Venting into an enclosed space recirculates heat and can create moisture problems.