
Wall Unit Air Conditioner Installation: What to Expect
Understand what a wall unit installation involves, which factors shape the scope of work, how to prepare your home, and how to verify the job is done right.
Start LearningWhy this guide matters: A wall unit performs only as well as its installation. Poor sealing, incorrect slope, and inadequate support cause most early failures and comfort complaints. This guide explains what a proper installation looks like so you can evaluate a quote with confidence.
What Installation Involves
Wall unit air conditioner installation is more than sliding a unit into a hole. A proper job covers opening preparation, structural support, sealing, electrical connection, and drainage verification. The exact scope varies by wall type, whether a sleeve already exists, and the electrical situation.
Opening and Sleeve
The installer measures and prepares the wall opening, then fits or installs a wall sleeve sized to the unit.
Support and Slope
The unit is set level or with a slight outward slope so condensate drains outside rather than into the room.
Sealing
The perimeter is sealed with weather-resistant material to prevent air leakage and water infiltration.
Electrical Connection
The unit is wired to the correct circuit and breaker, with voltage and amperage verified against the nameplate.
Drainage
The installer confirms that condensate exits outdoors and does not pool against the wall or drip onto walkways.
Testing
The unit is powered on and checked for cooling performance, vibration, and unusual noise.
Wall Repair and Finish
Interior and exterior trim is fitted or repaired so the opening looks clean and weather-tight.
Documentation
The installer provides notes on the electrical circuit, sealing method, and warranty registration steps.
For a broader look at installation scope across wall-mounted formats, the wall mounted air conditioner with installation overview explains what to verify in a package offer. If you are comparing split-type systems, the split system air conditioner and installation guide covers a different installation path.
Factors That Shape Labor Scope
Two installations of the same unit can differ significantly in scope depending on the home. The table below outlines the main variables.
| Factor | What It Affects | Typical Complexity |
|---|---|---|
| Existing wall sleeve | Whether a new opening must be cut or the unit can slide into an existing sleeve | Lower when a compatible sleeve exists |
| Wall construction | Wood frame, masonry, brick veneer, or concrete block | Higher for masonry and brick |
| Floor level | Ground floor versus upper floor access | Higher for upper floors needing lifts or ladders |
| Electrical circuit | Whether a dedicated circuit exists or must be added | Higher when a new circuit is required |
| Drainage route | Where condensate can exit safely | Higher when a pump or extended drain is needed |
| Interior finish | Trim, drywall repair, or paint touch-up | Higher for finished interiors with matching trim |
For context on how wall unit installation compares with split-type installation scope, the split unit air conditioner installation cost guide covers the variables that influence split-type labor. The overview on wall mounted air conditioning unit with installation explains what to expect when a package includes installation.
Wall Sleeve and Opening Preparation
The wall sleeve is the frame that holds the unit and protects the opening. If a compatible sleeve already exists, the installer verifies that it is secure, level, and drained. If not, a new sleeve must be fitted before the unit goes in.
- Measure the sleeve and unit: The unit must match the sleeve's dimensions. Adapter kits may be needed when they do not align.
- Check the sleeve condition: Rust, sagging, or loose fasteners should be repaired before installing a new unit.
- Confirm drainage: The sleeve should slope slightly outward so condensate exits the exterior.
- Seal the perimeter: Gaps around the sleeve let in air and water. Seal them with weather-resistant material.
The article on wall sleeve for through-the-wall air conditioners explains sleeve sizing and compatibility in more detail. For apartments and rentals with existing sleeves, the wall mounted air conditioner for apartment guide covers constraints specific to those settings.
Support, Slope, and Sealing
Support and sealing determine how quiet the unit runs, how well it drains, and whether the wall opening stays weather-tight.
Support
Wall units are heavy and vibrate in operation. Proper support brackets distribute the load and reduce vibration. For upper-floor installations, exterior brackets may be needed to carry the unit's weight safely.
Slope
The unit should sit level or with a slight outward slope so condensate drains outside. An inward slope causes water to pool inside the chassis, which leads to leaks and corrosion.
Sealing
The perimeter should be sealed with weather-resistant material to prevent air leakage and water infiltration. Poor sealing causes drafts, higher energy use, and moisture problems inside the wall cavity.
If water issues appear after installation, the guide on water coming out of air conditioner vents and the article on water dripping from AC vents help diagnose common causes. For more on placement principles, the wall mounted air conditioner heater combo installation guide covers similar support and sealing considerations.
Electrical Requirements
Electrical work is one of the most important parts of a wall unit installation. Confirm the circuit and breaker rating match the unit's requirements before work begins.
- Dedicated circuit: Many wall units require a dedicated circuit. Sharing a circuit with other appliances can cause nuisance trips.
- Breaker sizing: The breaker must match the unit's rated amperage and the wire gauge.
- Voltage: Confirm whether the unit runs on standard household voltage or requires a higher-voltage circuit.
- Grounding: The unit must be properly grounded for safety.
- Permits: Many jurisdictions require permits for new electrical work.
If you are considering a combination heating unit, check the guide on a wall mounted air conditioner heater combo 110 volt configuration before selecting a model. For general electrical questions, the wall mounted air conditioning unit installation overview covers what to confirm with the installer.
Installation Process Step by Step
While details vary by home, a standard wall unit installation follows a predictable sequence.
- Site inspection: The installer confirms the wall location, sleeve condition, and electrical supply.
- Opening preparation: If no sleeve exists, the opening is cut and framed to fit the sleeve.
- Sleeve installation: The sleeve is secured, leveled, and sealed to the wall.
- Support installation: Brackets are fitted to carry the unit's weight and reduce vibration.
- Unit placement: The unit slides into the sleeve and is checked for level and slope.
- Electrical connection: The unit is wired to the correct circuit and breaker.
- Sealing: The perimeter is sealed with weather-resistant material.
- Drainage check: Condensate is confirmed to exit outdoors without pooling.
- Startup and testing: The unit is powered on and checked for cooling performance and noise.
- Handover: The installer explains operation, filter access, and warranty registration.
For a broader view of installation scope across wall-mounted formats, see the wall mounted air conditioner with installation guide.
Questions to Ask the Installer
A short conversation before work begins prevents most misunderstandings.
| Topic | Question to Ask | Why It Matters |
|---|---|---|
| Scope | What exactly is included in the installation? | Reveals exclusions such as wall repair, trim, or electrical upgrades. |
| Sleeve | Is the existing sleeve compatible, or will a new one be installed? | Incompatible sleeves can cause vibration, leaks, and inefficiency. |
| Support | How will the unit be supported, especially on upper floors? | Proper brackets reduce vibration and protect the wall opening. |
| Electrical | Is a dedicated circuit required, and will it be added? | Inadequate circuits cause tripping and pose safety risks. |
| Drainage | How will condensate be routed and tested? | Improper drainage causes indoor water damage and mold. |
| Permits | Will you handle any required permits? | Unpermitted work can complicate resale and insurance claims. |
| Warranty | What does the workmanship warranty cover, and for how long? | Labor defects are separate from the equipment warranty. |
Post-Installation Checklist
Before the installer leaves, verify the following items yourself.
- Cooling performance: The unit should deliver a clear temperature differential at the supply vent.
- Drainage: Condensate should exit outdoors without pooling or dripping onto walkways.
- No abnormal noise: Listen for rattles, vibration, or compressor noise that suggests a support or level issue.
- Sealing: The perimeter should be weather-tight with no visible gaps.
- Electrical: Confirm the breaker matches the unit and that the circuit is dedicated.
- Documentation: Collect installation notes and warranty registration instructions.
If the unit stops cooling after installation, the article on wall unit air conditioner not blowing cold air covers initial troubleshooting steps. For broader system issues, the trouble shooting air conditioning guide explains when to call a technician.
Common Installation Mistakes
These are the errors that most often lead to performance problems or callbacks.
- Inward slope: A unit that tilts inward pools condensate inside the chassis, causing leaks and corrosion.
- Poor sealing: Gaps around the unit let in air and water, which reduces efficiency and damages the wall cavity.
- Undersized circuit: A circuit that trips under load signals the breaker or wiring is not matched to the unit.
- Incompatible sleeve: A loose or oversized sleeve causes vibration, noise, and air leakage.
- No support brackets: Unsupported units sag and vibrate, which damages the wall opening and the unit itself.
- Blocked exterior airflow: A unit hemmed in by walls or debris loses efficiency and overheats.
If you are comparing a wall unit against split-type systems, the wall AC units air conditioning overview and the wall air conditioners and heaters hub are useful starting points. For related formats without an outdoor unit, see the wall air conditioner without outdoor unit guide.
Recommended Wall Unit Air Conditioners for Easy Installation
⚠️ AFFILIATE DISCLOSURE: This website contains affiliate links. As an Amazon Associate, we earn from qualifying purchases. If you make a purchase through these links, we may receive a small commission at no additional cost to you. Read our full affiliate policy.

BPTCUE Dual Use Compact Portable Wall Mounted Air Conditioner Hot Cold for Bedroom, 2 in 1 Air Conditioner Heater
Check price on Amazon
COSTWAY 12000BTU Mini Split Air Conditioner& Heater | 20 SEER2 115V Wall-Mounted Ductless AC Cools up to 750 Sq. Ft, Energy Efficient Inverter AC with Heat Pump
Check price on Amazon
Wintcomfort Moulding Trim for Through The Wall Air Conditioner, Insulation Trim Frame for AC Wall Unit, Wall Mounted AC Unit Decorative Edges for Bedroom, Office Heat & Wind Insulation, Seal Gaps
Check price on Amazon
ROVSUN Smart 12000 BTU Through the Wall Air Conditioner with Heat, Wall AC Unit & Heater Combo with Remote, APP & Voice Control & Timer Function, Compatible with Alexa/Google Assistant, 230V/60Hz
Check price on Amazon
Midea 8,000 BTU Smart Inverter Air Conditioner Window Unit with Heat and Dehumidifier – Cools up to 350 Sq. Ft., Energy Star Rated, Quiet Operation, Electronic Controls, Remote Control, White
Check price on Amazon
ROVSUN Smart 10000 BTU Through the Wall Air Conditioner with Heat, Wall AC Unit & Heater Combo with Remote, APP & Voice Control & Timer Function, Compatible with Alexa/Google Assistant, 230V/60Hz
Check price on Amazon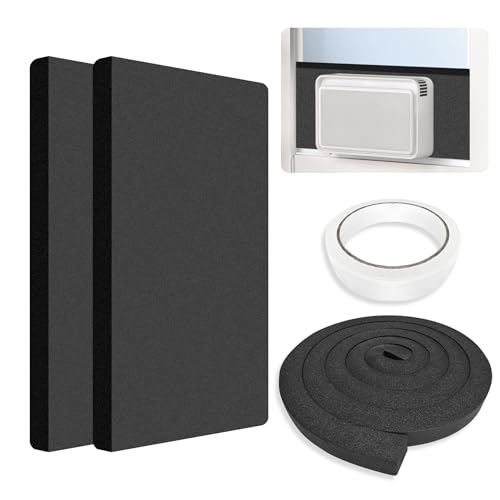
Window Air Conditioner Insulated Foam Side Panels Block Hot/Cold Air | Window AC Foam Insulation Kit, Reduce Noise & Energy Costs, Universal Fit Most 5000-15000 BTU Air Conditioners Unit
Check price on Amazon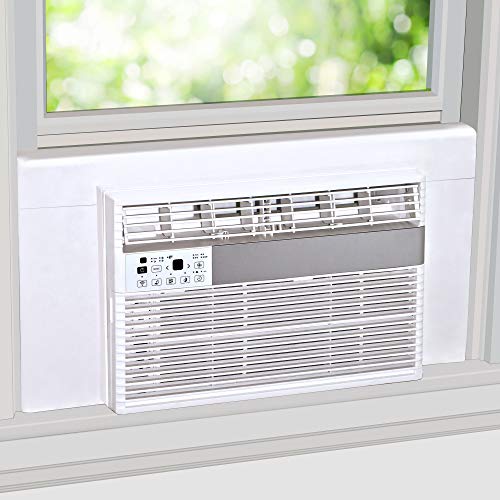
Breeze Stop Surround Insulation Side Panels White for Window AC Unit Indoor Air Conditioner Cover for Winter and Summer
Check price on AmazonFrequently Asked Questions
What does wall unit air conditioner installation involve?
Installation typically involves measuring and preparing the wall opening, fitting or installing a wall sleeve, setting the unit with proper support and slope, sealing the perimeter, wiring the unit to the correct circuit, and verifying that condensate drains outdoors.
Can a wall unit be installed in an existing wall sleeve?
Yes. A unit designed for the sleeve's dimensions can usually be installed directly. The installer verifies the sleeve is secure, level, and properly drained. Adapter kits may be needed when the unit and sleeve dimensions do not match.
What factors shape installation scope?
Wall construction, whether a sleeve exists, whether an electrical circuit must be added, the height of the opening, and access to the exterior all affect the scope of work. Masonry walls and second-story installations generally require more labor than ground-floor wood-frame walls.
Do I need a permit to install a wall unit air conditioner?
Permit rules vary by jurisdiction. Many areas require permits for new wall openings, electrical work, or structural modifications. Check with your local building department before scheduling work.
How should the unit be supported and sealed?
The unit should sit level or with a slight outward slope so condensate drains outside. The perimeter should be sealed with weather-resistant material to prevent air and water infiltration. Proper support brackets reduce vibration and protect the wall opening.
Ready to Compare Wall Unit Air Conditioners?
Review the recommended models above, confirm your wall opening and electrical setup, and choose a unit that matches your installation scope.
View Recommended Units