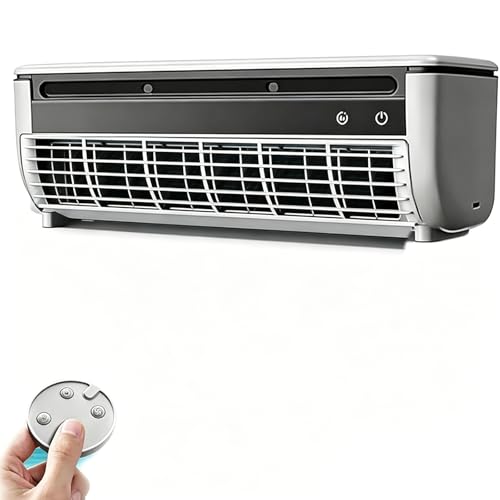
Wall Mounted Air Conditioning Unit With Installation: Complete Guide
Everything you need to know before buying a wall mounted air conditioning unit with installation — from site preparation and mounting steps to electrical requirements and post-install checks.
START LEARNINGAC Units Guide Philosophy: Buying a wall mounted air conditioning unit with installation is more than selecting a product — it is a project. Understanding what installation involves helps you ask the right questions, avoid hidden surprises, and ensure the system performs as designed for years. This guide walks you through every stage.
What a Wall Mounted AC Unit With Installation Includes
A wall mounted air conditioning unit with installation package typically bundles the equipment and the labor needed to get the system running. The exact scope depends on the seller and installer, but a complete installation generally covers:
- Indoor wall unit: The air handler that mounts high on the wall, including mounting plate or bracket.
- Outdoor condenser: The compressor and condenser unit, placed on a pad or wall bracket outside.
- Refrigerant line set: Insulated copper tubing connecting indoor and outdoor units, cut and flared to length.
- Drainage: Condensate drain line routed to a safe discharge point, with a pump if gravity flow is not possible.
- Electrical connection: Power supply to the indoor and outdoor units, including disconnect and breaker as required.
- Vacuum and charge: Evacuation of the line set to remove moisture and non-condensables, then refrigerant charge verification.
- Testing and commissioning: Running the system in cooling and heating modes, checking temperatures, and confirming no leaks.
- Cleanup and handover: Removal of packaging, patching of wall penetrations, and a walkthrough of controls and maintenance.
Not every package includes the same items. Some sellers include only the equipment and basic mounting hardware, leaving labor to a separate contractor. Others offer a full turnkey service. Always confirm exactly what is included before committing.
Why Professional Installation Matters
Warranty Protection
Most manufacturers require installation by a licensed technician to validate the warranty. Improper installation can void coverage for the compressor and other critical components.
Correct Refrigerant Charge
Overcharging or undercharging refrigerant reduces efficiency and can damage the compressor. A professional uses gauges and manufacturer specifications to charge precisely.
Moisture-Free Line Set
Proper vacuuming removes moisture and air from the refrigerant lines. Residual moisture can form acids that attack the compressor and metering devices over time.
Safe Electrical Work
Dedicated circuits, correct wire gauge, and proper grounding protect against electrical hazards. Licensed electricians ensure the installation meets local codes.
Leak-Free Connections
Flared and brazed connections must be leak-tested. A small leak can slowly deplete refrigerant, reducing performance and potentially freezing the indoor coil.
Optimal Placement
Correct indoor and outdoor unit placement maximizes airflow, minimizes noise, and avoids recirculation of hot air. A professional assesses the site before mounting.
If you are comparing options, a wall mounted mini split is the most common type of unit sold with installation. These systems pair a slim indoor air handler with a compact outdoor condenser and are well-suited to room-by-room comfort.
Pre-Installation Planning
Good installation begins before the technician arrives. Careful planning reduces the risk of mid-project surprises and ensures the finished system performs as expected.
- Confirm room size and capacity: Verify that the selected unit matches the room's heat load. For guidance, see our how to size an air conditioner guide.
- Choose the indoor unit location: High on the wall, 6–7 feet above the floor, with clear airflow and no obstruction from furniture or curtains. Avoid direct sunlight and heat sources.
- Choose the outdoor unit location: A stable, level surface with clearance for airflow. Protect from snow accumulation and direct sun where possible. Keep away from bedroom windows if noise is a concern.
- Measure the line set path: The shorter and more direct the refrigerant lines, the better. Check the manufacturer's maximum line length and elevation difference.
- Assess wall structure: The wall must support the indoor unit's weight. Wood studs, masonry, and reinforced concrete are typical. A wall mount bracket for mini split systems can provide additional support and leveling.
- Check electrical capacity: Confirm the available circuit and breaker size. Some units require a dedicated circuit and a licensed electrician to run wiring.
- Plan drainage: Identify a gravity drain path or a location for a condensate pump. Avoid routing water where it can cause damage or create slip hazards.
- Review permits and rules: Check local building codes and homeowner association rules for exterior equipment and wall penetrations.
For rooms without exterior wall access, consider a wall mounted air conditioner without outdoor unit, which keeps all components indoors but has different installation requirements.
Installation Process Step by Step
While every job is different, a typical installation of a wall mounted air conditioner with installation follows this sequence:
- Site assessment and layout The technician confirms indoor and outdoor unit locations, measures line set length, and identifies the wall penetration point.
- Mount the indoor plate The mounting plate or bracket is leveled and fastened to the wall. Correct leveling ensures proper condensate drainage.
- Drill the wall penetration A hole is drilled through the wall for the refrigerant lines, drain, and electrical cable. A sleeve protects the opening and seals it against weather and pests.
- Position the outdoor unit The condenser is set on a pad or wall bracket, leveled, and secured. Clearance for airflow is verified.
- Run the line set and drain Refrigerant tubing, communication cable, and drain line are routed through the penetration and connected to both units. The drain is pitched for gravity flow or connected to a pump.
- Electrical connection Power is connected to the indoor and outdoor units, including the disconnect and breaker. Grounding is verified.
- Vacuum and leak test The line set is evacuated with a vacuum pump to remove moisture and air. Pressure is held to confirm no leaks.
- Release refrigerant and charge Refrigerant is released from the outdoor unit and, if needed, additional charge is added per manufacturer specifications.
- Mount the indoor unit The air handler is hung on the plate, connections are finalized, and the unit is checked for secure fit and level.
- Test and commission The system is run in cooling and heating modes. Supply and return temperatures are measured, and controls are configured. The site is cleaned and the homeowner is briefed.
For a broader look at the process across system types, see our guide on wall mounted air conditioning unit installation.
Electrical and Drainage Requirements
Electrical and drainage work are the two areas most likely to cause complications during installation. Planning for them early avoids delays.
Electrical: Many wall-mounted systems require a dedicated circuit. Smaller units may run on standard household voltage, while larger or heat pump models often need a higher-voltage circuit. The circuit must be sized to the unit's rated current, with a properly rated breaker and disconnect. A licensed electrician should verify the panel capacity and run any new wiring. For general guidance, see our article on 110V vs 240V AC units.
Drainage: During cooling, the indoor unit produces condensate. Gravity drainage is preferred, but the drain must have a continuous downward slope. If gravity flow is not possible, a condensate pump lifts water to a suitable discharge point. Poor drainage can lead to water damage or mold, and standing water in the drain pan can cause odors or overflow. For a related issue, see water dripping from AC vents.
If your installation involves a heat pump model, the outdoor unit will also produce condensate during heating and needs a clear drainage path or a defrost drain pan.
Unit Types and Market Tiers
Wall-mounted units sold with installation come in several tiers. Use the descriptors below to understand relative positioning:
| Tier | Category | Best For | Typical Installation Notes |
|---|---|---|---|
| Entry-Level | Cooling-only wall unit | Small rooms, seasonal cooling, simple retrofits | Shorter line runs, standard electrical circuit, straightforward wall mount |
| Mid-Range | Inverter wall unit with heat pump | Year-round comfort, bedrooms, living rooms | Slightly larger outdoor unit, dedicated circuit may be needed, condensate pump may be required |
| Premium | High-efficiency cold-climate heat pump | Cold climates, energy-conscious households | Heavier outdoor unit, robust mounting, careful line routing, possible electrical upgrade |
| Flagship | Smart multi-zone system | Whole-home comfort, zone control | Multiple indoor units, longer line runs, coordinated electrical and drainage planning |
A wall mounted air conditioner and heater combo adds heating capability and typically requires similar installation work to a cooling-only unit, plus verification of the reversing valve and defrost function during commissioning.
For apartments, a wall mounted air conditioner for apartment often involves constraints such as limited outdoor space or building rules. In these cases, confirm with the installer that the outdoor unit placement is permitted before purchase.
Installation Comparison: Wall Unit vs. Other Systems
How does the installation of a wall-mounted unit compare to other system types? The table below summarizes the key differences:
| Feature | Wall Mounted Mini Split | Window AC | Central AC |
|---|---|---|---|
| Wall penetration | Small hole for line set and drain | Window or wall opening sized to unit | Multiple penetrations and ductwork |
| Refrigerant work | Yes — vacuum and charge required | No — sealed system | Yes — line set and charge required |
| Electrical work | Dedicated circuit often required | Standard outlet | Dedicated circuits and disconnect |
| Typical duration | 3–6 hours per zone | 1–2 hours | 1–3 days |
| Professional required | Strongly recommended (EPA, electrical) | Often DIY-friendly | Yes |
| Best for | Room comfort, retrofits, ductless homes | Single rooms, temporary cooling | Whole-home comfort with ducts |
If you are considering a multi-room solution, a two head mini split connects two indoor units to one outdoor condenser and requires coordinated line routing and drainage for both zones. For homes that already have ductwork, a split system air conditioner and installation may be a more suitable project.
What Affects the Scope of Installation
Installation projects vary widely in complexity. The factors below influence how much work — and how many trades — are involved:
- Line set length and routing: Longer runs, multiple bends, and difficult paths increase labor and material needs.
- Wall type: Masonry and concrete require different drilling and anchoring than drywall over studs.
- Electrical upgrades: Adding a dedicated circuit, running conduit, or upgrading a panel adds scope and requires an electrician.
- Drainage solution: Gravity drainage is simplest; a condensate pump adds equipment and a power source near the indoor unit.
- Outdoor unit placement: Rooftop, wall-bracket, or ground-pad installations have different requirements for access, stability, and safety.
- Number of zones: Multi-zone systems multiply the indoor work and require careful coordination of line sets and drainage.
- Permits and inspections: Some jurisdictions require permits and inspections that add time and administrative steps.
- Site access: Tight spaces, high floors, or limited parking can complicate equipment handling and extend the project.
Because scope varies so much, it is important to get a written quote that itemizes equipment, labor, electrical work, and any optional extras. This also helps you compare offers fairly. For related guidance, see our article on wall unit air conditioner installation.
Post-Installation Checks and First Steps
After the technician finishes, take time to verify the installation and learn how to operate and maintain the system:
- Confirm cooling and heating performance: Run the system in each mode and check that supply air is noticeably cooler or warmer than return air.
- Check for leaks: Look for water around the indoor unit or along the drain line. A small leak early on can signal a drainage issue.
- Verify remote and thermostat operation: Test all modes, fan speeds, and timers. If the unit has Wi-Fi, confirm the app connects and controls the system.
- Review the drainage path: Confirm where condensate discharges and that it flows freely.
- Inspect the outdoor unit: Ensure it is level, secure, and clear of debris. Listen for unusual noises during operation.
- Keep documentation: Store the manual, warranty card, and installation receipt. Register the warranty if required by the manufacturer.
- Schedule first maintenance: Plan to clean or replace filters within the first month and schedule professional service as recommended.
For a deeper dive into post-install best practices, see our guide on wall mounted air conditioning and heating units. If you notice issues such as wall unit air conditioner not blowing cold air, contact the installer promptly — many offer a workmanship guarantee for the first period after installation.
Routine care keeps the system efficient. A wall mounted air conditioner cleaning service can deep-clean coils and check refrigerant levels. For general troubleshooting, see our troubleshooting air conditioning guide.
Frequently Asked Questions
What does a wall mounted air conditioning unit with installation include?
A typical installation package covers the indoor wall unit, outdoor condenser, mounting bracket, refrigerant line set, drainage, electrical connection, vacuuming, and system testing. Scope varies by seller, so always confirm what is included before purchase.
How long does wall mounted air conditioner installation take?
A single-zone ductless wall unit installation usually takes three to six hours for an experienced technician. Complex jobs with long line runs, electrical upgrades, or difficult wall access can take longer.
Do I need a professional for wall mounted AC installation?
Yes in most cases. Refrigerant handling requires EPA certification, and electrical work must follow local codes. Professional installation also protects your warranty and ensures the system is charged and tested correctly.
What wall type is needed for a wall mounted AC unit?
Most indoor units mount to drywall over wood studs, masonry, or reinforced concrete. The wall must support the unit's weight and allow a small penetration for refrigerant lines and drainage.
Can a wall mounted unit be installed in an apartment?
Often yes, but it depends on building rules and outdoor space. Some apartments restrict exterior equipment or wall penetrations. Check with building management before purchasing, and consider a self-contained alternative if an outdoor unit is not permitted.
What is the difference between installation included and installation sold separately?
Some sellers bundle equipment and labor into one purchase, while others sell the unit and leave installation to a local contractor. Bundled installation can simplify coordination, but confirm the scope, warranty, and licensing of the installer.
How soon can I use the system after installation?
Immediately. The technician will commission the system and demonstrate operation. You can use it right away, but monitor performance and drainage closely during the first week.
Ready to Choose Your Wall Mounted AC Unit With Installation?
You now understand what installation involves, how to prepare your home, and what to verify after the job is done. Explore our recommended models below to find a system that fits your space and installation needs.
VIEW RECOMMENDED MODELS